> For the complete documentation index, see [llms.txt](https://docs-embed.anyflow.jp/llms.txt). Markdown versions of documentation pages are available by appending `.md` to page URLs; this page is available as [Markdown](https://docs-embed.anyflow.jp/trial-tour/start/step2.md).
# STEP2|エンドユーザー変数
## **概要**
STEP2では、STEP1のソリューションを活用し、Slackにメッセージを投稿する際のチャンネルを、**エンドユーザーに指定してもらう方法**をご紹介します。
今回のソリューションは、エンドユーザー変数を設定することで実現可能になります。\
エンドユーザー変数は、簡単に設定できる上に様々なソリューションで有効的に活用可能なので、ぜひマスターしてみてください🎉
{% hint style="success" %}
### エンドユーザー変数について
今回はトライアルツアーで設定するための必要な情報のみをご紹介しております。\
エンドユーザー変数の詳細については、[こちら](/solution-editor/variables/enduser.md)をご確認ください。
{% endhint %}
## **1. ソリューションを作成しよう(Lv2)**
[STEP1のソリューション](/trial-tour/start/step1.md)にて、Slackにメッセージを投稿する際のチャンネルを、エンドユーザーに指定してもらうための設定を行います。
### **1-1. エンドユーザー変数を設定する**
エンドユーザー変数は、ソリューションエディターとウィザードエディターのどちらも設定する必要があります。
## **2.ソリューションエディターの設定**
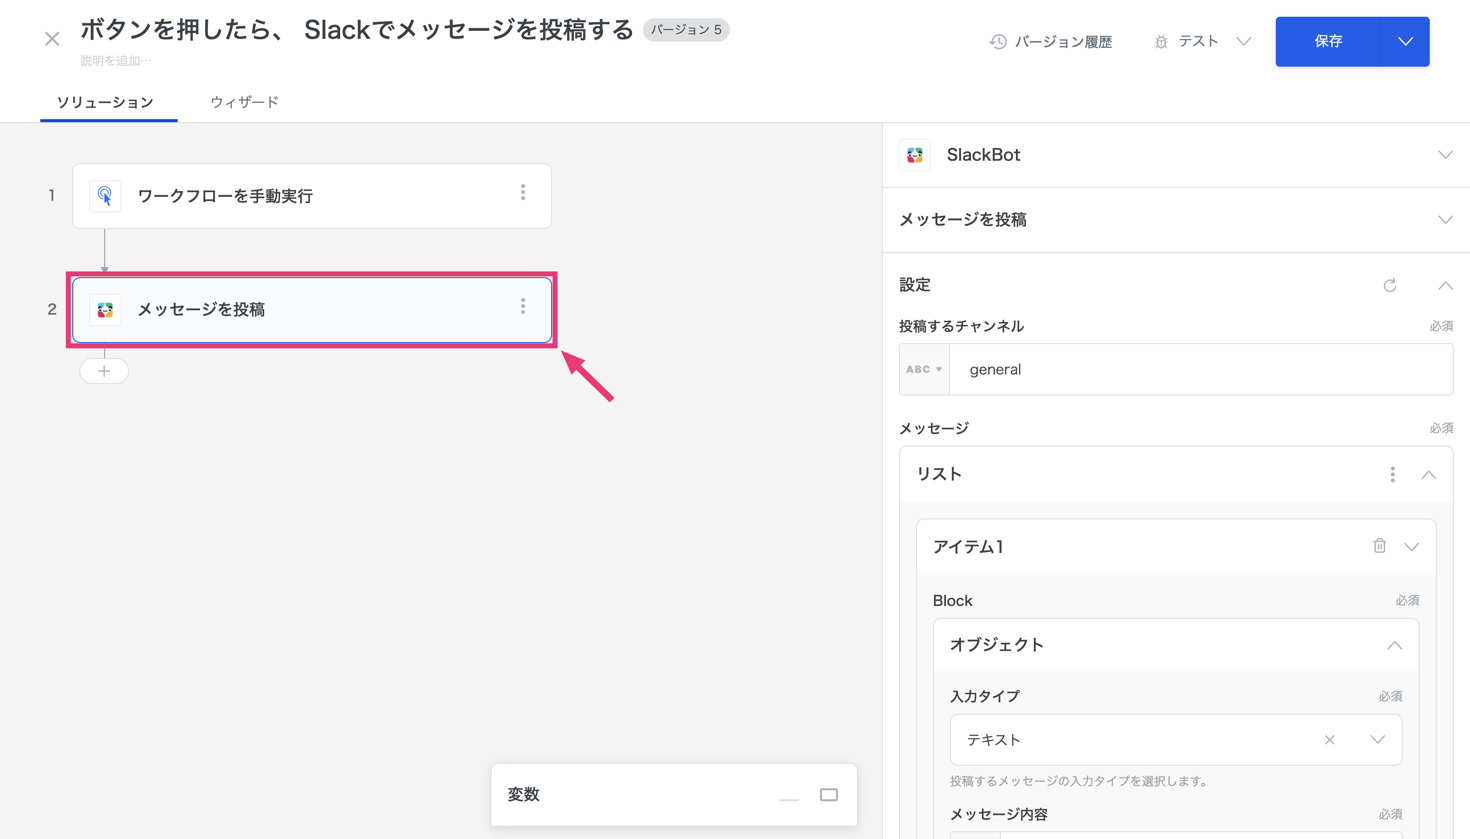
Slackアクションをクリックします。
***
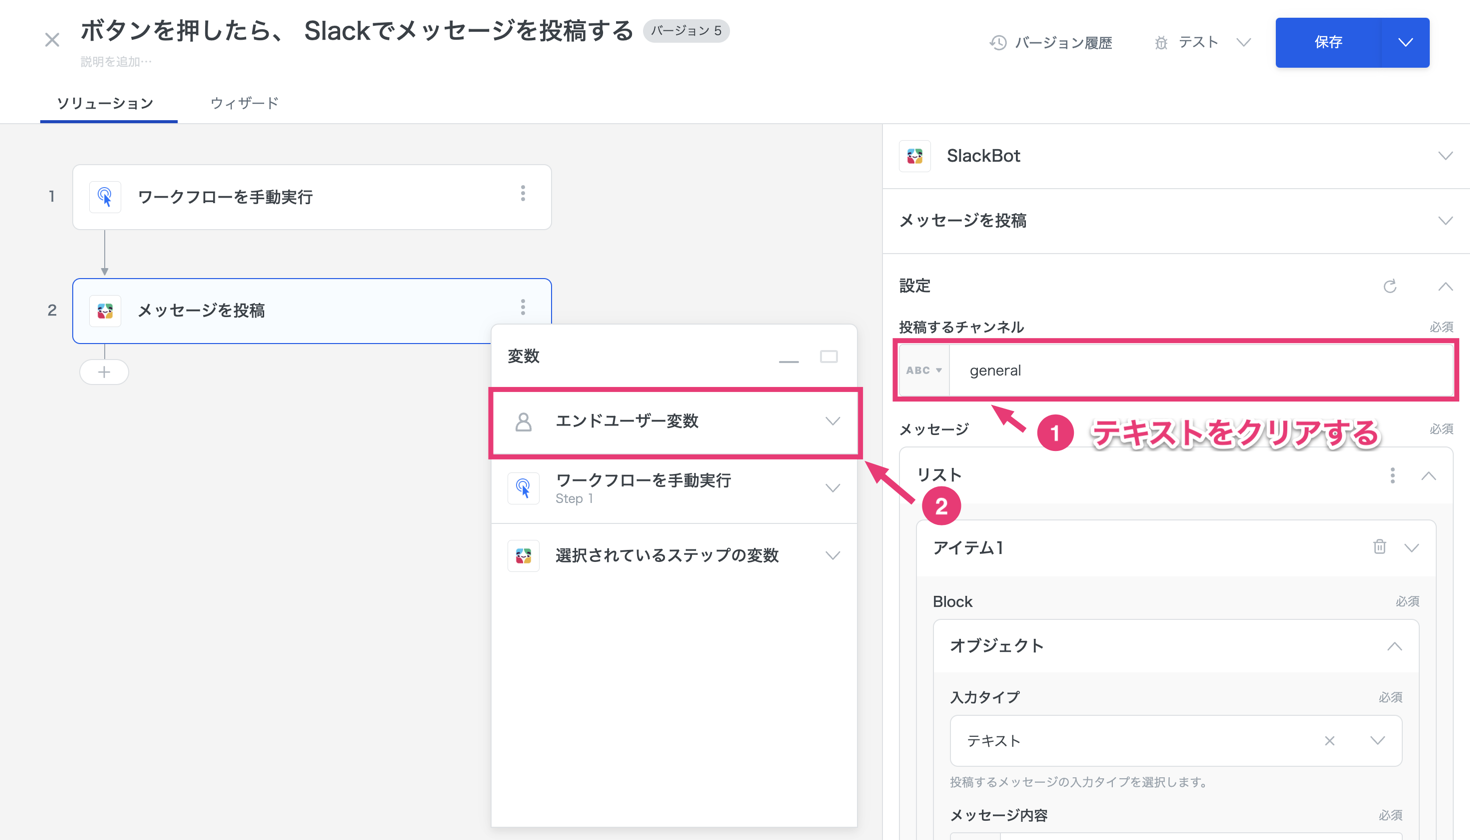
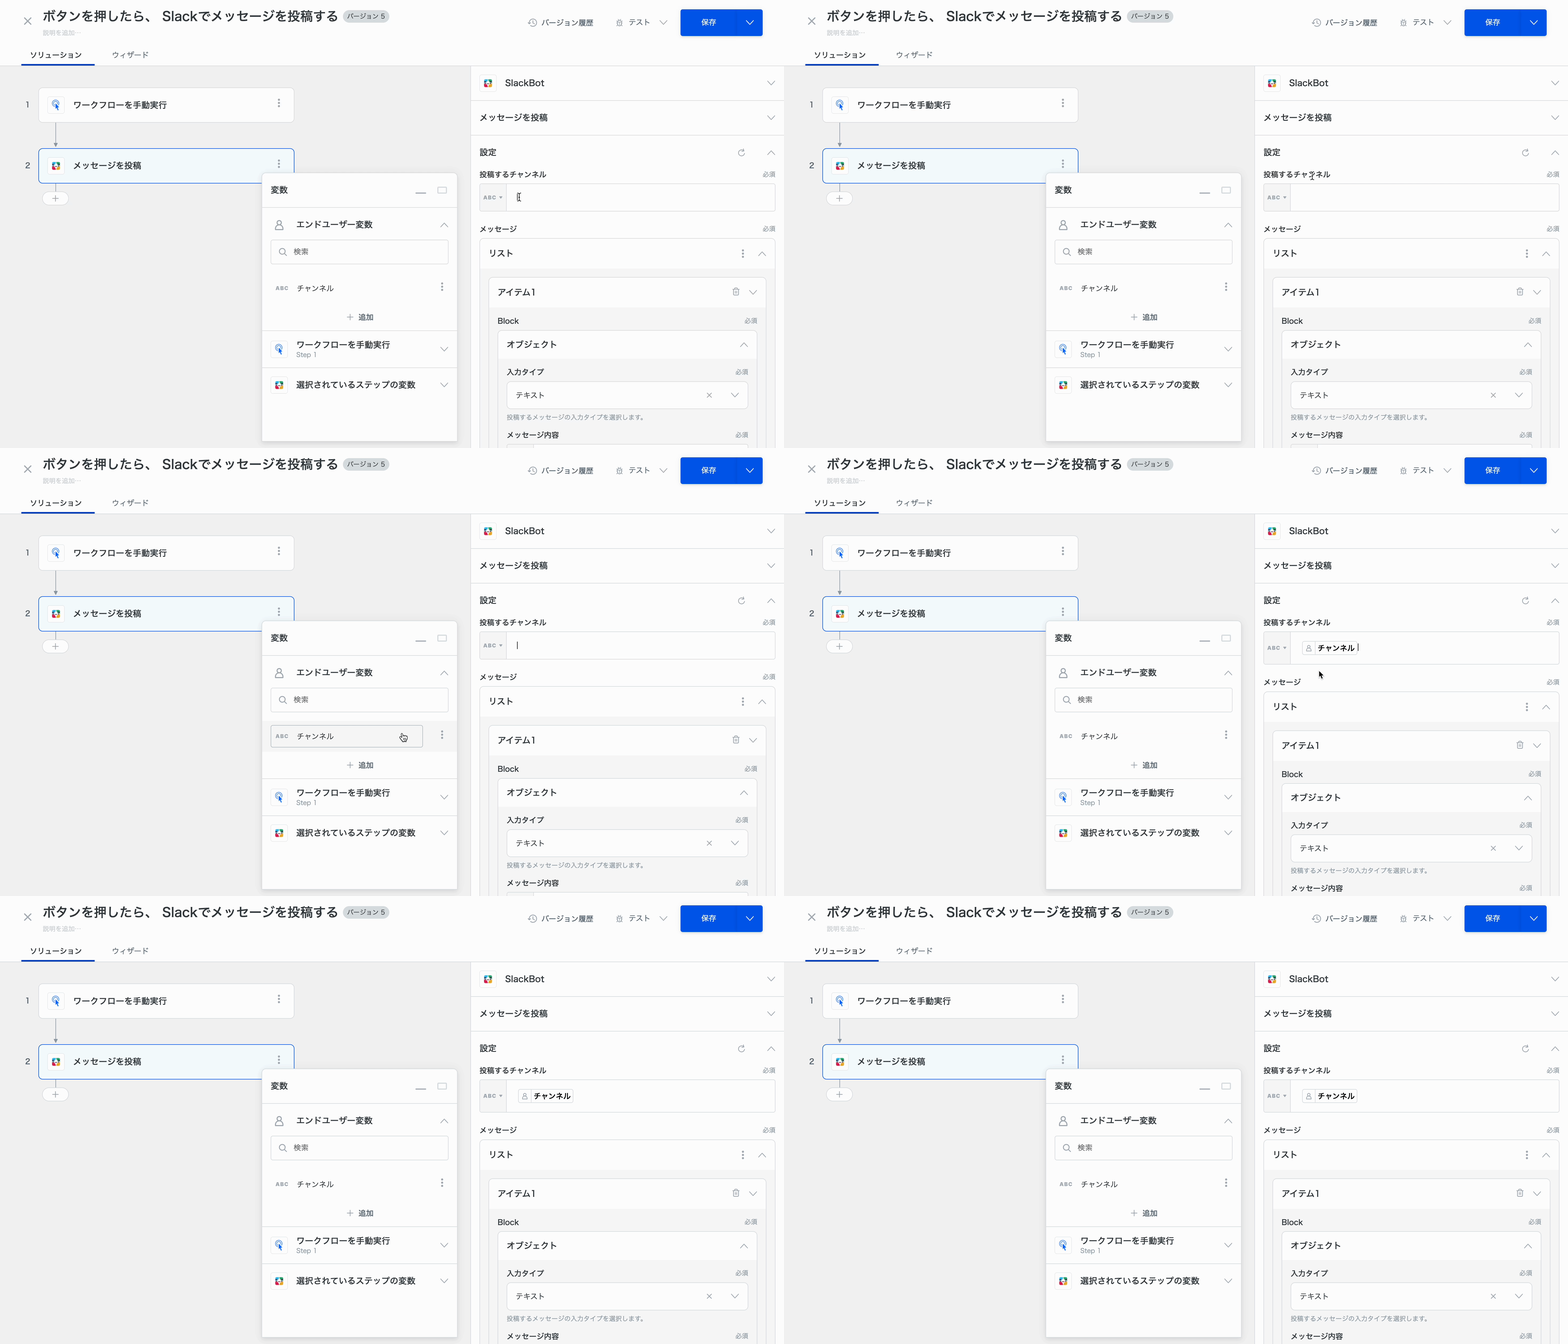
\[投稿するチャンネル] に入力されているテキストをクリアし、\
\[変数] ウィンドウの \[エンドユーザー変数] をクリックします。
***
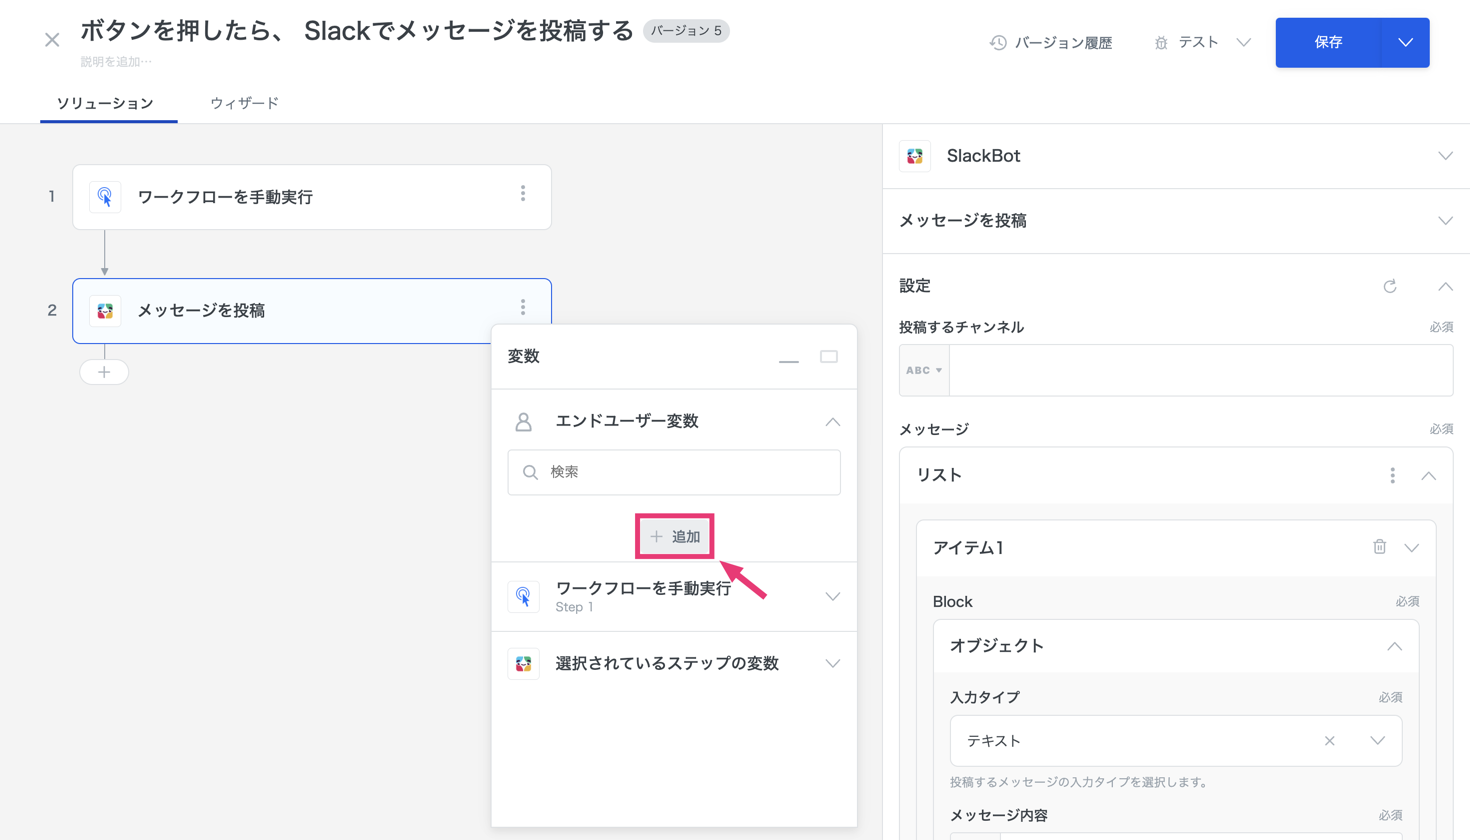
\[追加] をクリック
***
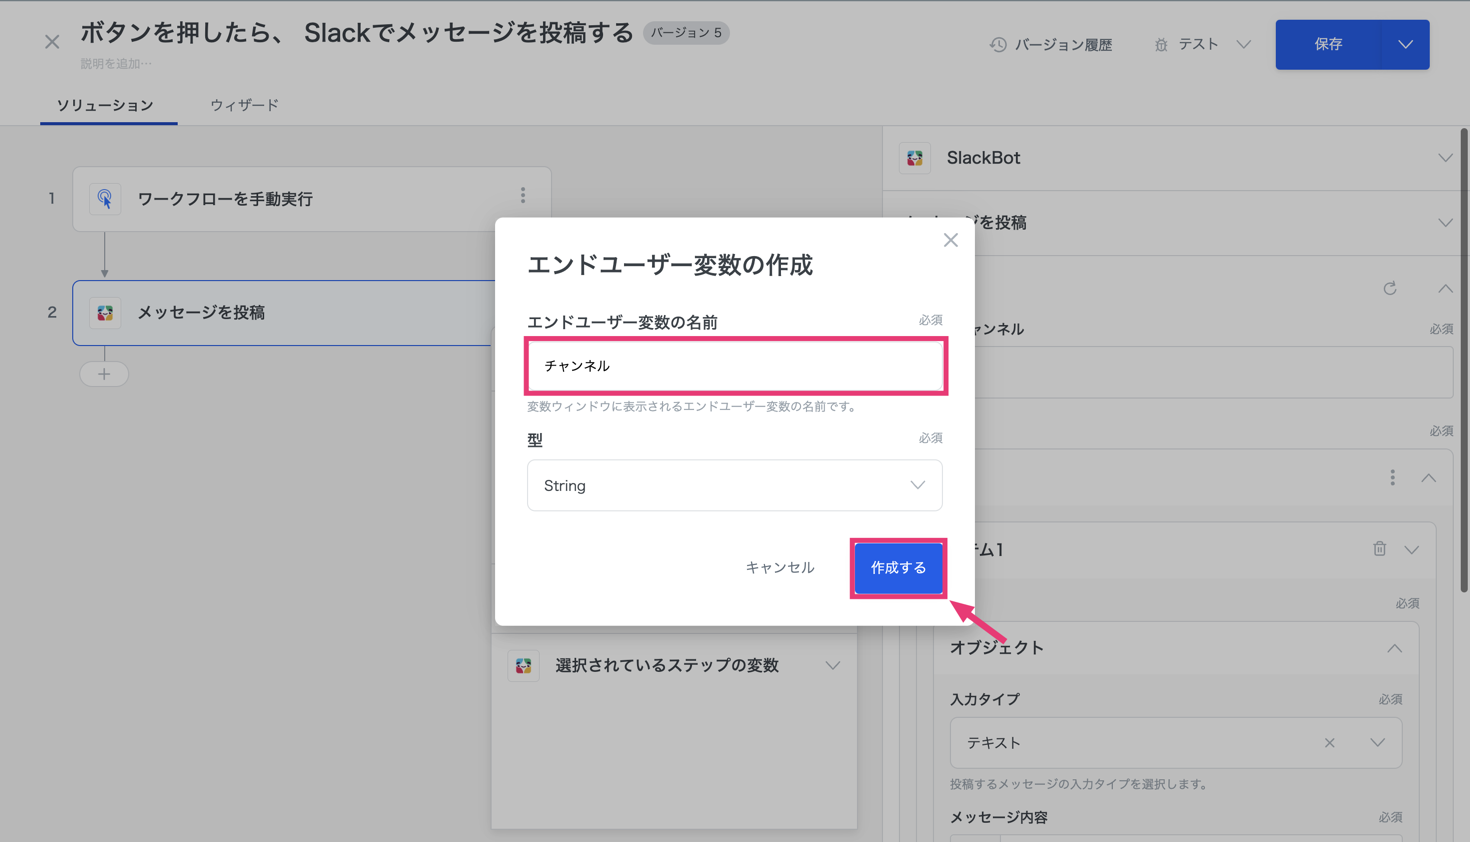
\[エンドユーザー変数の名前] を任意の名前に設定します。\
今回は、Slackのチャンネル名をエンドユーザーに指定してもらうため、\[チャンネル] と指定しました。
\[型] はStringのまま、右下の \[作成する] をクリックします。
{% hint style="info" %}
### 📘型について
型の詳細については、[こちら](/solution-editor/variables.md#windou)をご確認ください。
{% endhint %}
***
\[保存する]をクリックすると、このように \[エンドユーザー変数] が作成されます。

***
作成したエンドユーザー変数を、\[投稿するチャンネル] に配置します。
一度、\[投稿するチャンネル] の入力フィールドの枠内をクリックし、エンドユーザー変数を選択することで配置可能です。
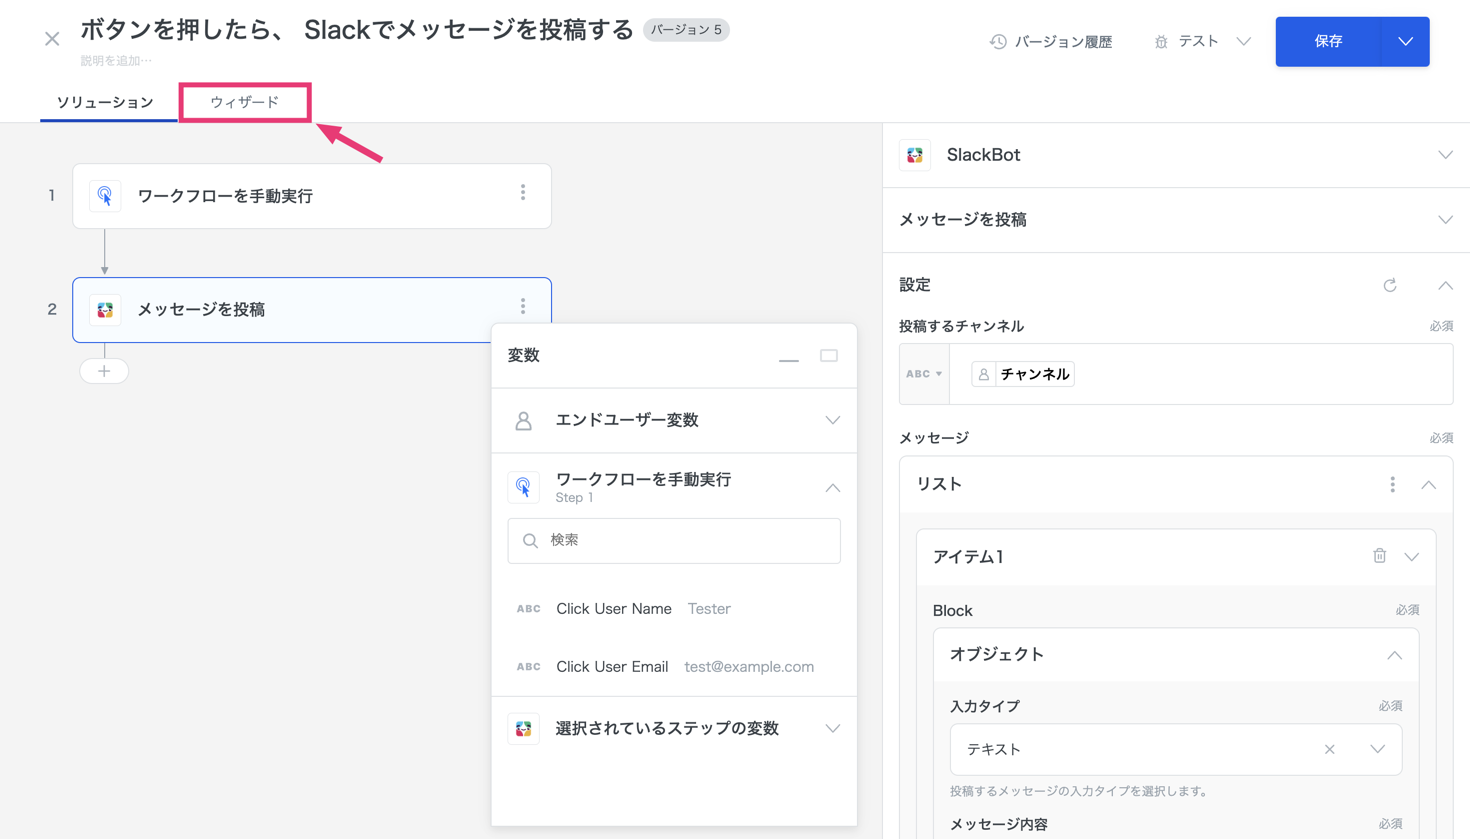
以上で、ソリューションエディターの設定は完了です。
***
## **3.ウィザードエディターの設定**
画面左上 \[ウィザード] をクリック
***
### **3-0.(任意)新しいスクリーンを追加する**
スクリーンを追加したい場合は、[こちら](/wizard-editor/about.md)の方法で追加します。\
1つのスクリーンに収めることも可能ですが、今回は新しいスクリーンを追加しています。
### **3-1.エンドユーザー変数の配置**
ソリューションエディターで設定した、エンドユーザー変数を配置します。
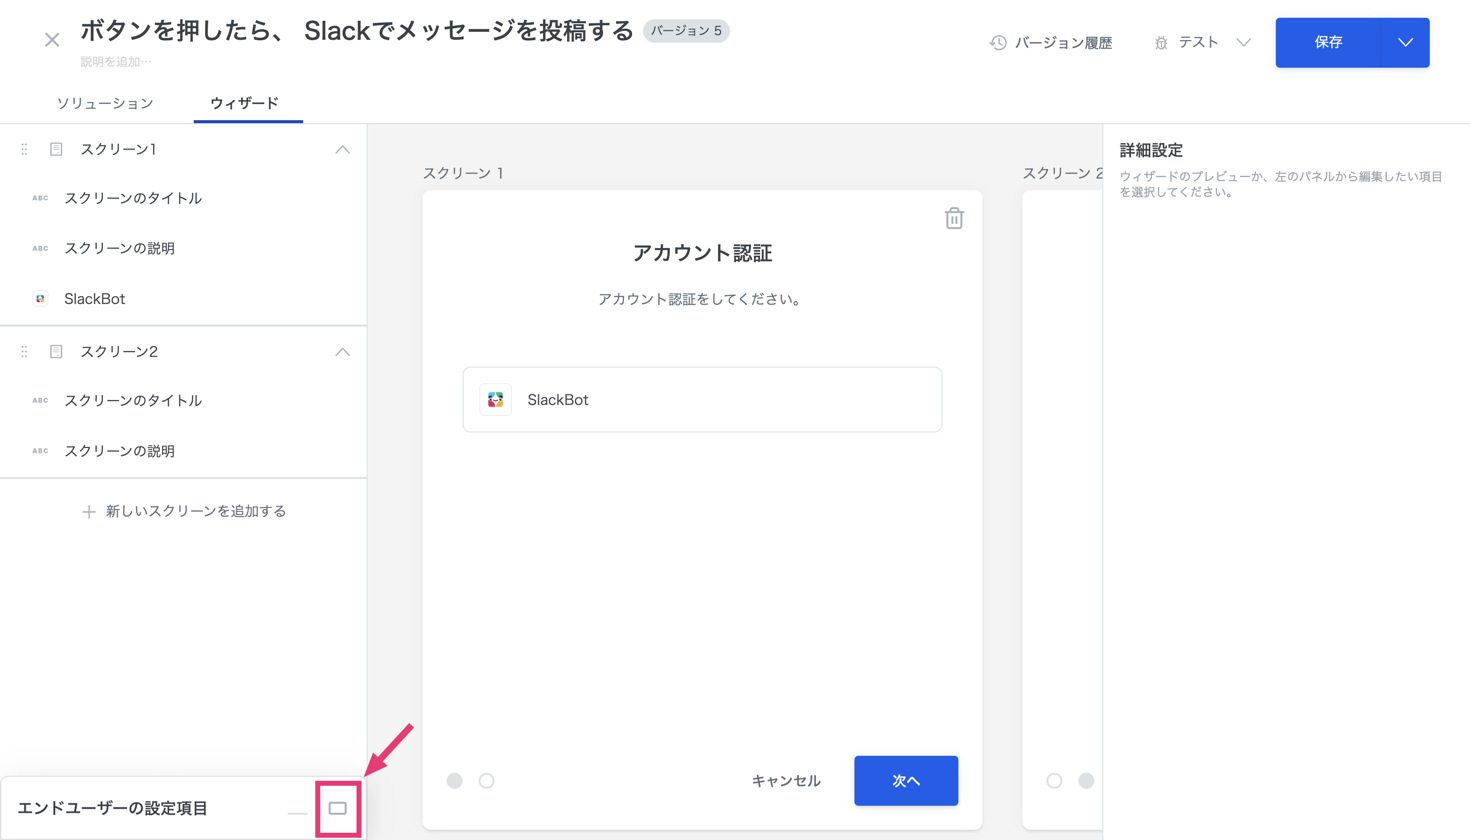
画面左下をクリック
***
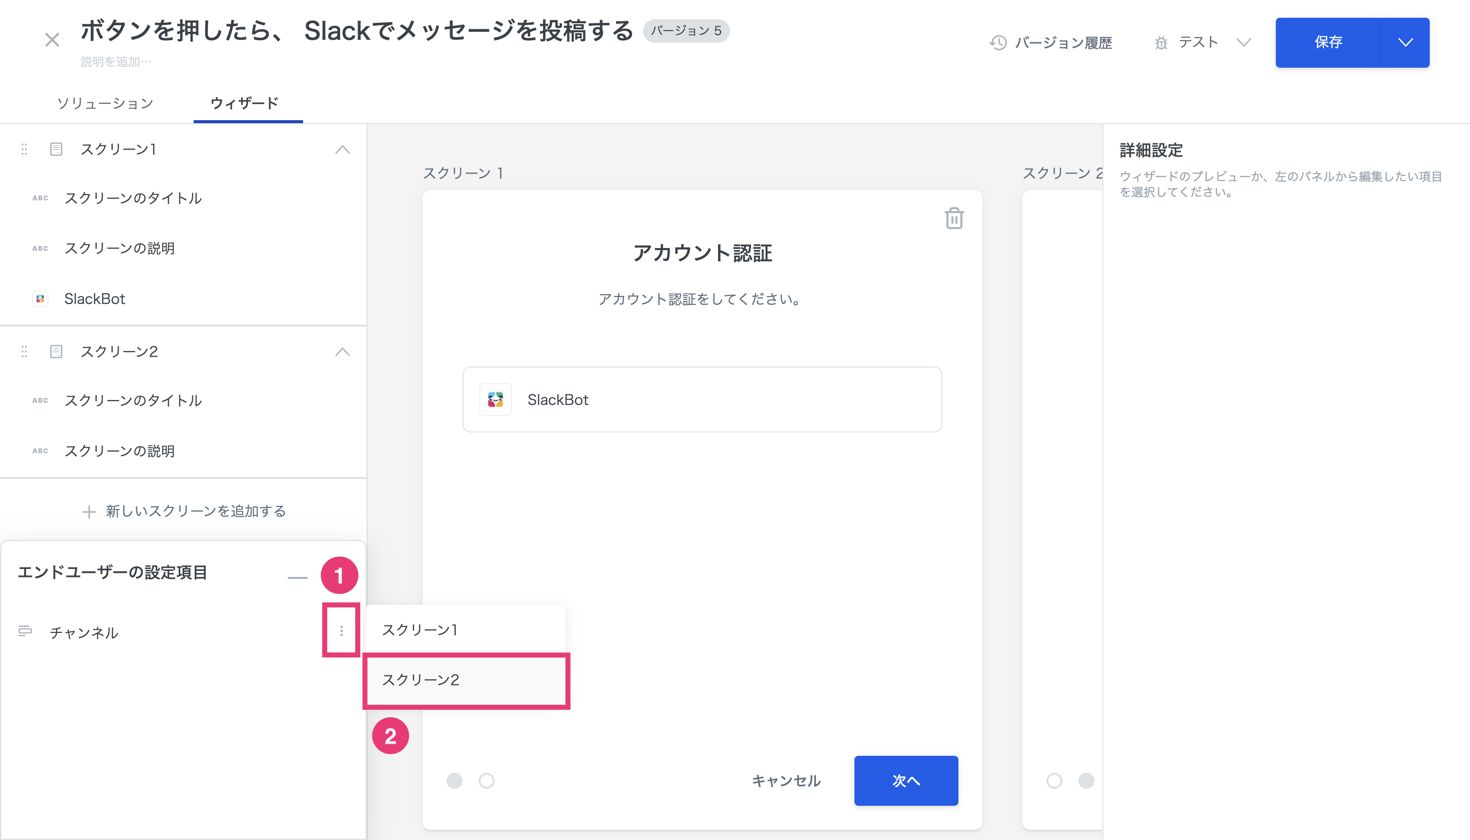
配置したいエンドユーザー変数の右側の \[…] をクリックし、どのスクリーンに配置するか指定します。\
今回は、スクリーン2に配置します。
***
### **3-2.アシストを設定する**
アシストを設定することにより、エンドユーザーがSlackのチャンネルを自由に指定可能になります。
{% hint style="info" %}
### 📘アシストについて
アシストの詳細については、[こちら](/wizard-editor/widget.md)をご確認ください。
{% endhint %}
***
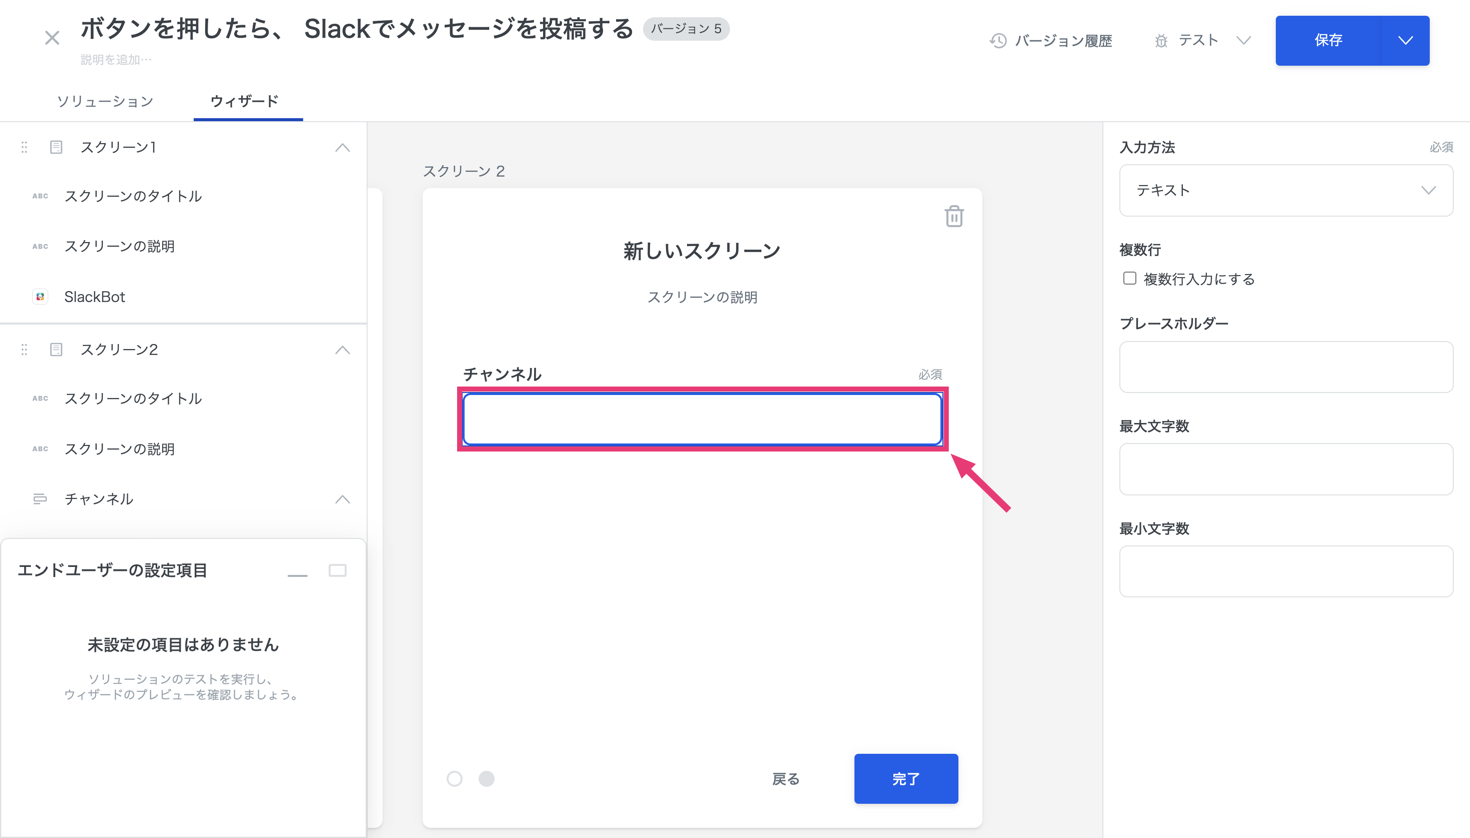
チャンネルの入力フィールドをクリックすることで、画面右サイドにエンドユーザー変数の設定画面が表示されます。
***
\[入力方法] は、 \[アシスト] を選択します。

***
\[Slackのチャンネル/ユーザー一覧]を選択します。

***
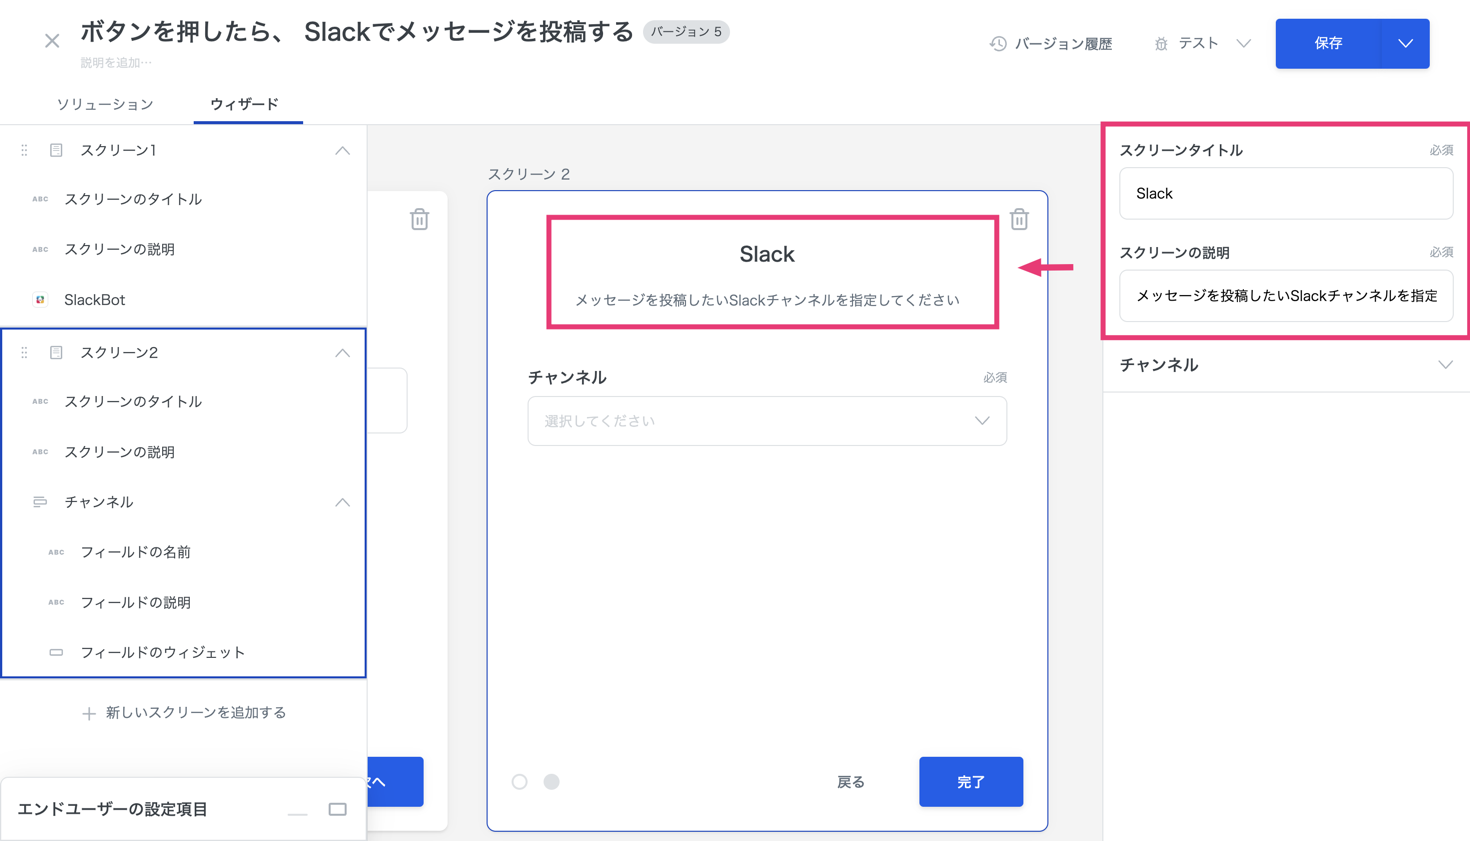
### **3-3.表示するテキストを設定する**
[STEP1](/trial-tour/start/step1.md#id-3-2surutekisutowosuru)と同様の方法で設定します。
以上で、全ての設定が完了です🎉
***
## **4.テスト実行**
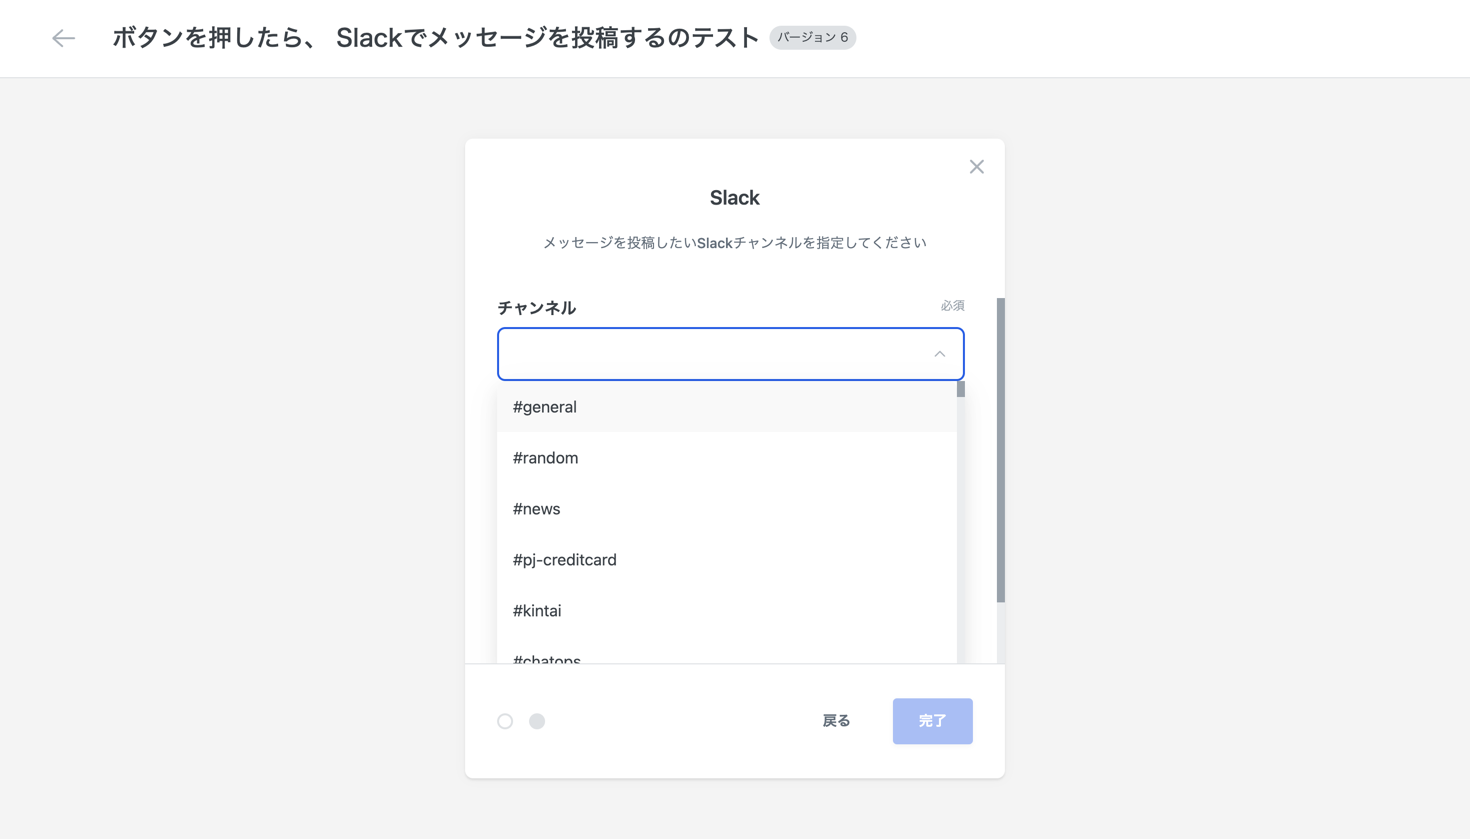
[STEP1](/trial-tour/start/step1.md#id-4tesuto)と同様の方法でテスト実行を行います。
エンドユーザー変数を配置したスクリーン2では、認証したSlackアカウントに紐付く \[チャンネル] が選択可能になりました。
***
## (補足)ソリューションを複製しておく
今回のSTEP2で作成したソリューションを中級編で活用しますので、ソリューションを複製しておきましょう。
[ソリューション一覧](https://embed.anyflow.jp/solutions)から、今回作成したソリューションの複製を行います。
**複製が完了するとエディタ画面が開きますので、名前を『中級編』など分かるように変更してください。**
***
## **まとめ**
今回のセクションでは、
1. エンドユーザー変数の作成/配置方法
2. アシストの設定方法
といった、応用的な内容について学ぶことができました。\
エンドユーザー変数は、様々な[データ型](/solution-editor/variables.md#xing)に対応しているので、今回扱ったデータ型以外もぜひお試しください。
***
## **ネクストステップ**
次は、STEP2のソリューションを活用し、指定の内容で条件分岐する方法をご紹介します。
[STEP3|ifステップ ](/trial-tour/start/step3.md)にお進みください。
---
# Agent Instructions
This documentation is published with GitBook. GitBook is the documentation platform designed so that both humans and AI agents can read, navigate, and reason over technical content effectively. Learn more at gitbook.com.
## Querying This Documentation
If you need additional information that is not directly available in this page, you can query the documentation by asking a question.
Perform an HTTP GET request on the following URL with the `ask` and `goal` query parameters:
```
GET https://docs-embed.anyflow.jp/trial-tour/start/step2.md?ask=&goal=
```
`ask` is the immediate question: it should be specific, self-contained, and written in natural language.
`goal` is what the user is ultimately trying to achieve, the reason they need the answer. Sharing it helps GitBook give you a better, more relevant answer. A goal is most helpful when it describes the outcome the user wants rather than restating the question. For example, with `ask=how do I create an API token`, a goal like `automate deployments from our CI pipeline` lets GitBook tailor the answer to that use case.
The response will contain a direct answer to the question and relevant excerpts and sources from the documentation.
Use this mechanism when the answer is not explicitly present in the current page, you need clarification or additional context, or you want to retrieve related documentation sections.