> For the complete documentation index, see [llms.txt](https://docs-embed.anyflow.jp/llms.txt). Markdown versions of documentation pages are available by appending `.md` to page URLs; this page is available as [Markdown](https://docs-embed.anyflow.jp/trial-tour/start/step1.md).
# STEP1|アカウント作成 〜 ソリューション作成
ログイン〜ソリューションの基本的な作成方法について
## **1.アカウント作成**
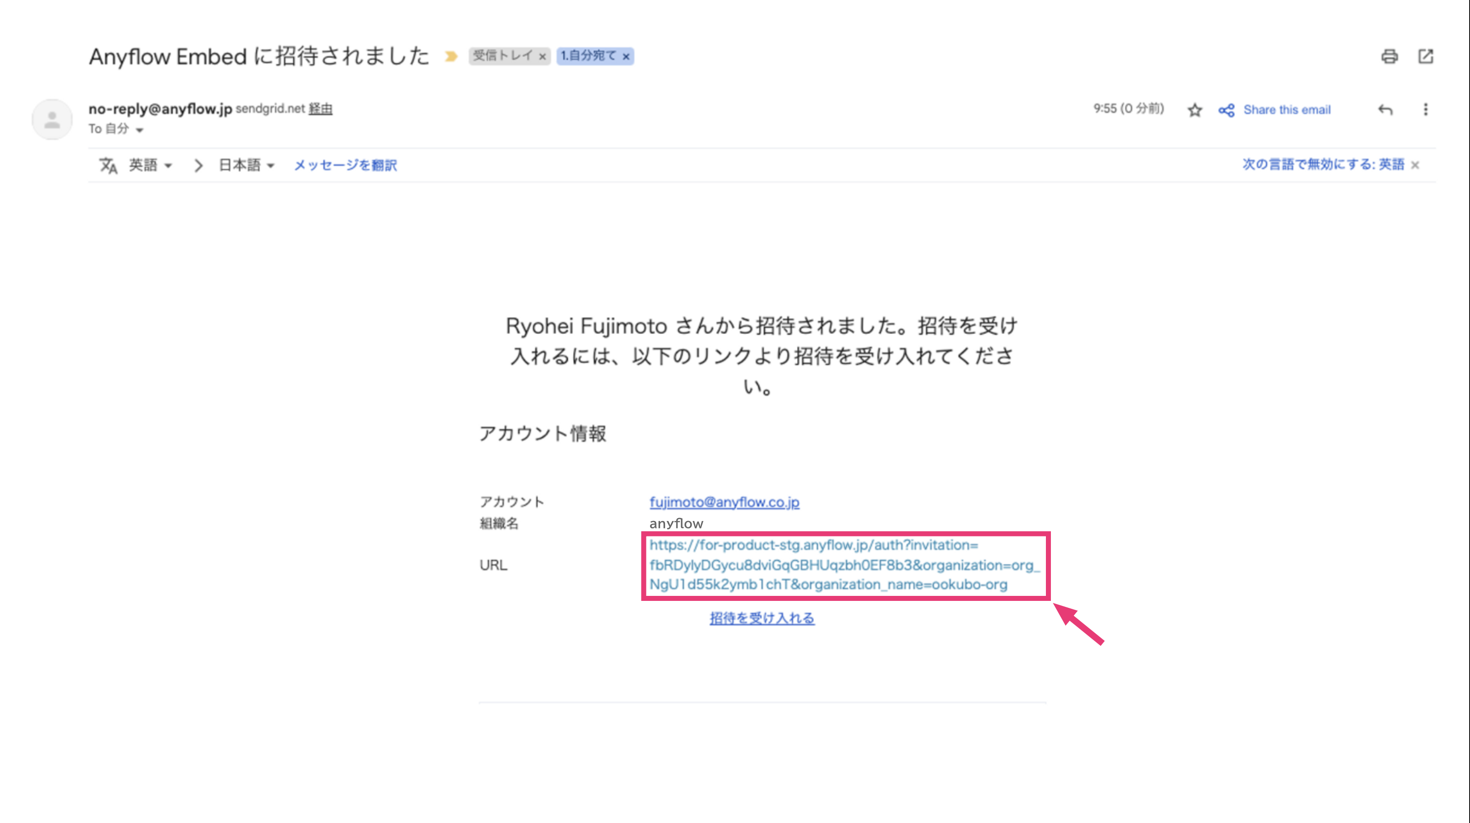
Anyflowの担当者より、アカウント作成のための招待メールが届きます。
URLをクリックします。
***
### **1-1.組織の入力**
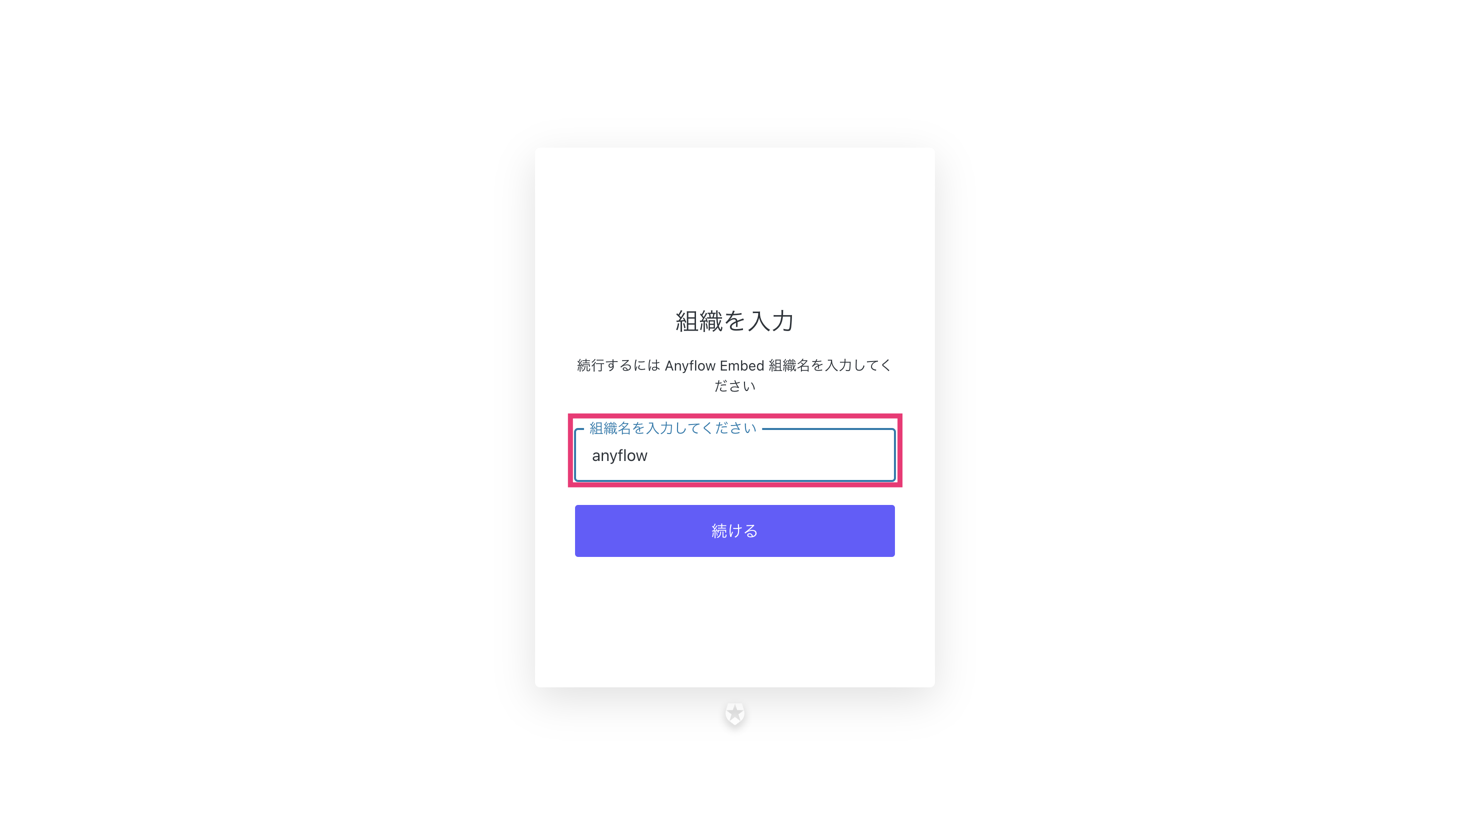
ご自身の組織を入力します。\
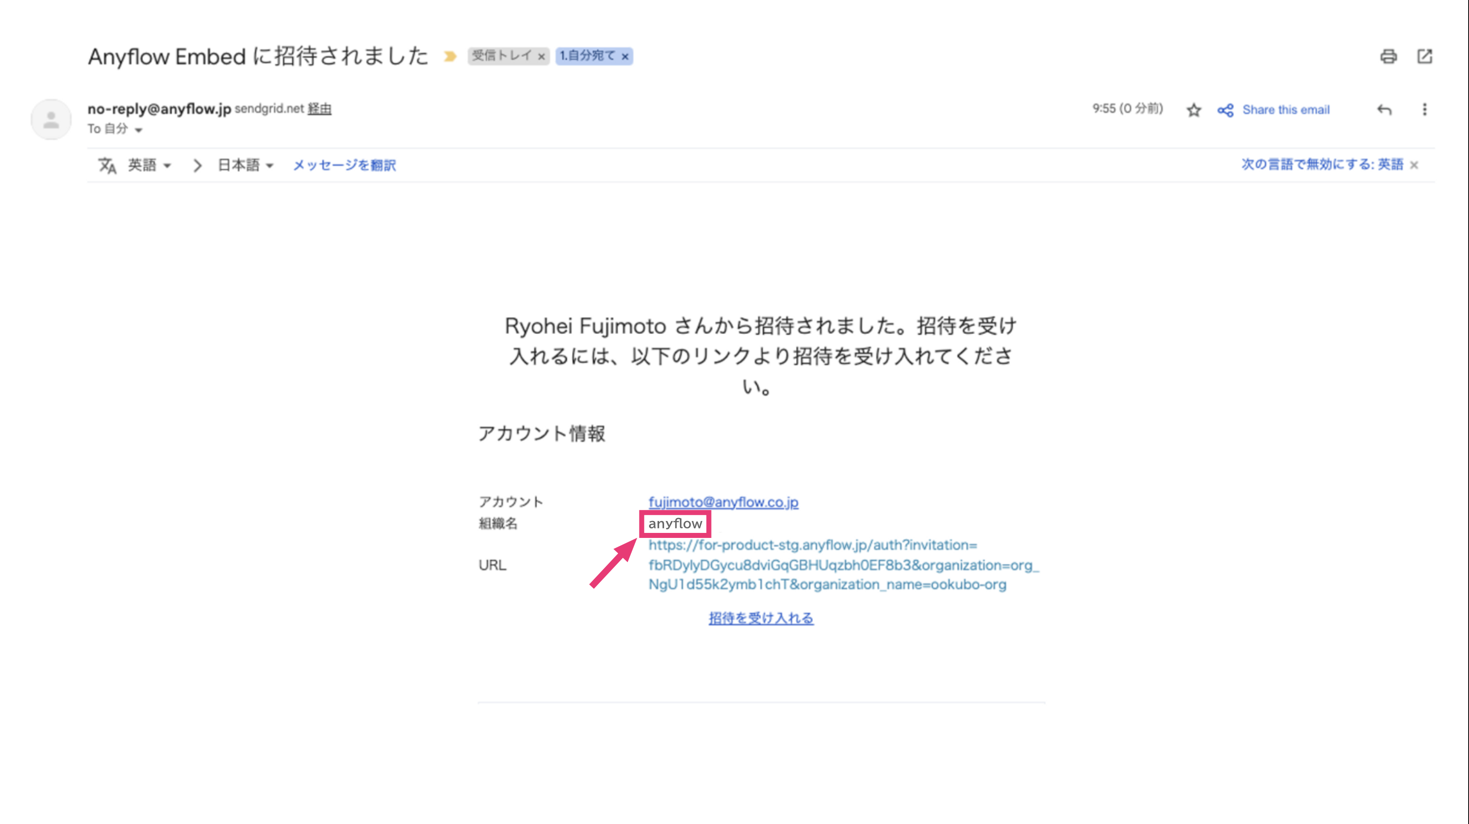
招待メールの\[組織名]を入力します。
{% hint style="success" %}
### ヒント
組織名はログインの度に入力します。忘れないようにしましょう。
{% endhint %}
***
### **1-2.ログイン**
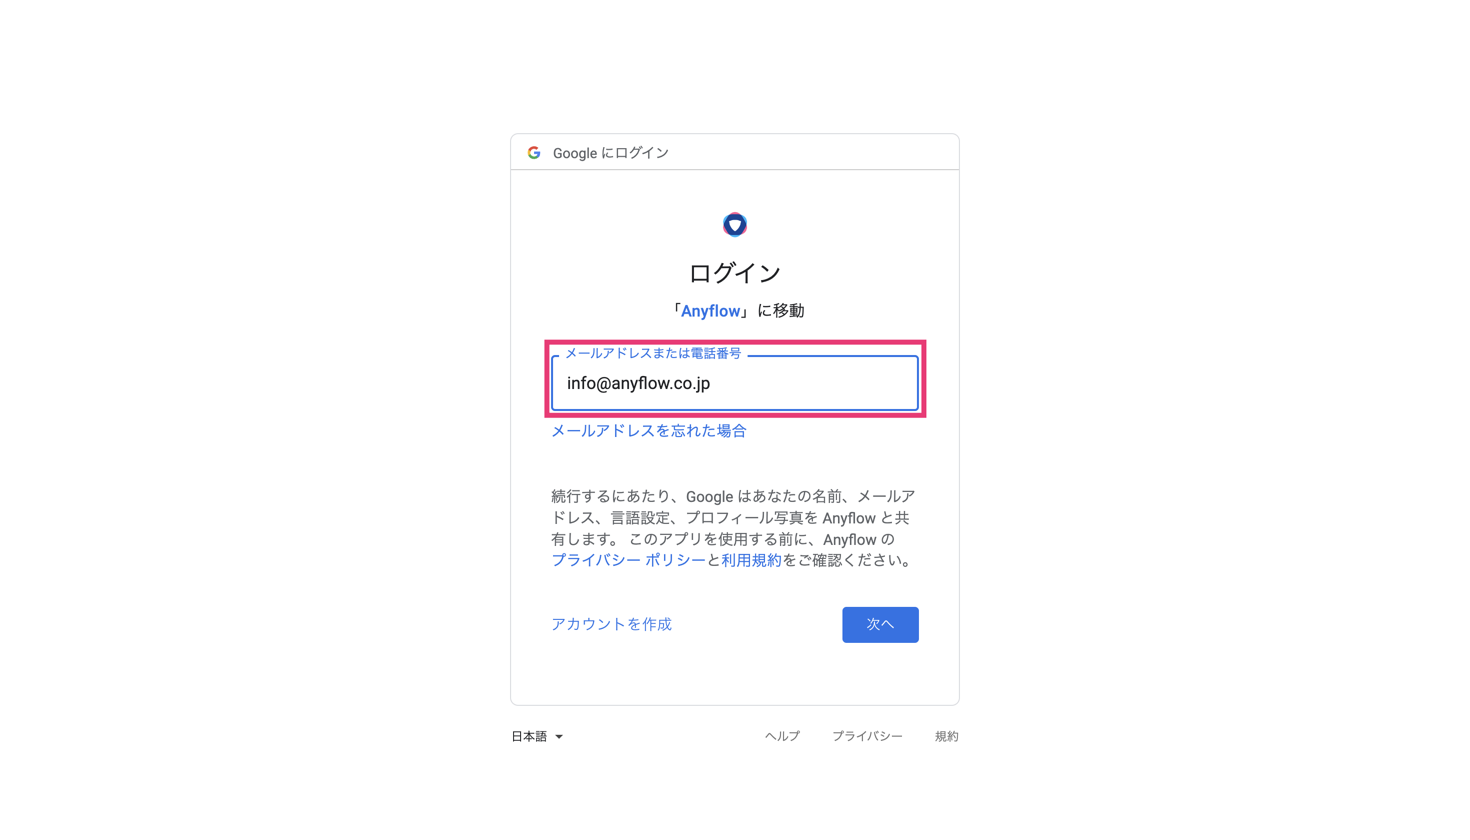
Anyflow Embed へのログインには、以下の認証方式を設定できます。
* Googleアカウントでのログイン
* Microsoftアカウントでのログイン
* Salesforceアカウントでのログイン
* ID / パスワードでのログイン
ご利用の組織にて、どのログイン方法を有効にするかはAnyflow担当者にお知らせください。
ログイン画面にて必要な情報を入力し、ソリューション一覧画面が表示されたらログイン完了です。
***
## **2.ソリューションを作成しよう(Lv1)**
今回作成するソリューションは、**ボタンを押したら、 Slackでメッセージを投稿する**というシンプルなソリューションです。
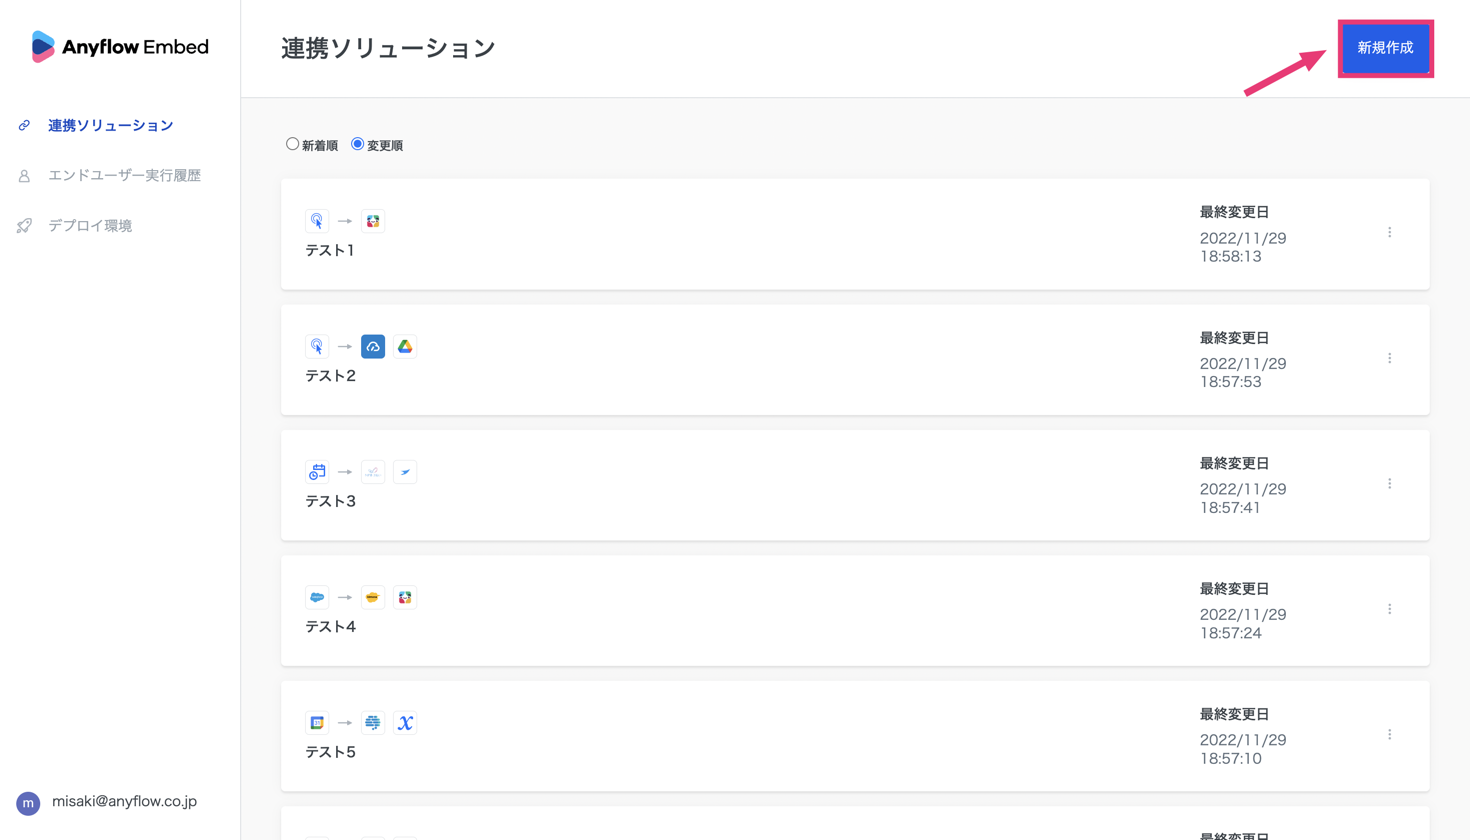
右上の \[新規作成] から \[ソリューション名] を設定し、ソリューションを作成します。
***
### **2-1.トリガー設定**
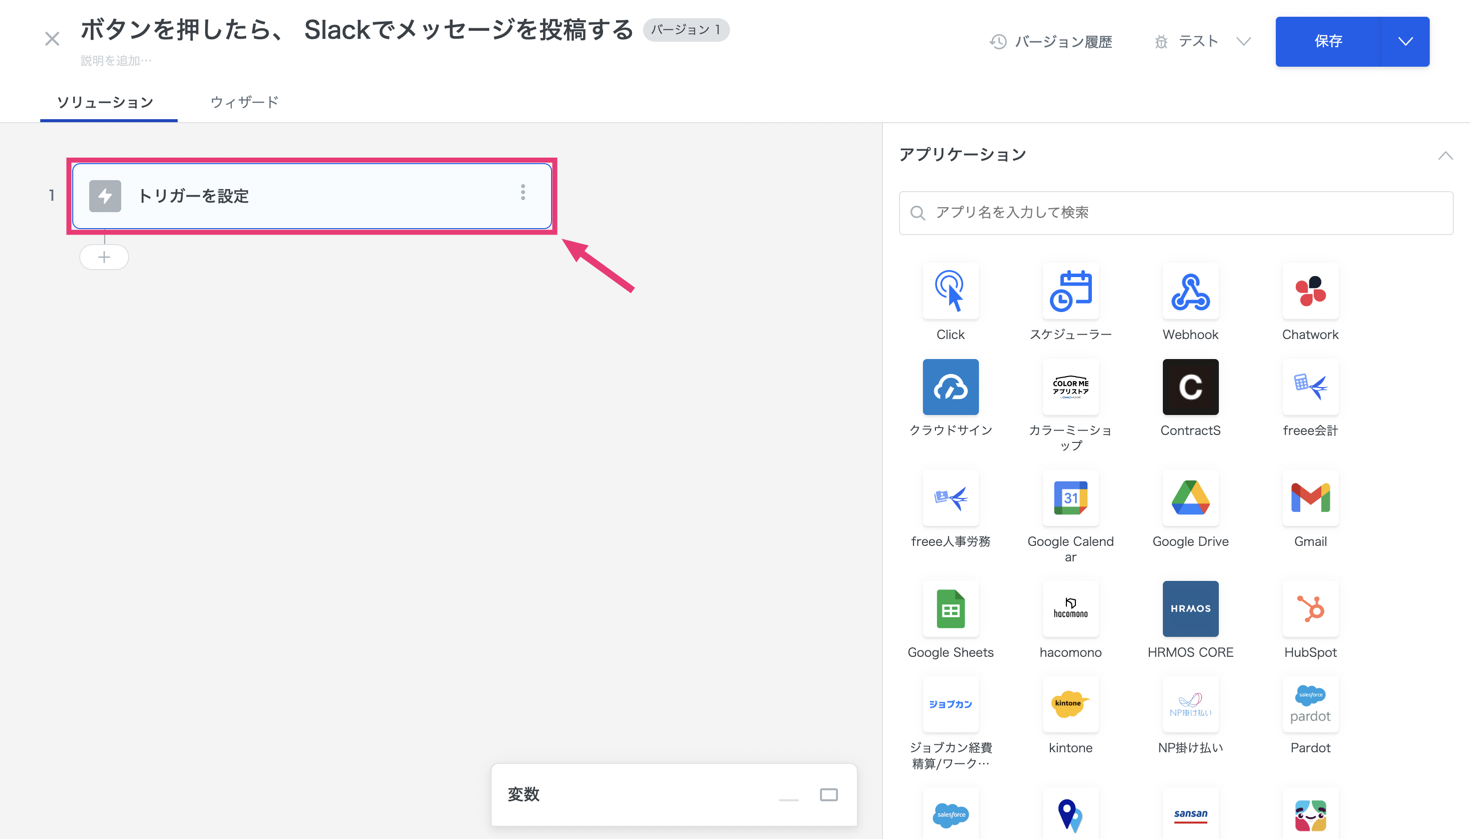
まずは、トリガーを設定します。\
画面左の \[トリガーを設定] をクリック
***
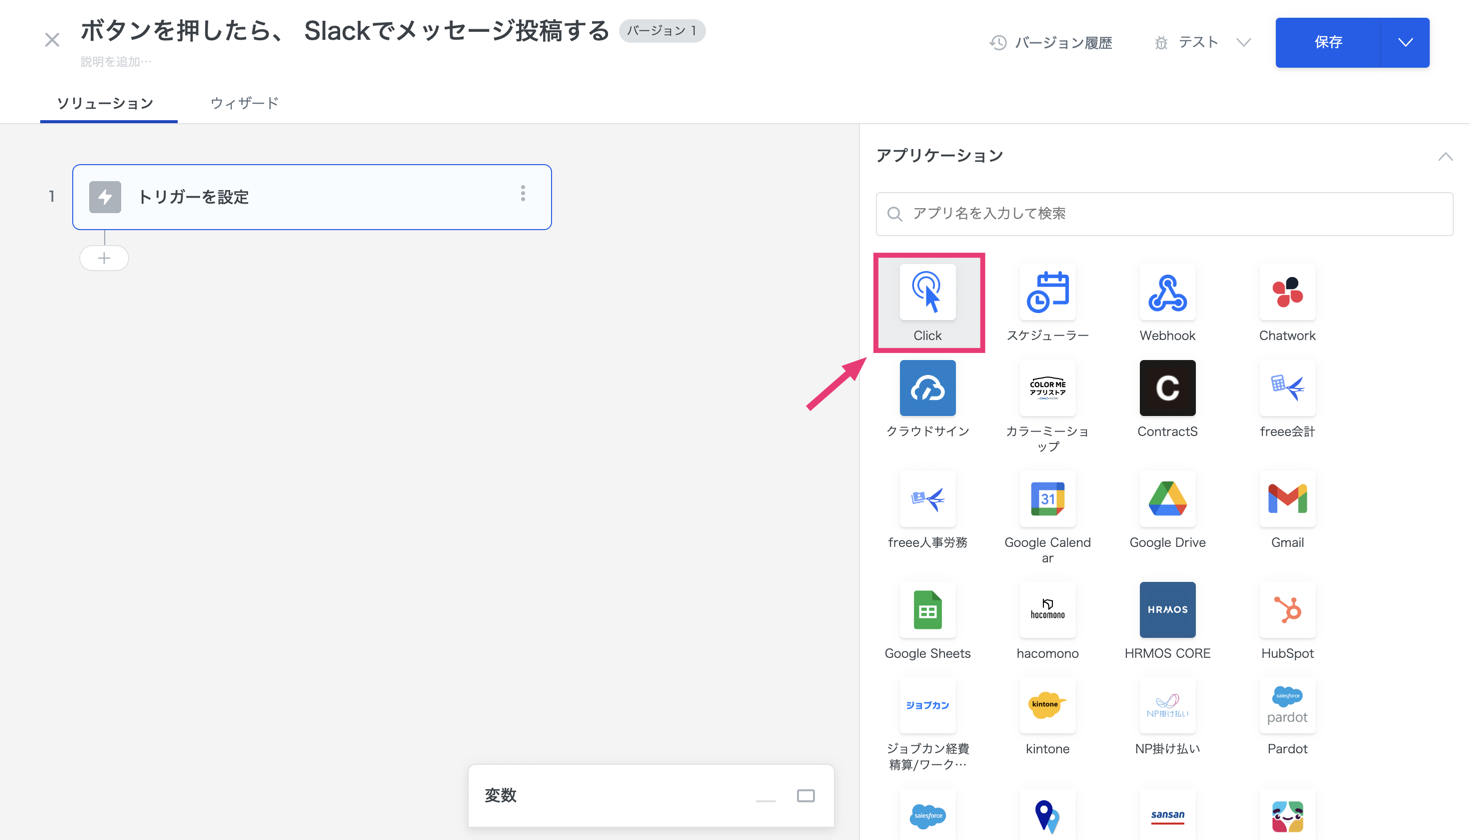
今回は「ボタンを押したら」というトリガーなので、\[[Click](/solution-editor/triggers/outgoing/click-triggers.md)] を選択します。
***
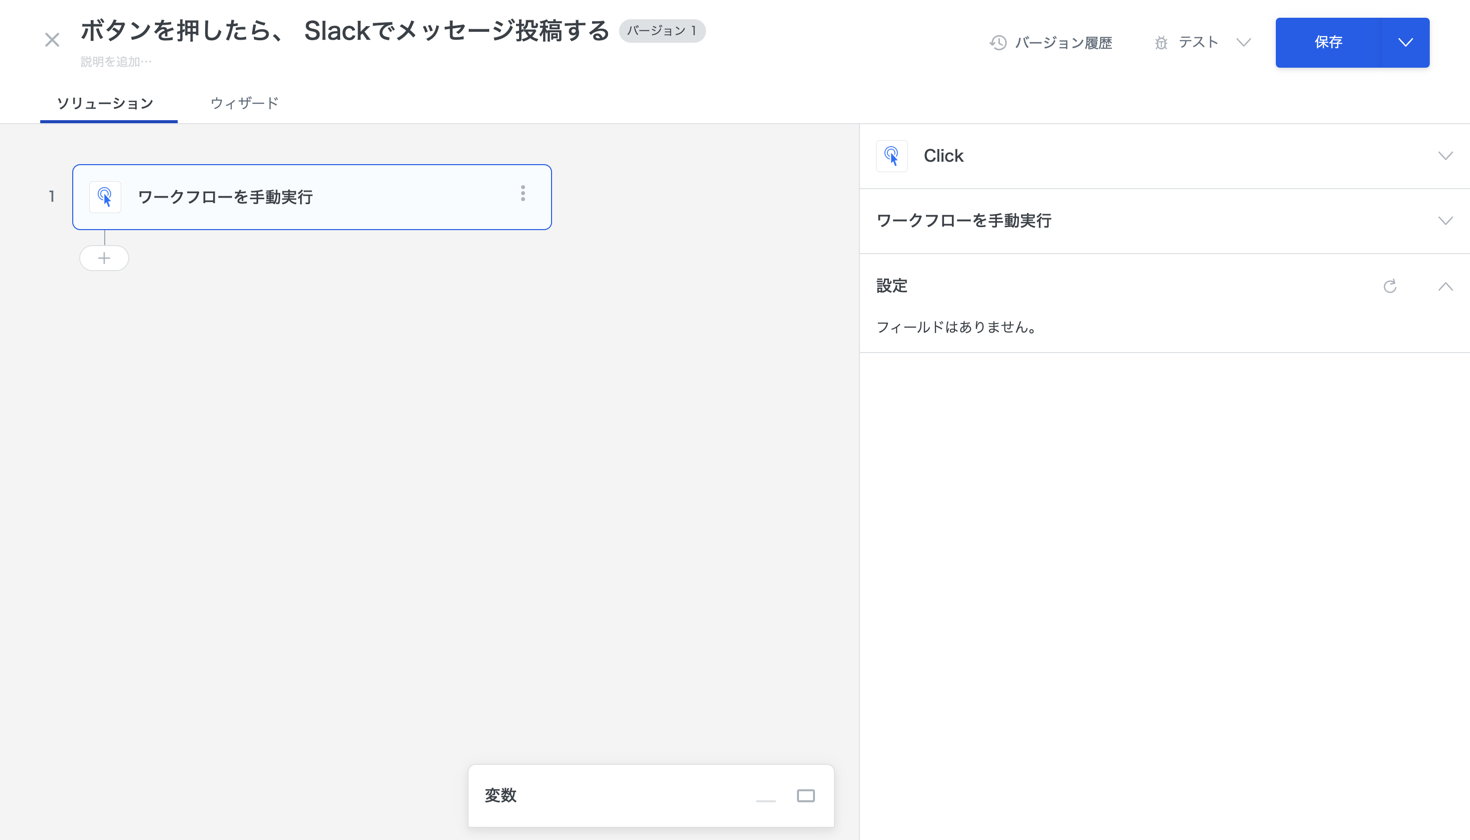
以上で、トリガーの設定は完了です。
***
### **2-2.アクションの設定**
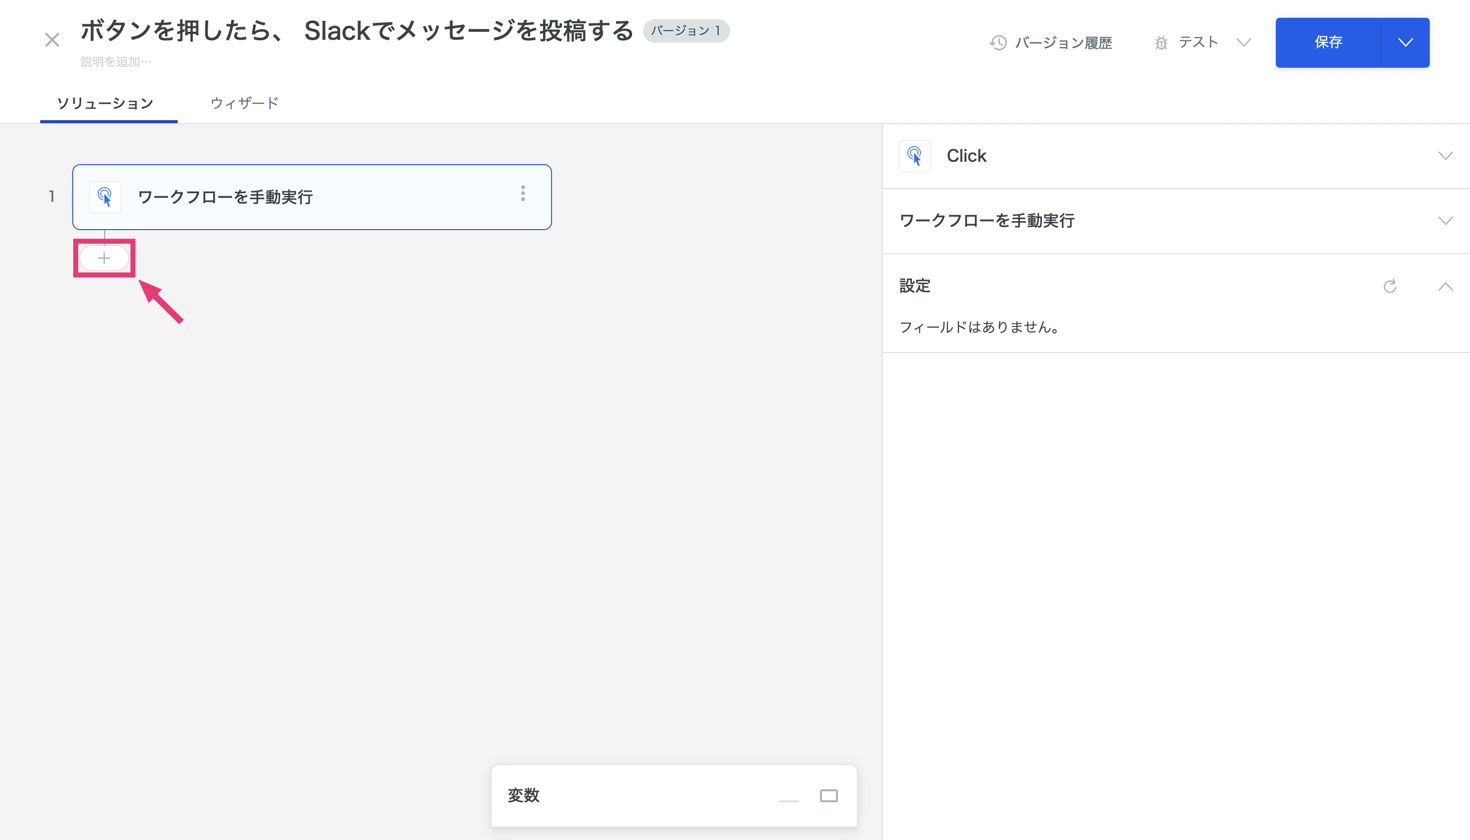
画面左の \[+] をクリック
***
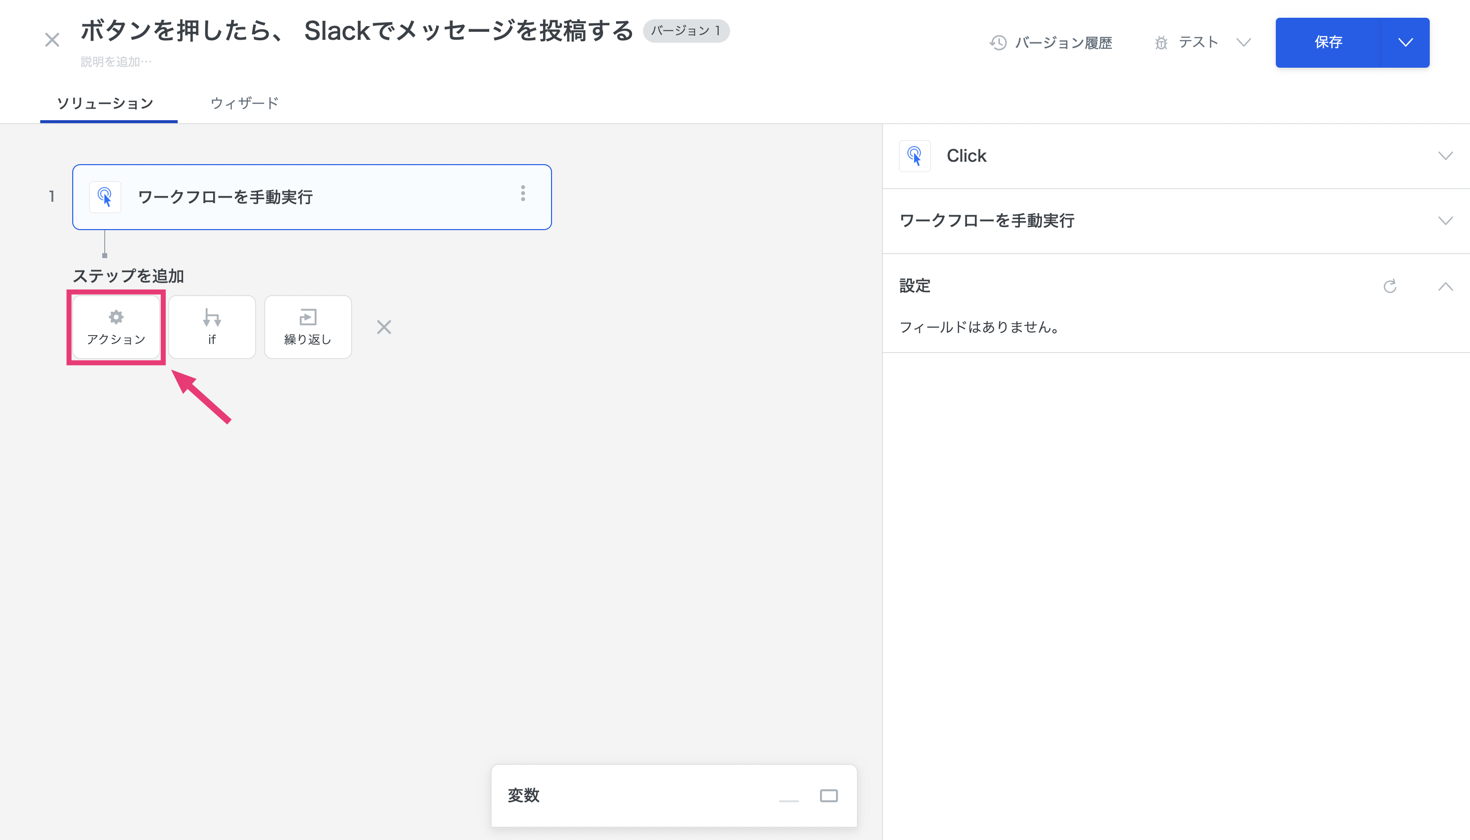
\[アクション] をクリック
***
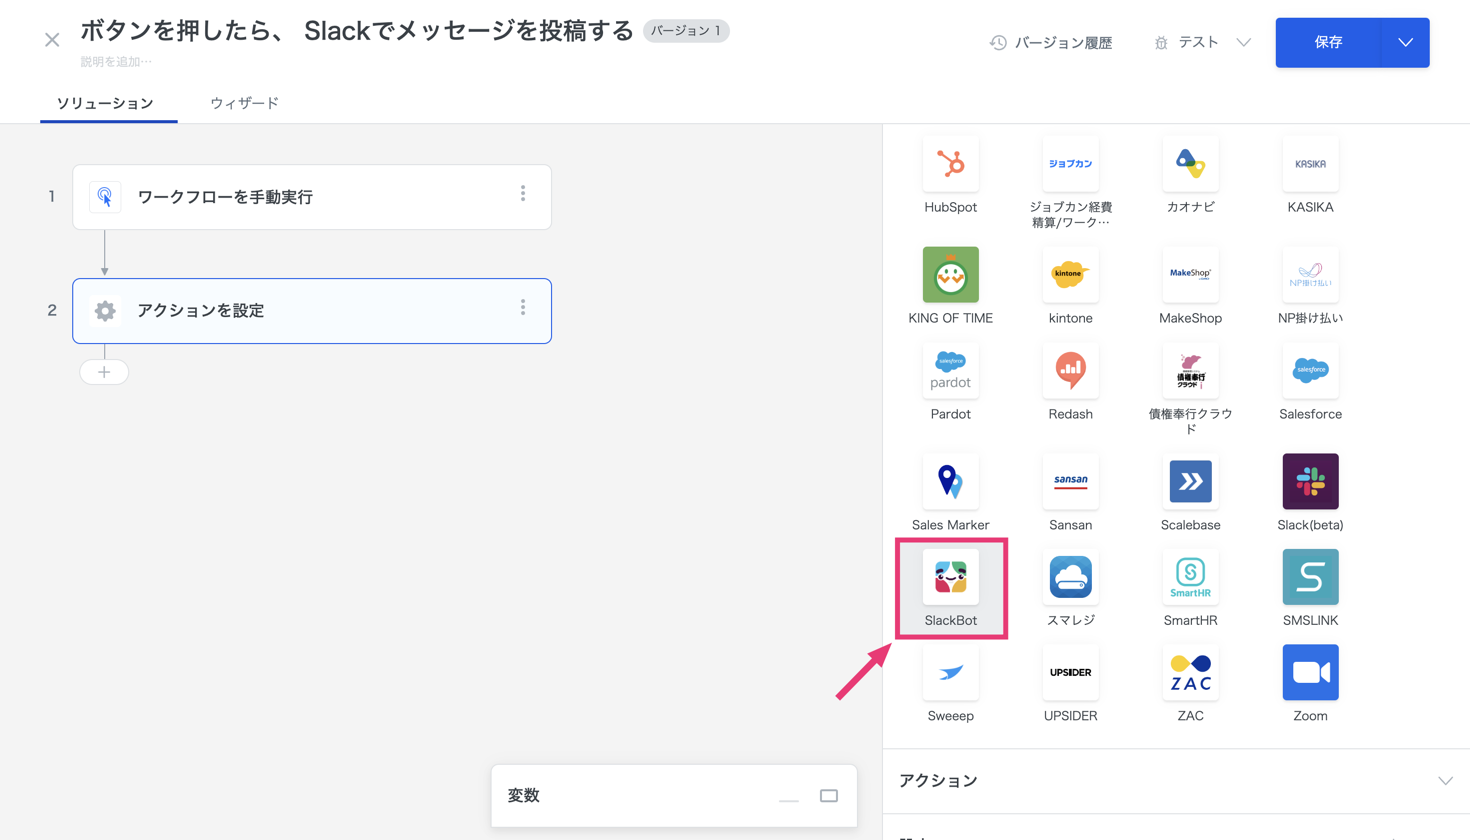
今回は「Slackでメッセージを投稿する」というアクションなので、SlackBot をクリックします。
***
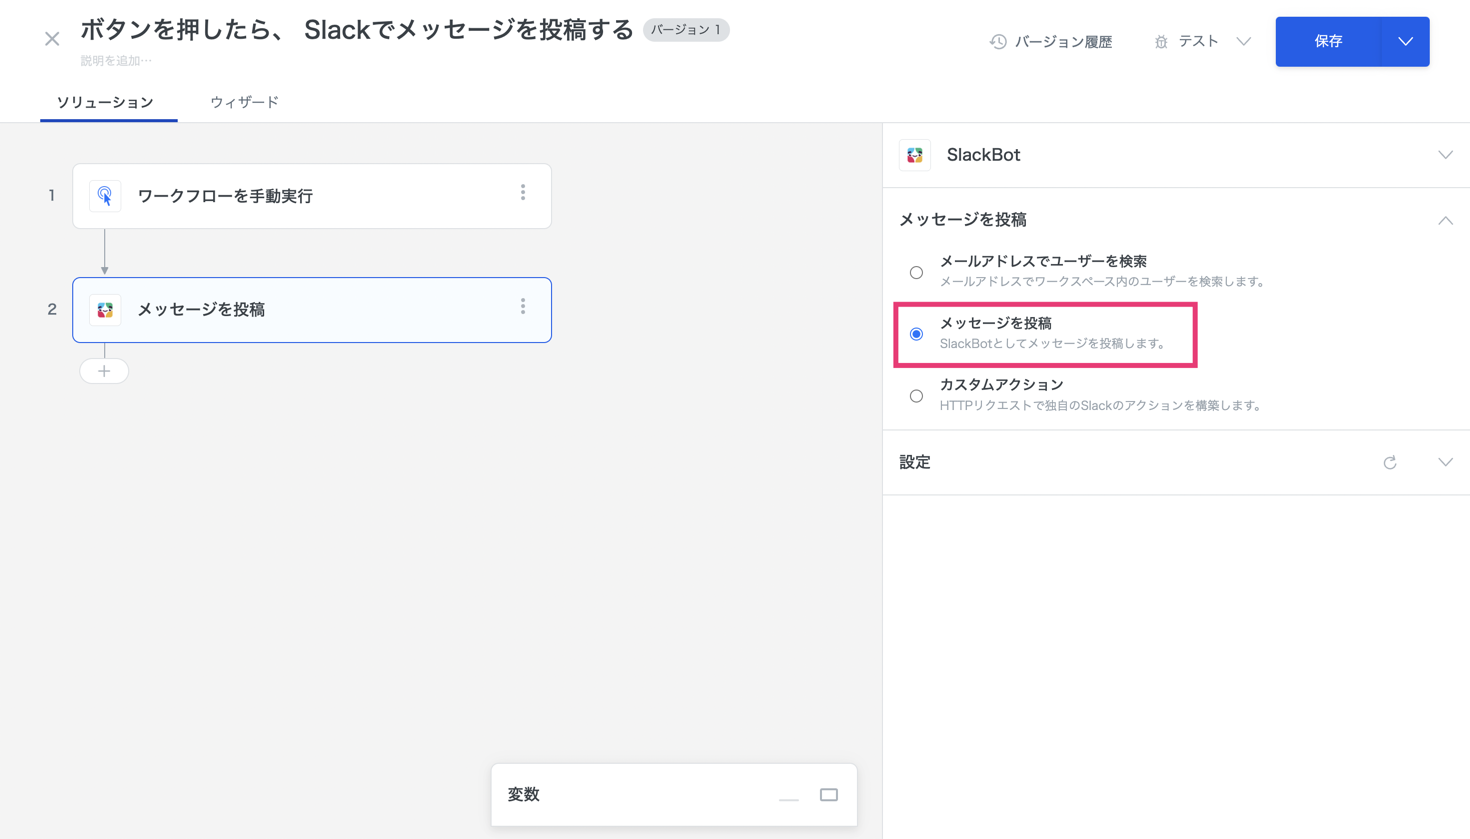
\[メッセージを投稿] をクリック
***
### **2-3.メッセージを投稿するSlackチャンネルの設定**
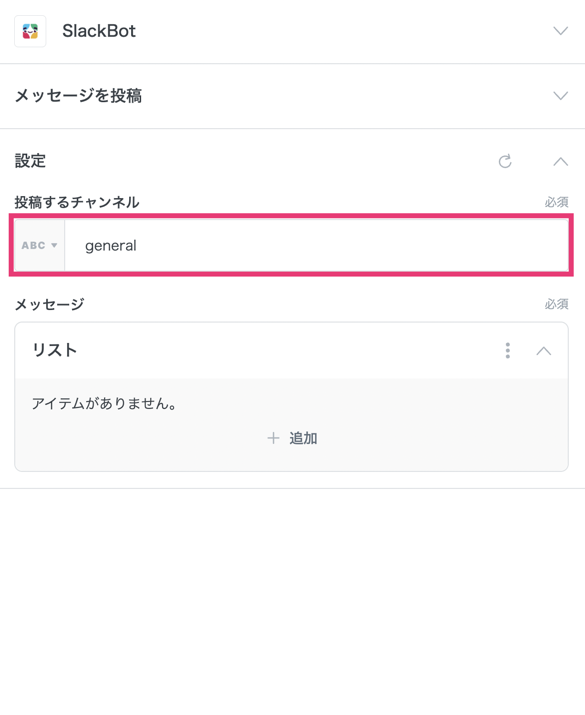
メッセージを投稿したいSlackのチャンネル名を、テキストで入力します。
{% hint style="success" %}
### ヒント
投稿先のチャンネル「general」はあくまでも一例です。\
ご利用中のSlackワークスペースの状況に応じて適宜変更してください。
{% endhint %}
***
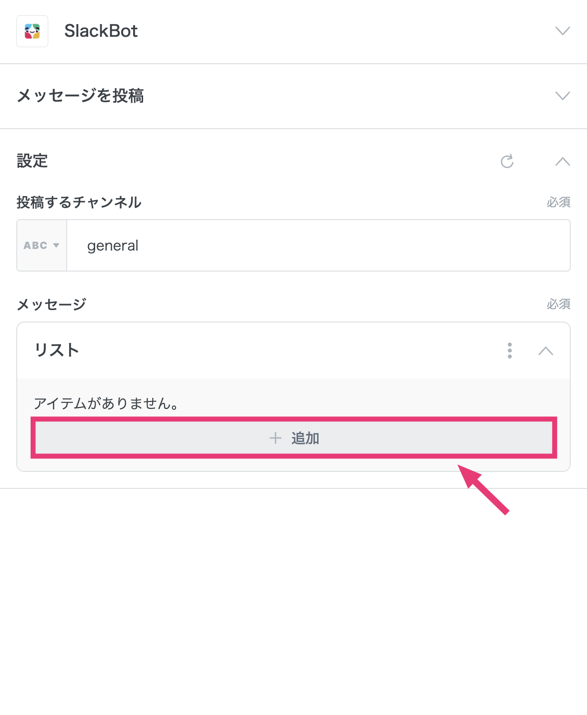
2-4.メッセージの内容を設定
\[追加] をクリック
***
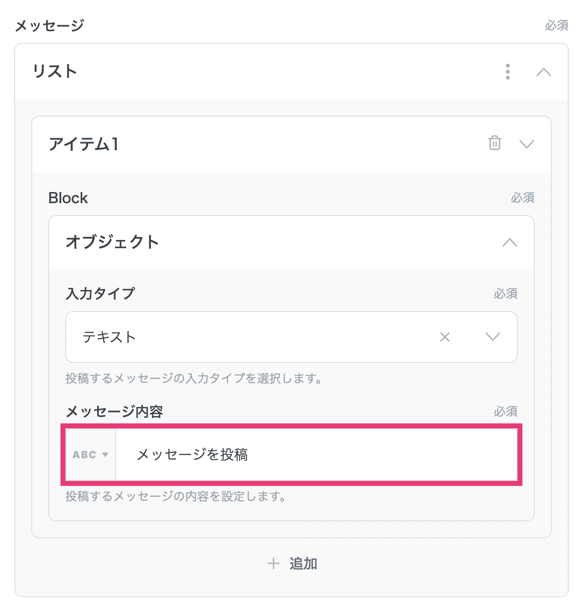
メッセージの入力フィールドが生成されるので、 \[メッセージ内容] に投稿したいメッセージをテキストで入力します。
以上で、ソリューションエディターの設定は完了です。
***
## **3.ウィザードの設定**
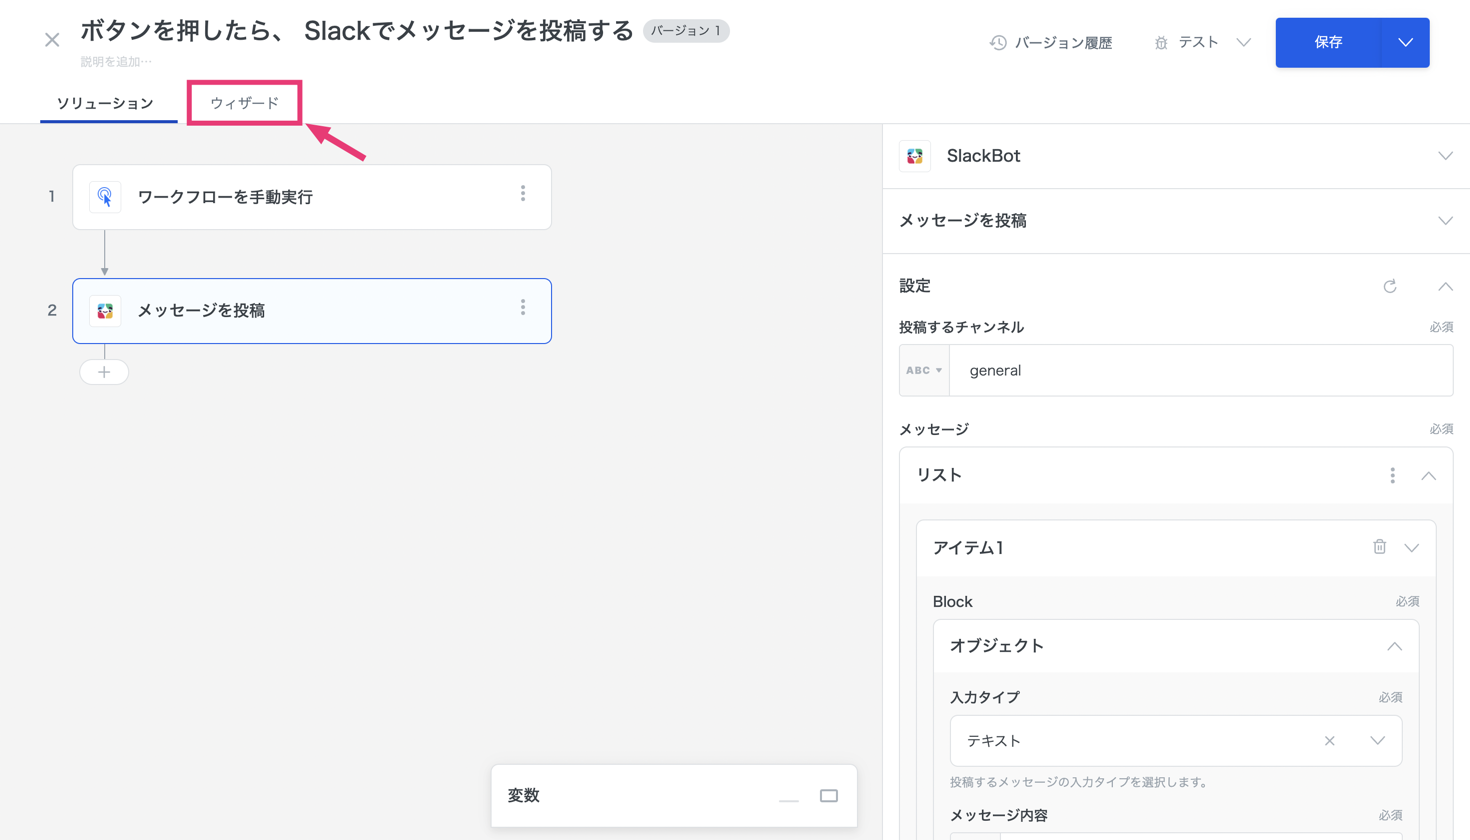
画面左上 \[ウィザード] をクリック
***
### **3-1.アカウント認証**
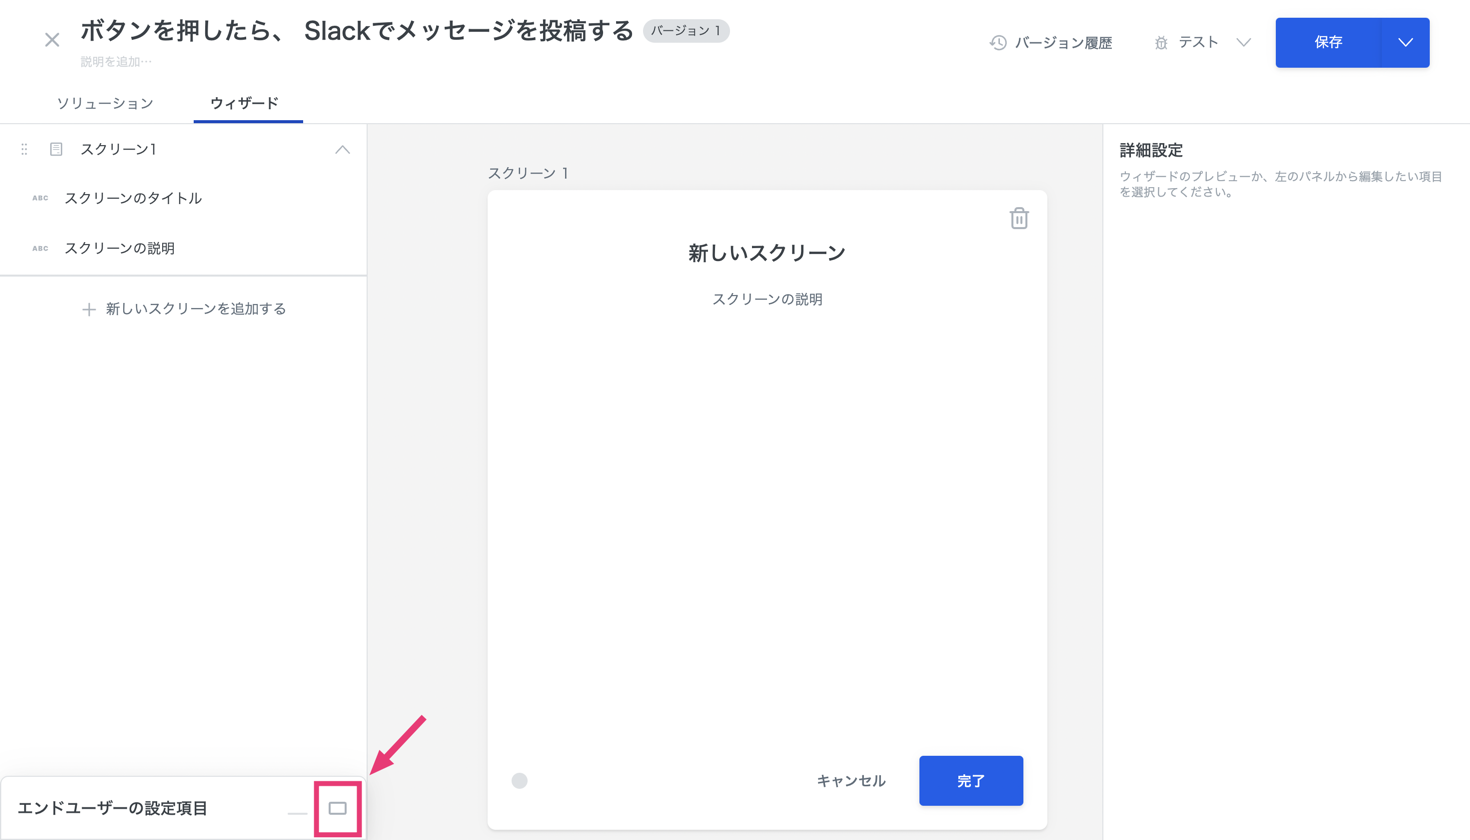
今回、Slackコネクタを使用しているので、Slackアカウントを認証するための設定を行います。
画面左下をクリック
***
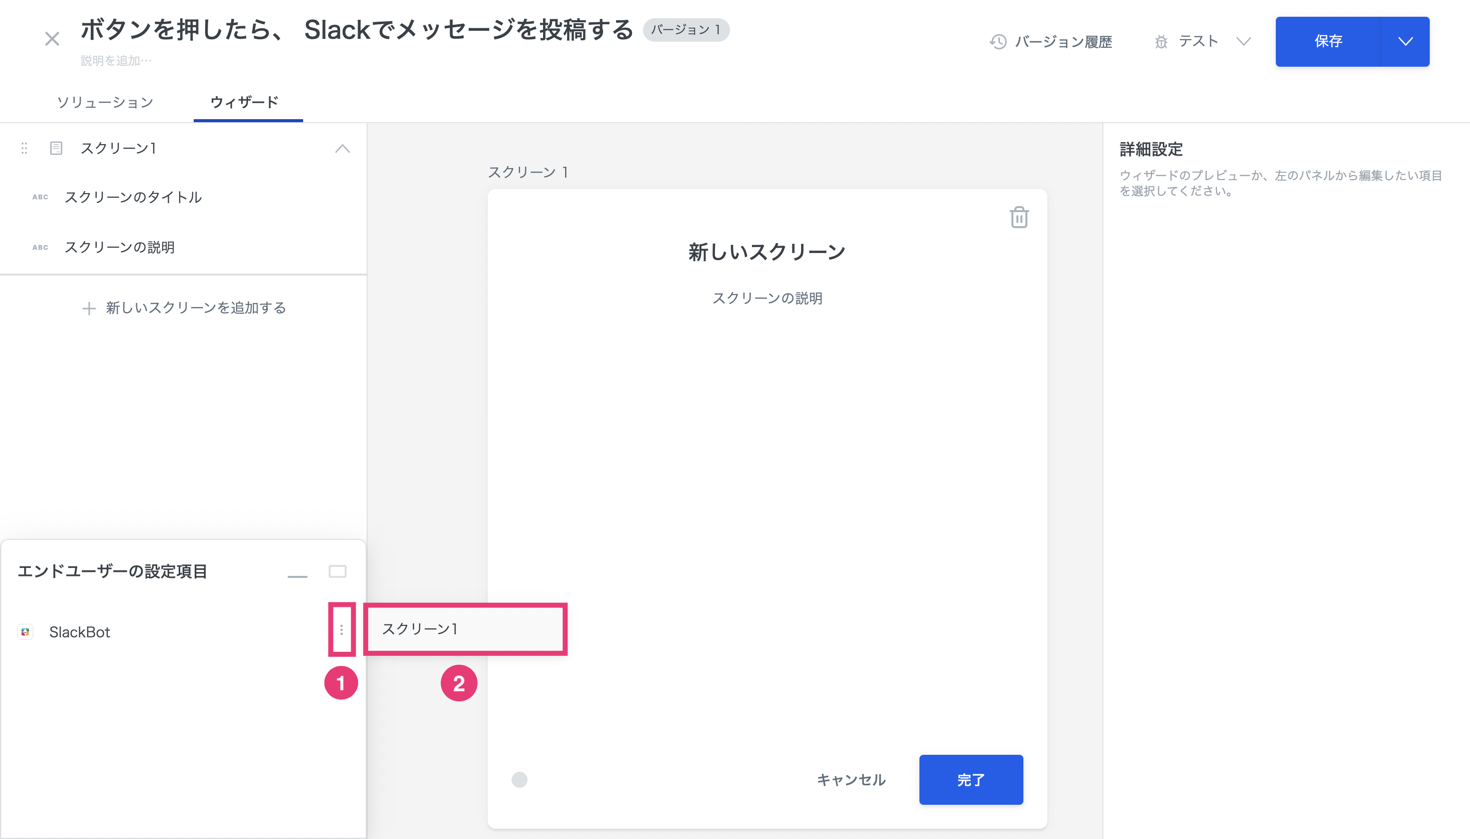
認証するコネクタの右側の \[…] をクリックし、どのスクリーンに配置するか指定します。
***
### **3-2.表示するテキストを設定する**
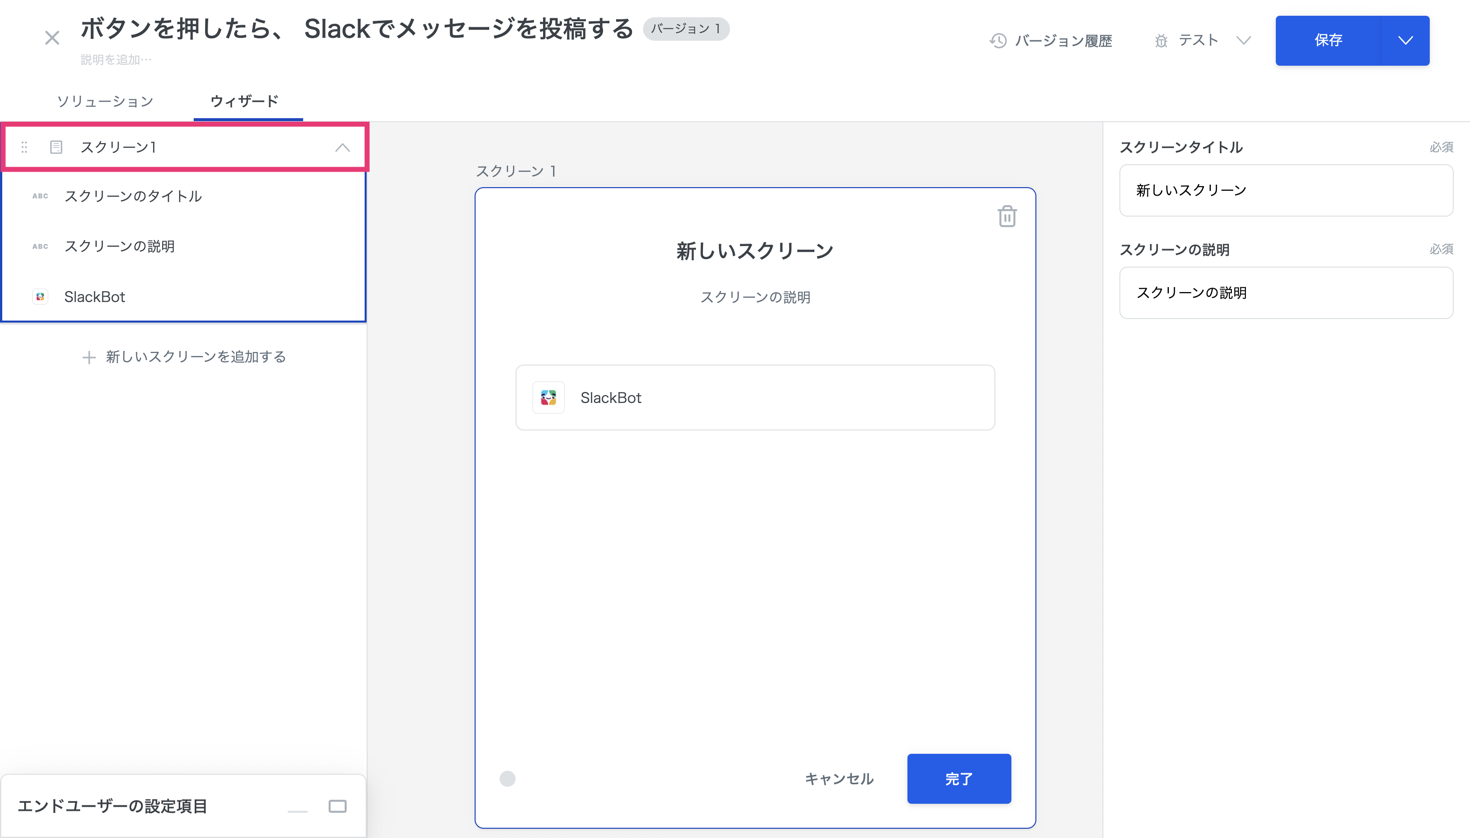
画面左上 \[スクリーン1] をクリック
***
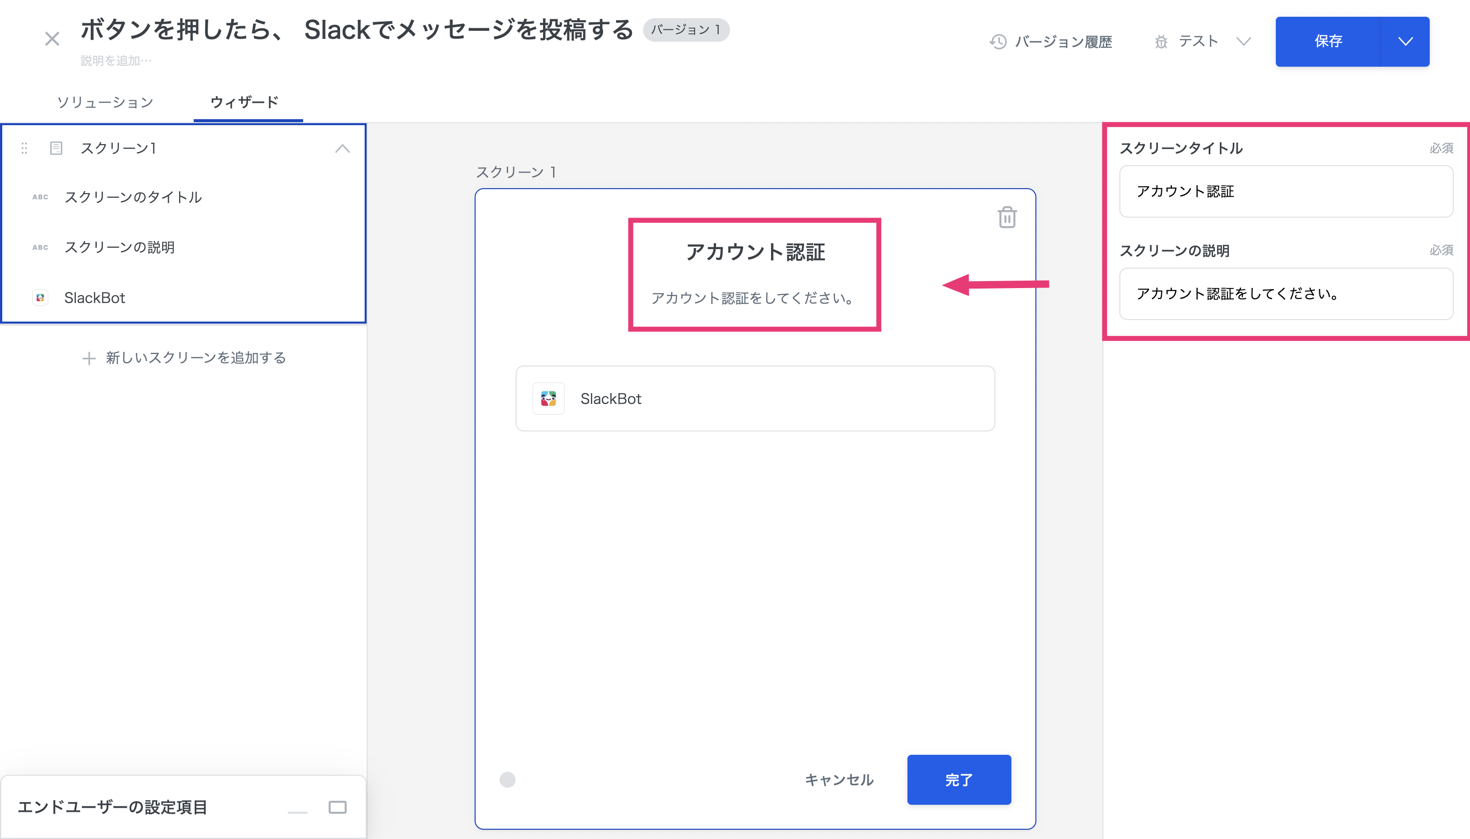
\[スクリーンタイトル] と\[スクリーンの説明] を自由に設定します。\
テキストを入力すると、ウィザードに反映されます。
以上で、全ての設定が完了です🎉
***
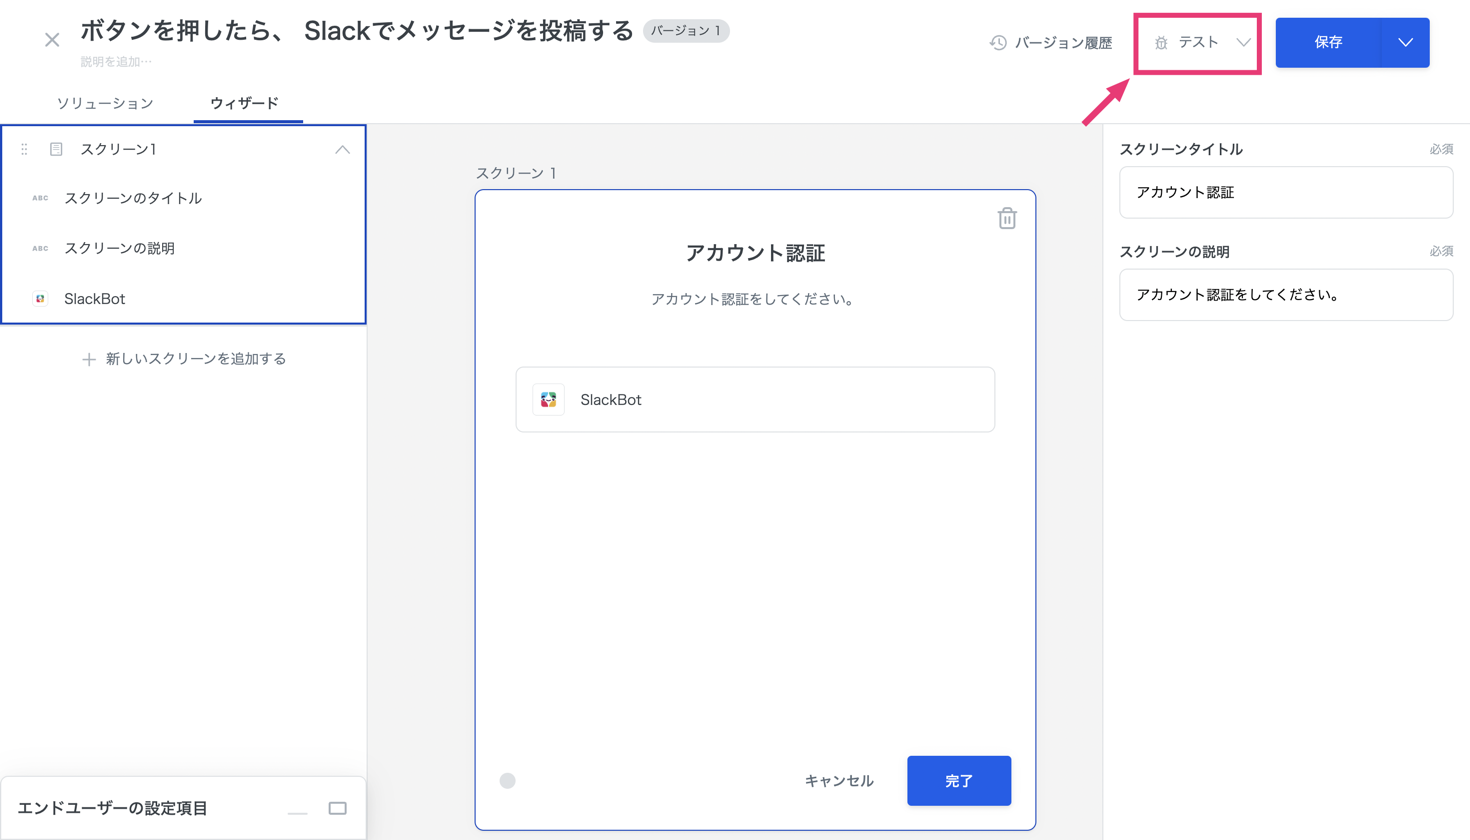
## **4.テスト**
実際にソリューションが動作するかテストします。\
画面右上の \[テスト] をクリック
***
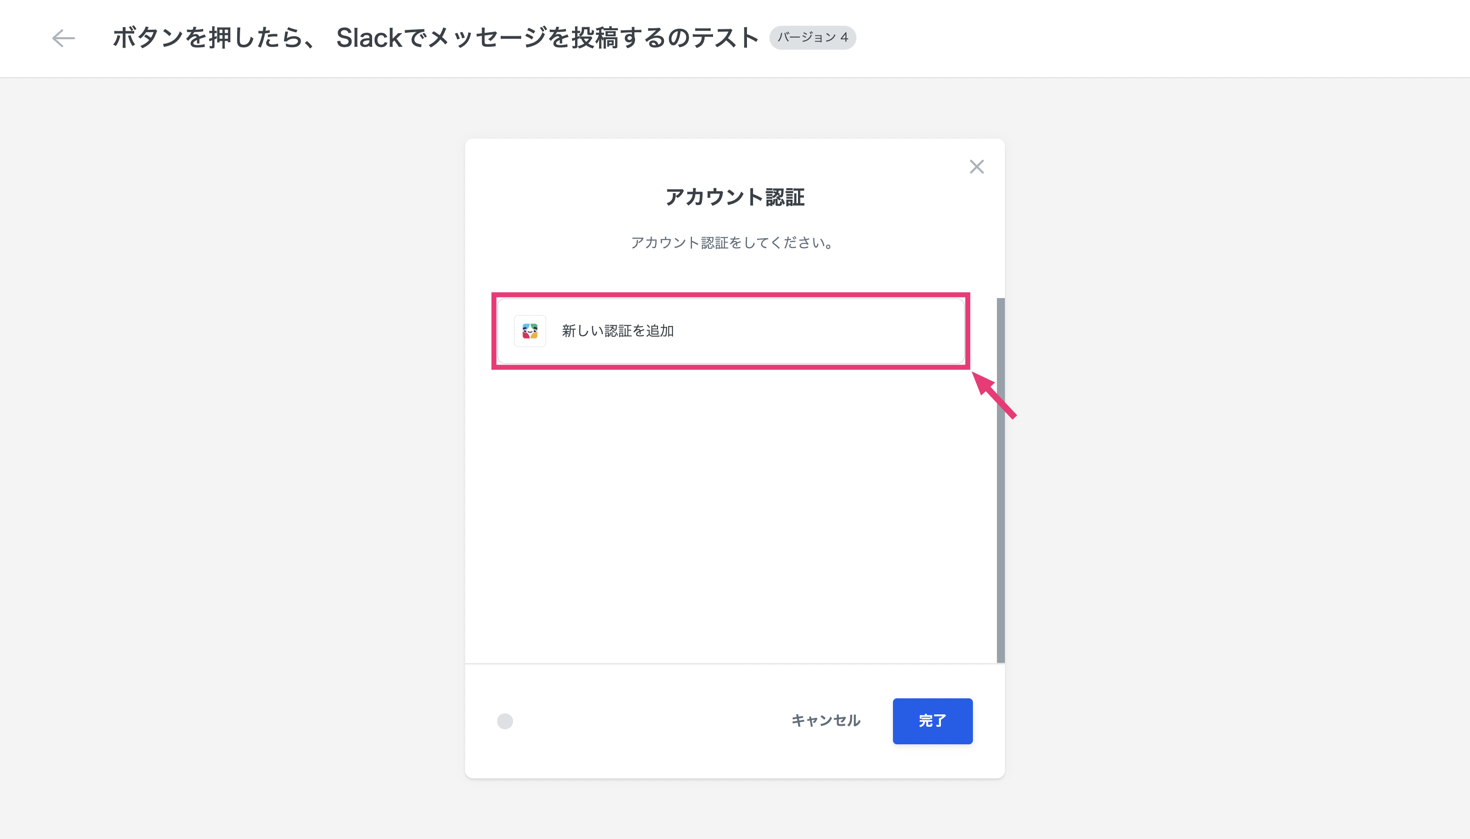
### **4-1.アカウント認証**
Slackアカウントを認証するため、 \[新しい認証を追加] をクリックします。
***
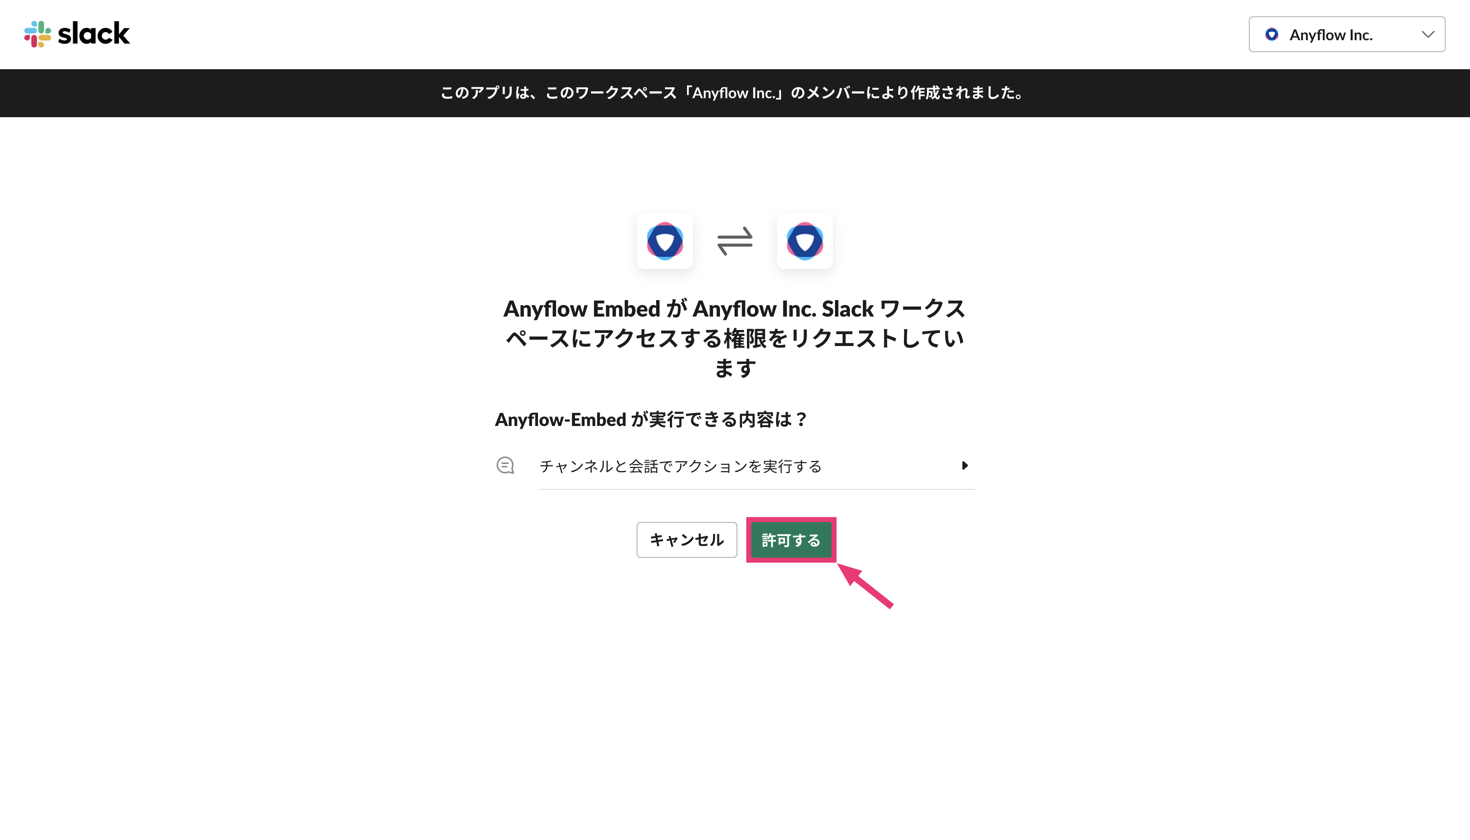
Slackの認証画面が表示されるので、 \[許可する] をクリックします。
***
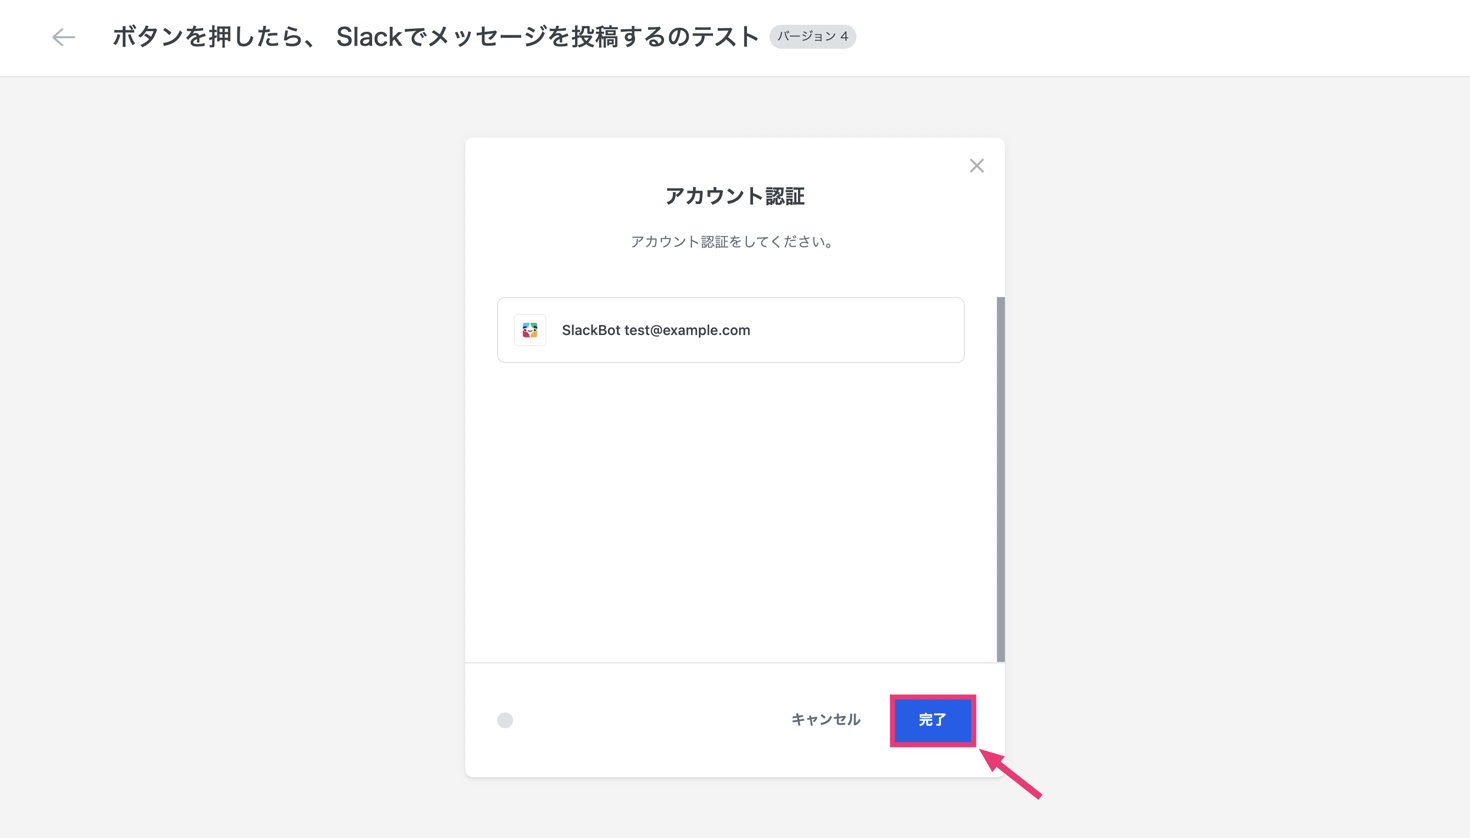
アカウント認証が完了したら、右下の \[完了] をクリックします。
***
### **4-2.テスト実行**
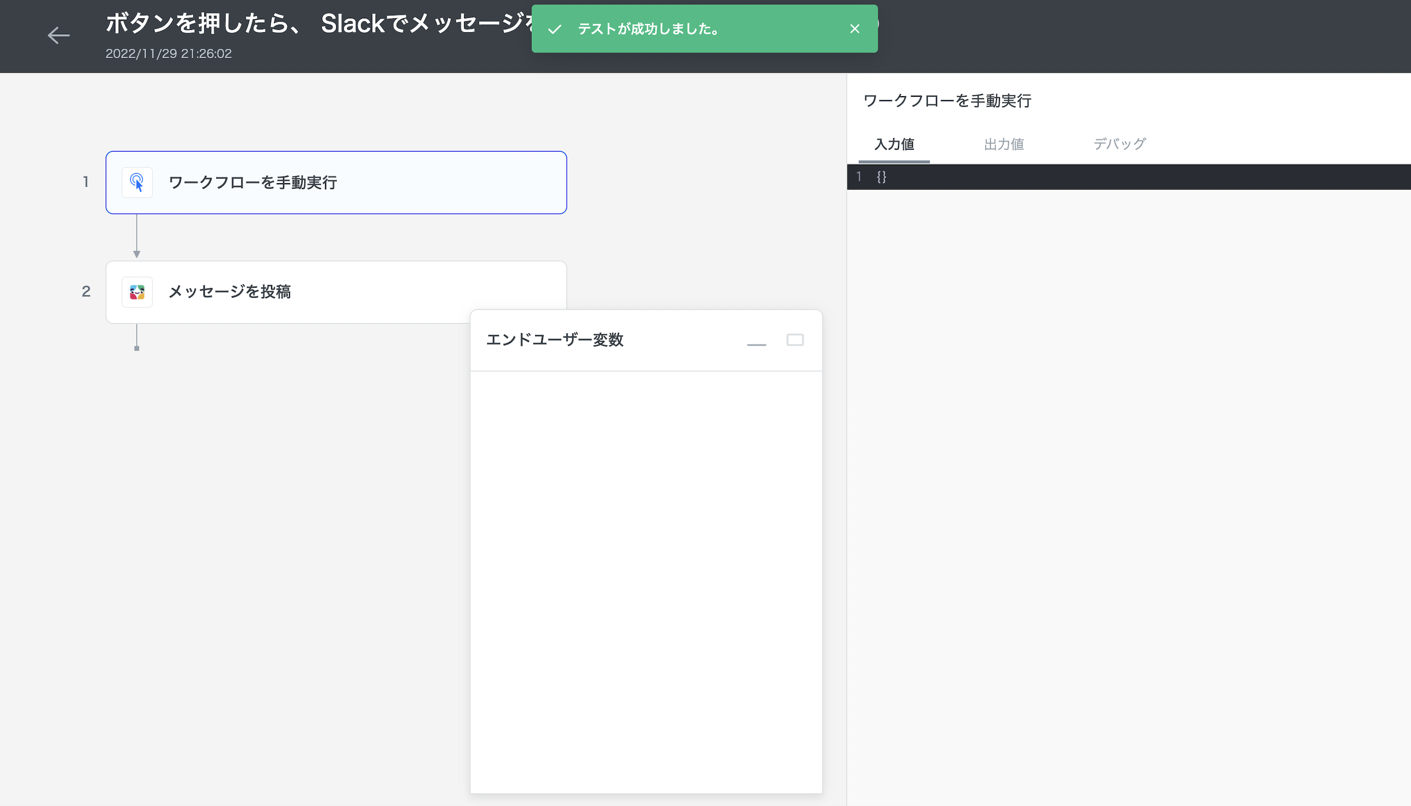
\[完了] をクリックすると、テスト実行が開始されます。
***
無事にテストが成功しました🎉
***
設定で指定したSlackのチャンネルに正しくメッセージが投稿されているか確認します。
***
## **まとめ**
今回のセクションでは、
1. アカウント作成(ログイン)
2. ソリューション作成
3. ウィザードの設定
4. テスト
といった、基本的な操作を学ぶことができました。
この一連の操作は、次のステップ以降も必ず使用する形になるので、わからないことがあった場合は、こちらのセクションを確認してみてください。
***
次は、STEP1のソリューションを活用し、Slackにメッセージを投稿する際のチャンネルを、エンドユーザーに指定してもらう方法をご紹介します。
[STEP2|エンドユーザー変数](/trial-tour/start/step2.md) にお進みください。
---
# Agent Instructions
This documentation is published with GitBook. GitBook is the documentation platform designed so that both humans and AI agents can read, navigate, and reason over technical content effectively. Learn more at gitbook.com.
## Querying This Documentation
If you need additional information that is not directly available in this page, you can query the documentation by asking a question.
Perform an HTTP GET request on the following URL with the `ask` and `goal` query parameters:
```
GET https://docs-embed.anyflow.jp/trial-tour/start/step1.md?ask=&goal=
```
`ask` is the immediate question: it should be specific, self-contained, and written in natural language.
`goal` is what the user is ultimately trying to achieve, the reason they need the answer. Sharing it helps GitBook give you a better, more relevant answer. A goal is most helpful when it describes the outcome the user wants rather than restating the question. For example, with `ask=how do I create an API token`, a goal like `automate deployments from our CI pipeline` lets GitBook tailor the answer to that use case.
The response will contain a direct answer to the question and relevant excerpts and sources from the documentation.
Use this mechanism when the answer is not explicitly present in the current page, you need clarification or additional context, or you want to retrieve related documentation sections.