> For the complete documentation index, see [llms.txt](https://docs-embed.anyflow.jp/llms.txt). Markdown versions of documentation pages are available by appending `.md` to page URLs; this page is available as [Markdown](https://docs-embed.anyflow.jp/connectors/custom-oauth-client.md).

# OAuth画面をカスタムする

## OAuth画面をカスタムする

## 概要

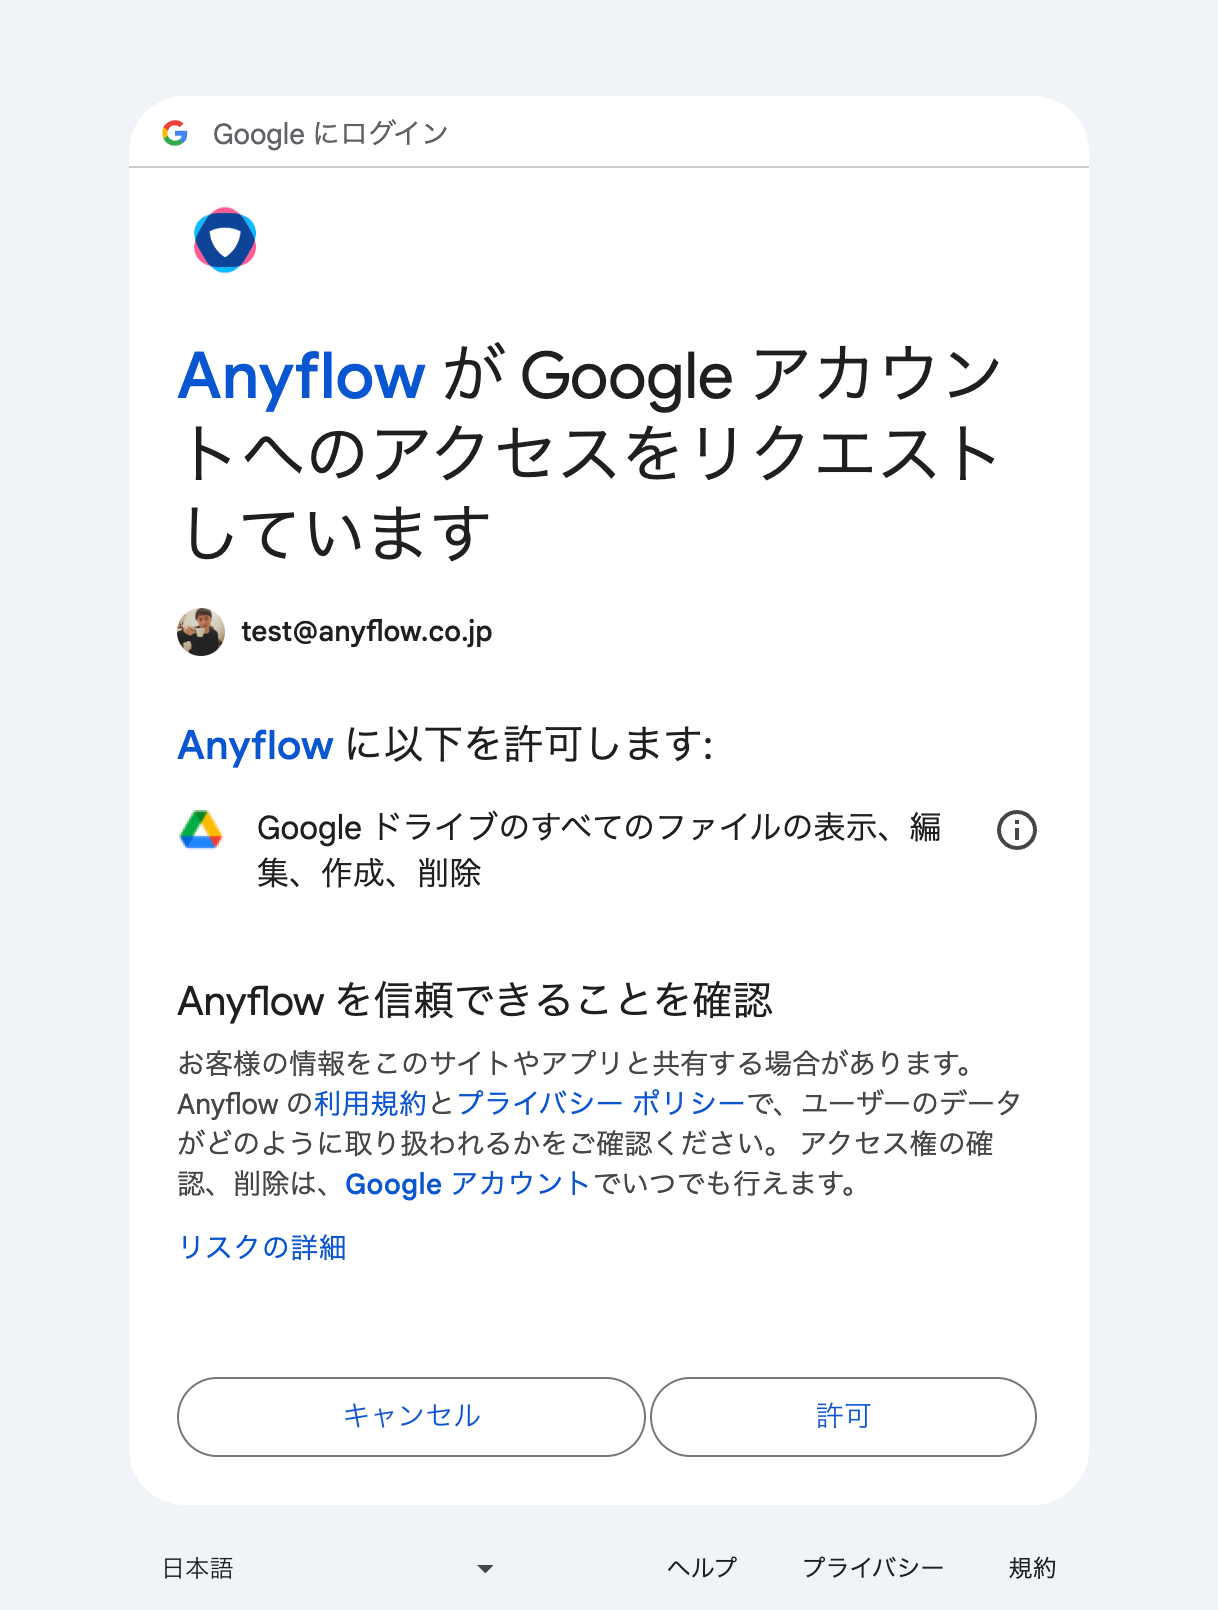
ウィザードでエンドユーザーがOAuthを使用するサービス（Slack, Salesforce, Google Workspace等）の連携を行う場合、以下のような認可画面が表示されます。

<figure><img src="https://files.readme.io/0517362-accounts.google.com_signin_oauth_consent_authuser0partAJi8hAMLT4ZYM-tIzdio-57rW8t-K8OILUyV6_-rnySCwwq_08uJgskDe7ulTsIaLhlzLhSSYHN70TMgdIuDFiwBpSKa7n3pZqNwY4V3jhK6gQKmWTuYMTN5DR8MXamlLeKho0L8LJii67PnQzONLfPWthCImakmv3v4G2fqaKF-VHWPSLbXGKp.png" alt="Google Drive の認証時に表示される画面" width="375"><figcaption><p>Google Drive の認証時に表示される画面</p></figcaption></figure>

デフォルトではAnyflowのOAuthクライアントが適用されているため、Anyflowの名前やロゴが表示されています。

これを変更し自社のOAuthクライアントにすることが可能です。

{% hint style="info" %}
GoogleやZoomのように、OAuthクライアントの公開審査でドメイン認証が必要なサービスでは、認可画面・審査画面に表示されるドメインを自社ドメインに統一するために追加のDNS設定が必要です。

その場合は本ページの「[DNS設定が必要なケース](#dnsganaksu)」もあわせてご確認ください。
{% endhint %}

## 手順

1. 認可画面を変更したいサービスの開発者ポータル等にログインします。
2. 自社のOAuthクライアントを作成します。
3. リダイレクトURLは以下を設定してください。

```
https://for-product-api.anyflow.jp/oauth2/callback
```

{% hint style="warning" %}
カスタムドメインを利用する場合（「DNS設定が必要なケース」に該当する場合）は、ここで設定するリダイレクトURLが上記ではなく `https://<カスタムドメイン>/oauth2/callback` になります。
{% endhint %}

4. スコープには、ソリューションで利用する予定のスコープを指定します。\
   ただし、ソリューション内でカスタムアクションを利用している場合は、カスタムアクションが要求するスコープを一通り指定してください。
5. OAuthクライアントを作成したらAnyflowのCS担当者に以下2点を受け渡してください。
   1. クライアントID
   2. クライアントシークレット

## レシピ

OAuthクライアントの具体的な作成手順は各サービスにより異なりますが、いくつか一例を紹介します。

* [SlackBot](https://docs-embed.anyflow.jp/recipe/communication/slackbot-custom-original-bot)
* [freee](https://docs-embed.anyflow.jp/recipe/accounting/freee-custom-oauth)
* [Zoom](https://docs-embed.anyflow.jp/connectors/notes/zoom-vs-zoom-custom)
* [Google](https://docs-embed.anyflow.jp/recipe/groupware/custom-oauth-google-drive)

## DNS設定が必要なケース

GoogleやZoomなど一部のサービスでは、OAuthクライアントの公開審査時に「ドメイン認証」が求められます。このようなサービスでは、次のいずれかの理由から自社ドメインを使う必要があります。

* リダイレクトURLを、自社が所有するドメイン配下にする必要がある
* 認可画面・審査画面に表示されるドメインを、自社ドメインに統一したい

この場合は、自社が所有するドメインのサブドメイン（カスタムドメイン  例：`app-auth.example.com`）を1つ用意し、以下の3ステップで設定します。

#### **1. DNSにCNAMEレコードを追加する**

自社プロダクトドメインのDNSサーバーに、以下のCNAMEレコードを追加してください。

<table><thead><tr><th width="199.46875">Parameter</th><th>Value</th></tr></thead><tbody><tr><td>Record type</td><td>CNAME</td></tr><tr><td>Name</td><td>カスタムドメイン名（e.g. anyflow-auth.example.comなど）を入力</td></tr><tr><td>Time to Live (TTL)</td><td>任意の値を入力</td></tr><tr><td>Data</td><td>for-product-custom-oauth.anyflow.jp</td></tr></tbody></table>

#### **2. リダイレクトURLをカスタムドメインで設定する**

「手順」のステップ3で設定するリダイレクトURLを、`https://for-product-api.anyflow.jp/oauth2/callback` ではなく、以下の形式（カスタムドメイン配下）にしてください。

```
https://<カスタムドメイン>/oauth2/callback
```

#### **3. カスタムドメイン名をAnyflow担当者へ共有する**

Anyflow側でSSL証明書を発行するため、カスタムドメイン名をAnyflowのCS担当者に受け渡してください。

{% hint style="info" %}
**認証時の流れ（参考）**

1. （ブラウザ）認証後、`https://<カスタムドメイン>/oauth2/callback` へリダイレクトされます。
2. （お客様DNS）カスタムドメインがCNAMEにより `for-product-custom-oauth.anyflow.jp` へ解決されます。
3. （Anyflowサーバー）カスタムドメインのSSLを終端し、callback処理を実行します。

これにより、認可画面・審査画面に表示されるドメインが自社カスタムドメインに統一されます。
{% endhint %}


---

# Agent Instructions
This documentation is published with GitBook. GitBook is the documentation platform designed so that both humans and AI agents can read, navigate, and reason over technical content effectively. Learn more at gitbook.com.

## Querying This Documentation
If you need additional information that is not directly available in this page, you can query the documentation dynamically by asking a question.

Perform an HTTP GET request on the current page URL with the `ask` query parameter, and the optional `goal` query parameter:

```
GET https://docs-embed.anyflow.jp/connectors/custom-oauth-client.md?ask=<question>&goal=<endgoal>
```

`ask` is the immediate question: it should be specific, self-contained, and written in natural language.
`goal` is optional and describes the broader end goal you are ultimately trying to accomplish on behalf of the user. GitBook uses it to tailor the answer towards what is most useful for that goal.

The response will contain a direct answer to the question and relevant excerpts and sources from the documentation.

Use this mechanism when the answer is not explicitly present in the current page, you need clarification or additional context, or you want to retrieve related documentation sections.