> For the complete documentation index, see [llms.txt](https://docs-embed.anyflow.jp/llms.txt). Markdown versions of documentation pages are available by appending `.md` to page URLs; this page is available as [Markdown](https://docs-embed.anyflow.jp/trial-tour/start-intermediate-1/step3-intermediate.md).
# STEP3 | My Event を実装する
## **概要**
STEP2ではMy Event の仕組みについて、デモ環境を使って学びました。
STEP3では、実際に自身の環境でMy Event を実装していきましょう。
{% hint style="warning" %}
### コード実装が必要な内容です
JWTの発行や[SDKの組み込み](/anyflow-sdk/docs.md)などの内容が登場するため、コードの実装を行うことができる開発者の方とともに進めてください。
{% endhint %}
## **1.My Event を作成する**
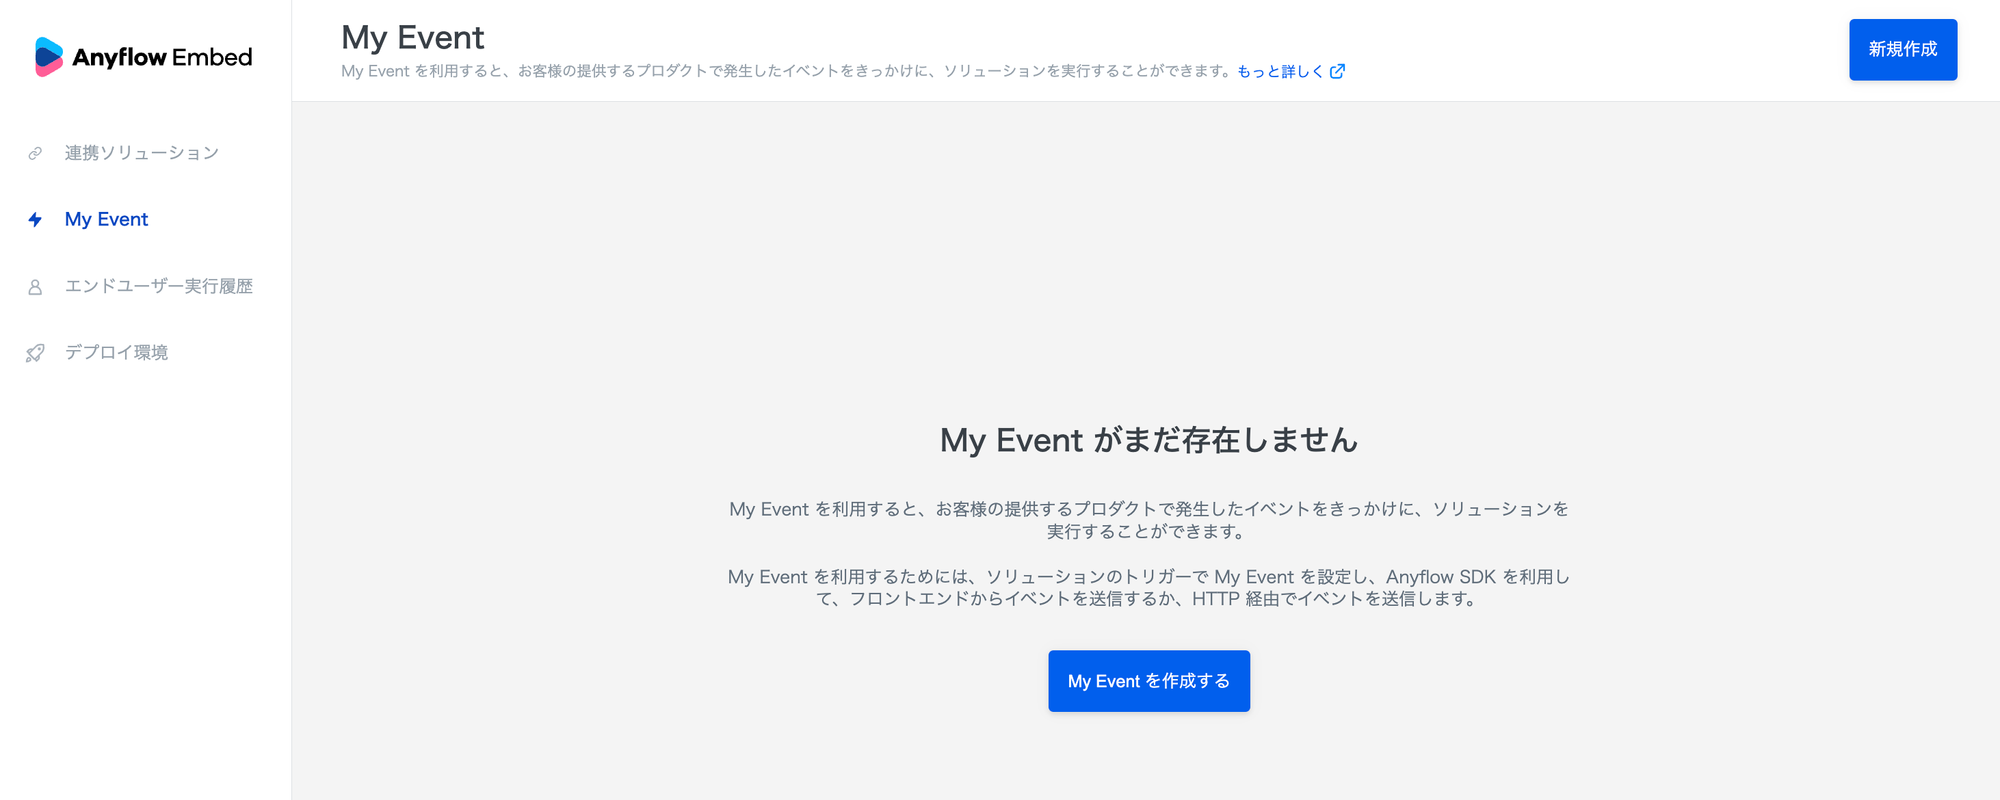
My Event の作成は [My Event 一覧画面](https://embed.anyflow.jp/my-events) から行います。
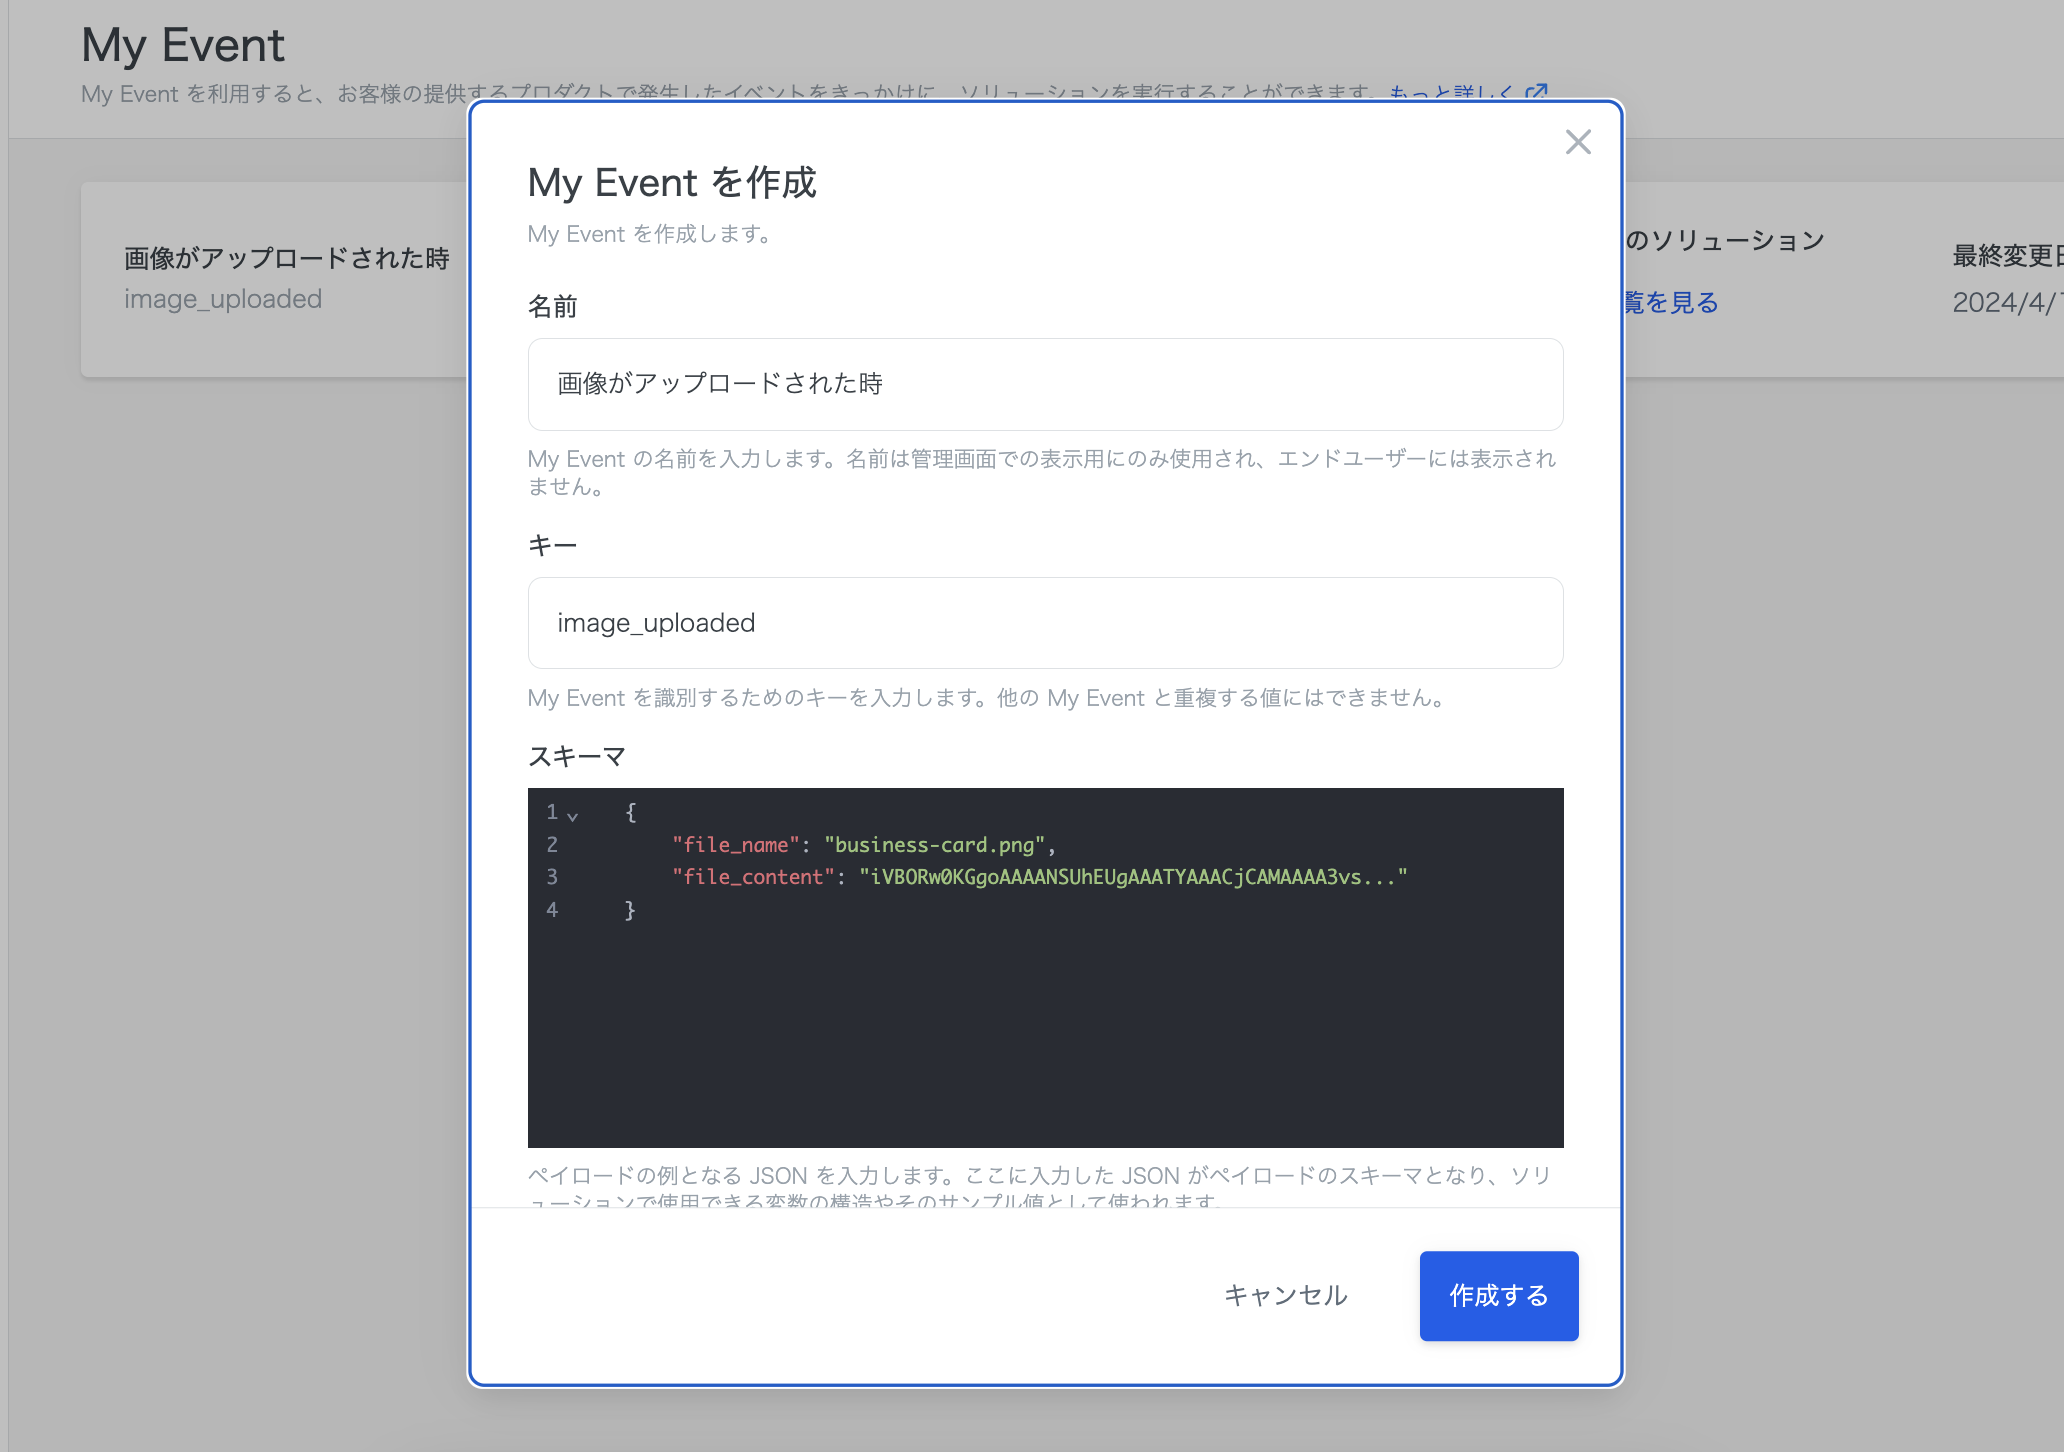
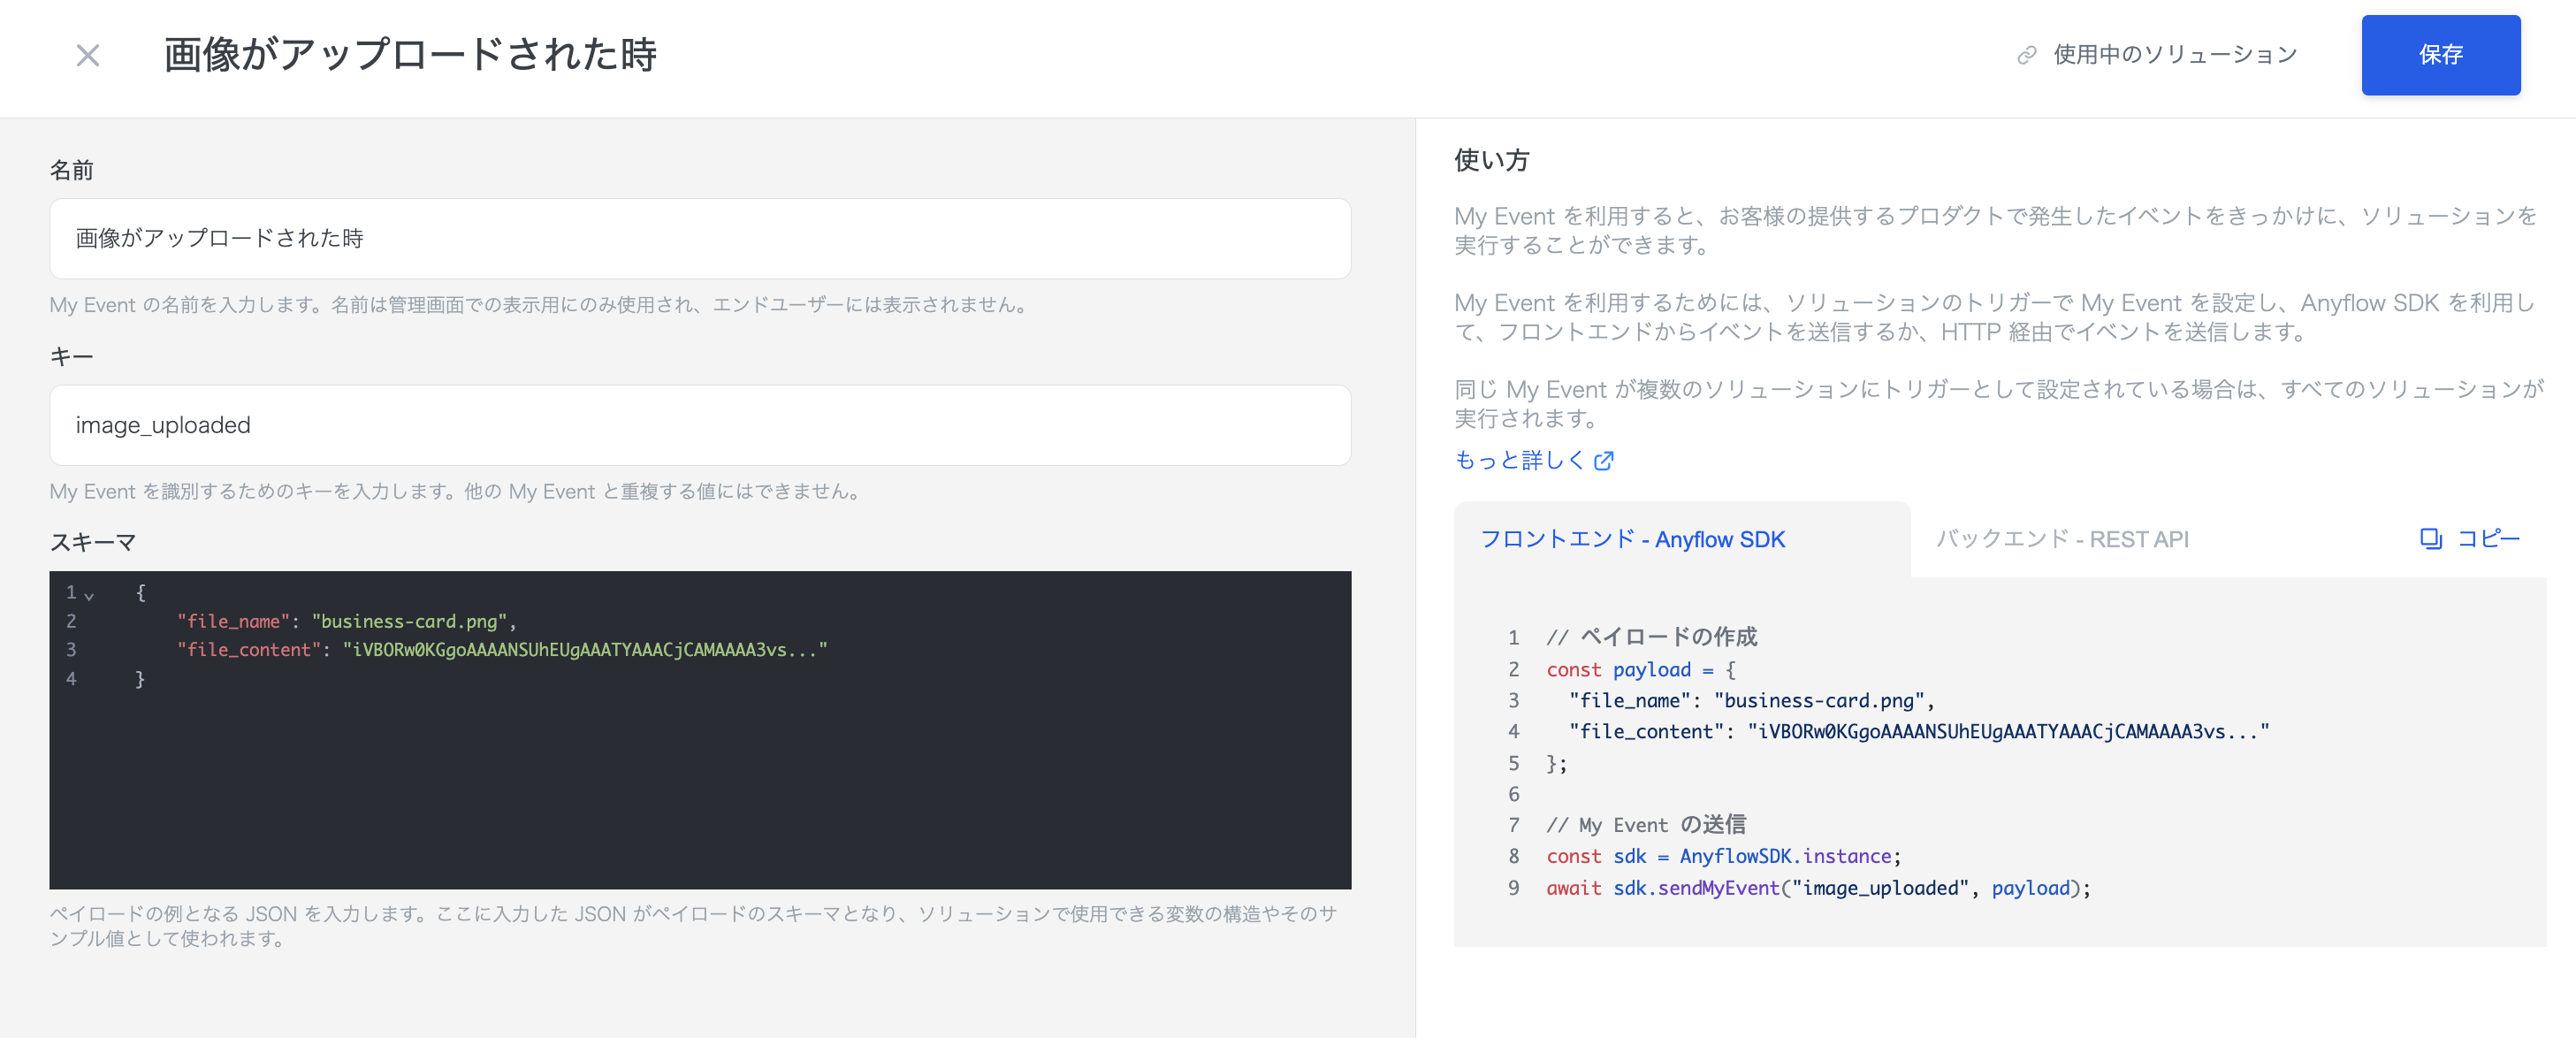
今回は「画像がアップロードされた時」というイベントを作成します。
名前:画像がアップロードされた時
キー:`image_uploaded`
スキーマ:
{% code title="JSON" %}
```
{
"file_name": "business-card.png",
"file_content": "iVBORw0KGgoAAAANSUhEUgAAATYAAACjCAMAAAA3vs..."
}
```
{% endcode %}
***
## **2. My Event をソリューションに適用する**
[連携ソリューション一覧](https://embed.anyflow.jp/solutions) に移動し、STEP1で作成したソリューションを開きます。
### **2-1. トリガーをMy Eventに変更する**
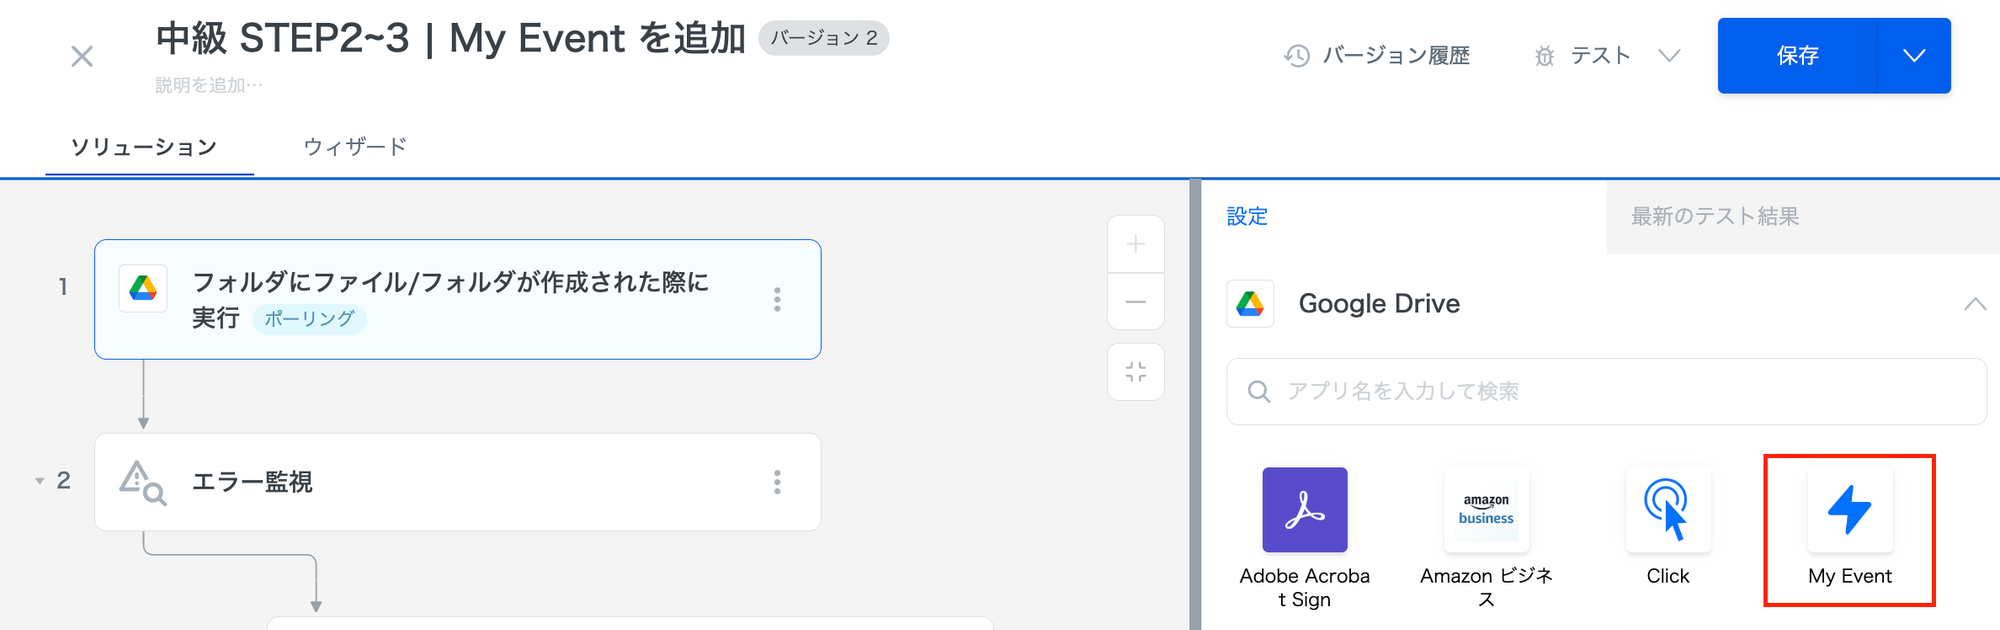
Google Driveトリガーを My Event に変更します。
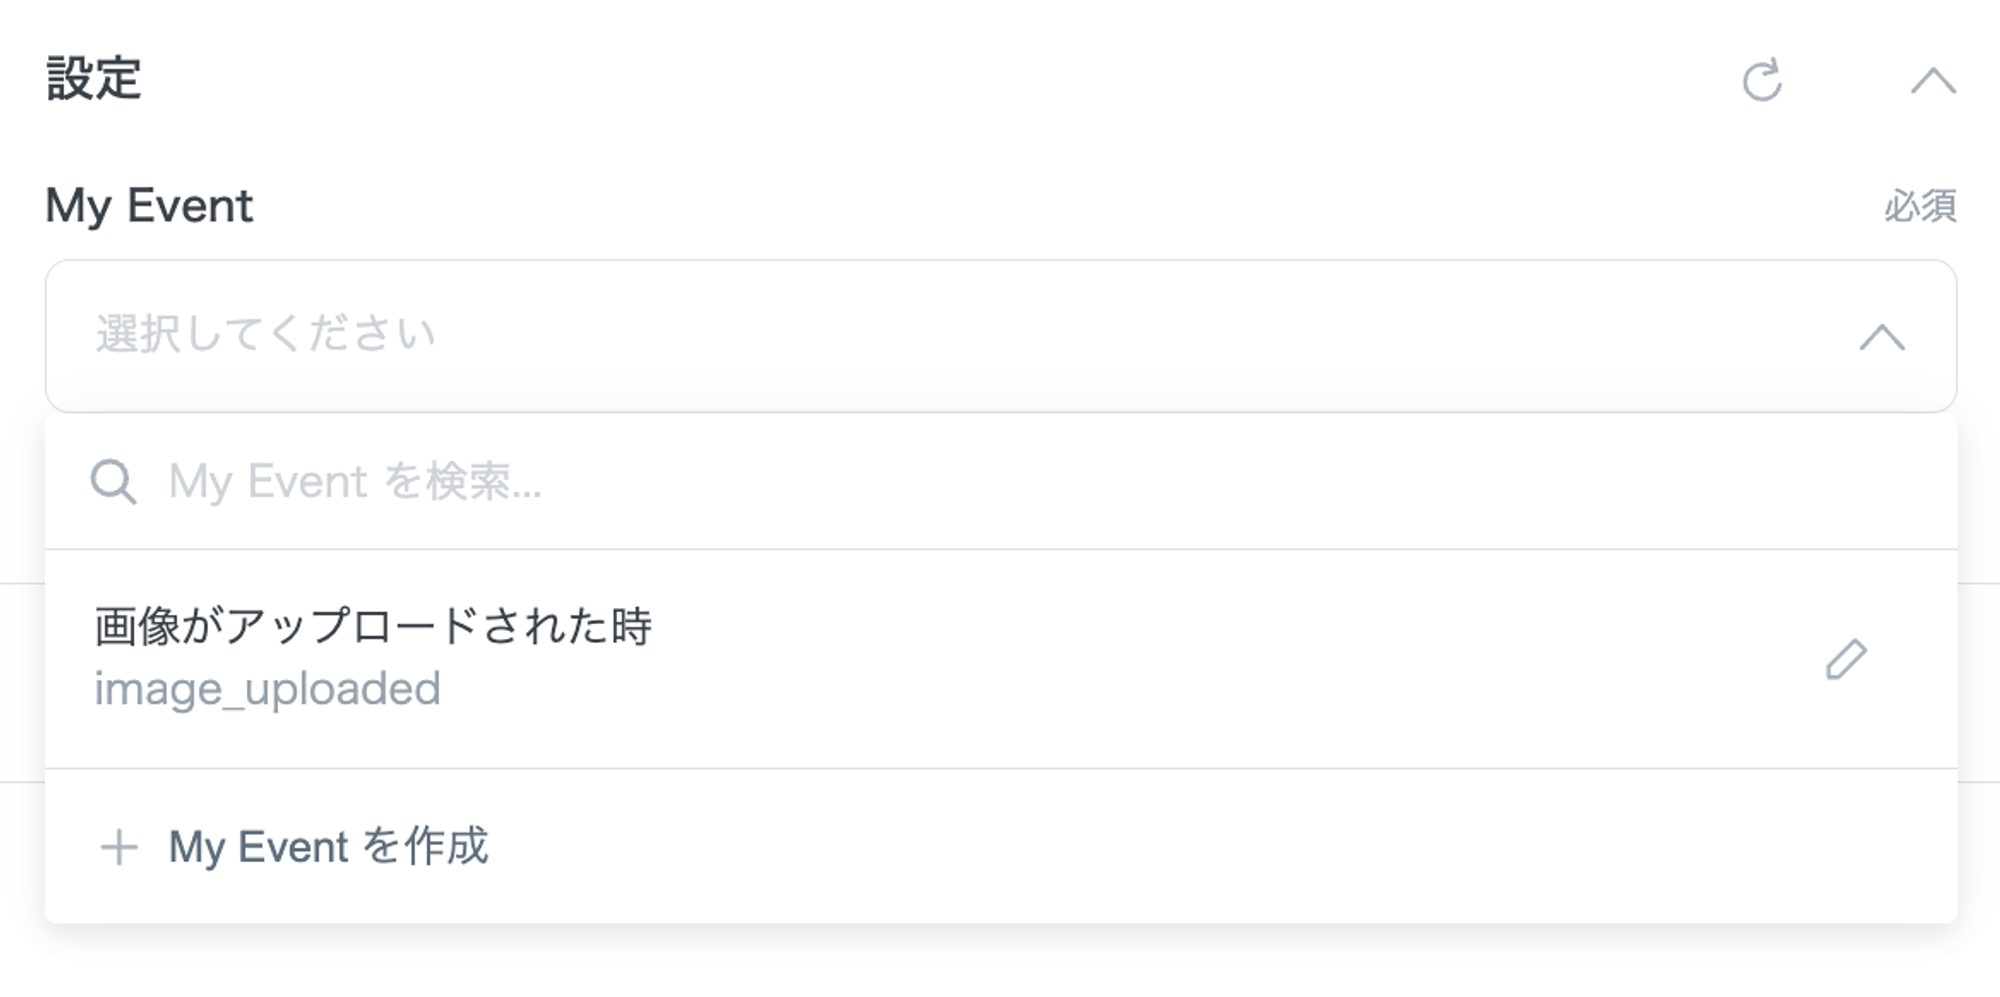
My Event の設定で「画像がアップロードされた時(image\_uploaded)」を選択します。
### **2-2. HTTPコネクタの設定を変更する**
トリガーが変更されたことで、HTTPコネクタの設定を変更する必要があるため、修正していきます。
リクエストボディに指定する値を、Google Drive の値からMy Event の値に変更します。
* file\_name:My Event の file\_name
* file\_content:My Event の file\_content
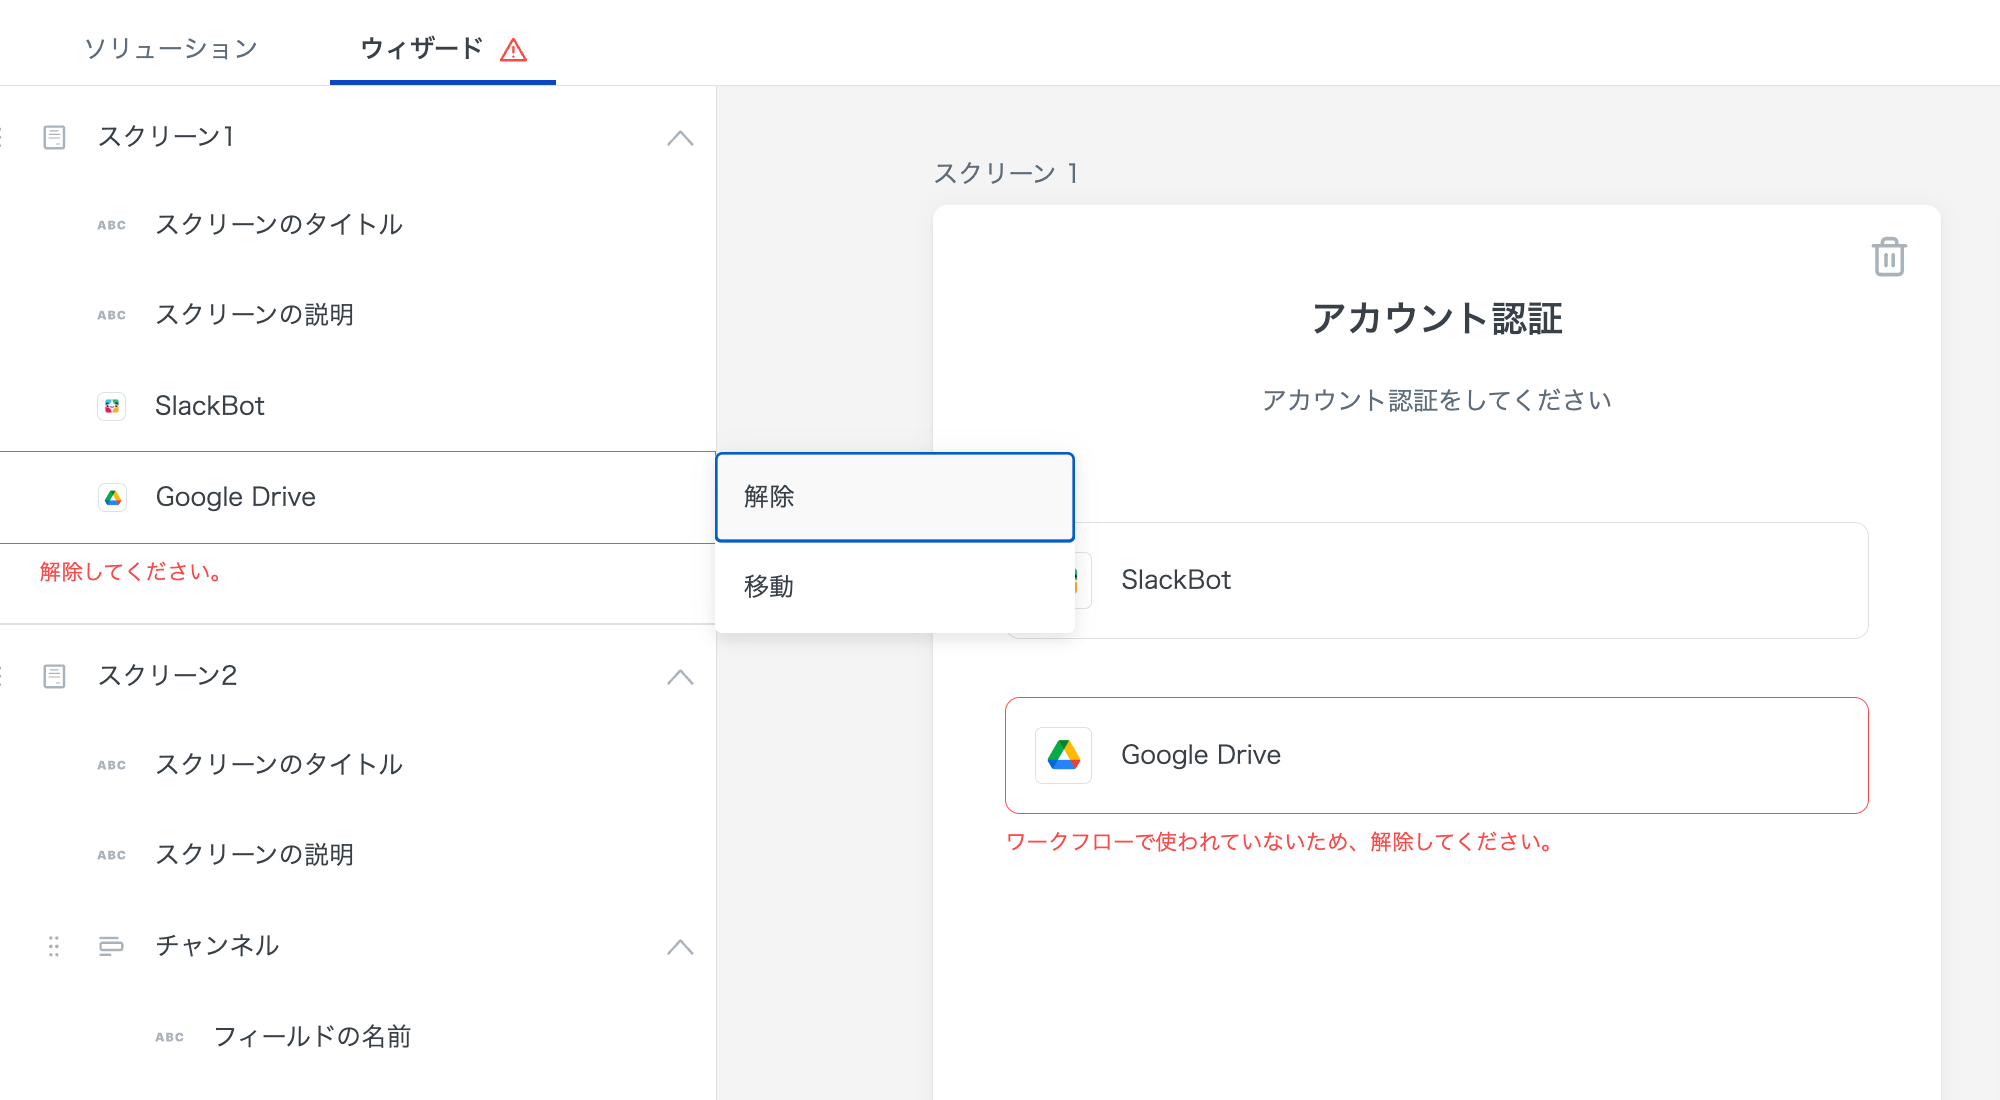
### **2-3. ウィザードからGoogle Driveを解除する**
Google Driveの認証は使わないため、ウィザードから解除します。
***
### **2-4. ソリューションをテストする**
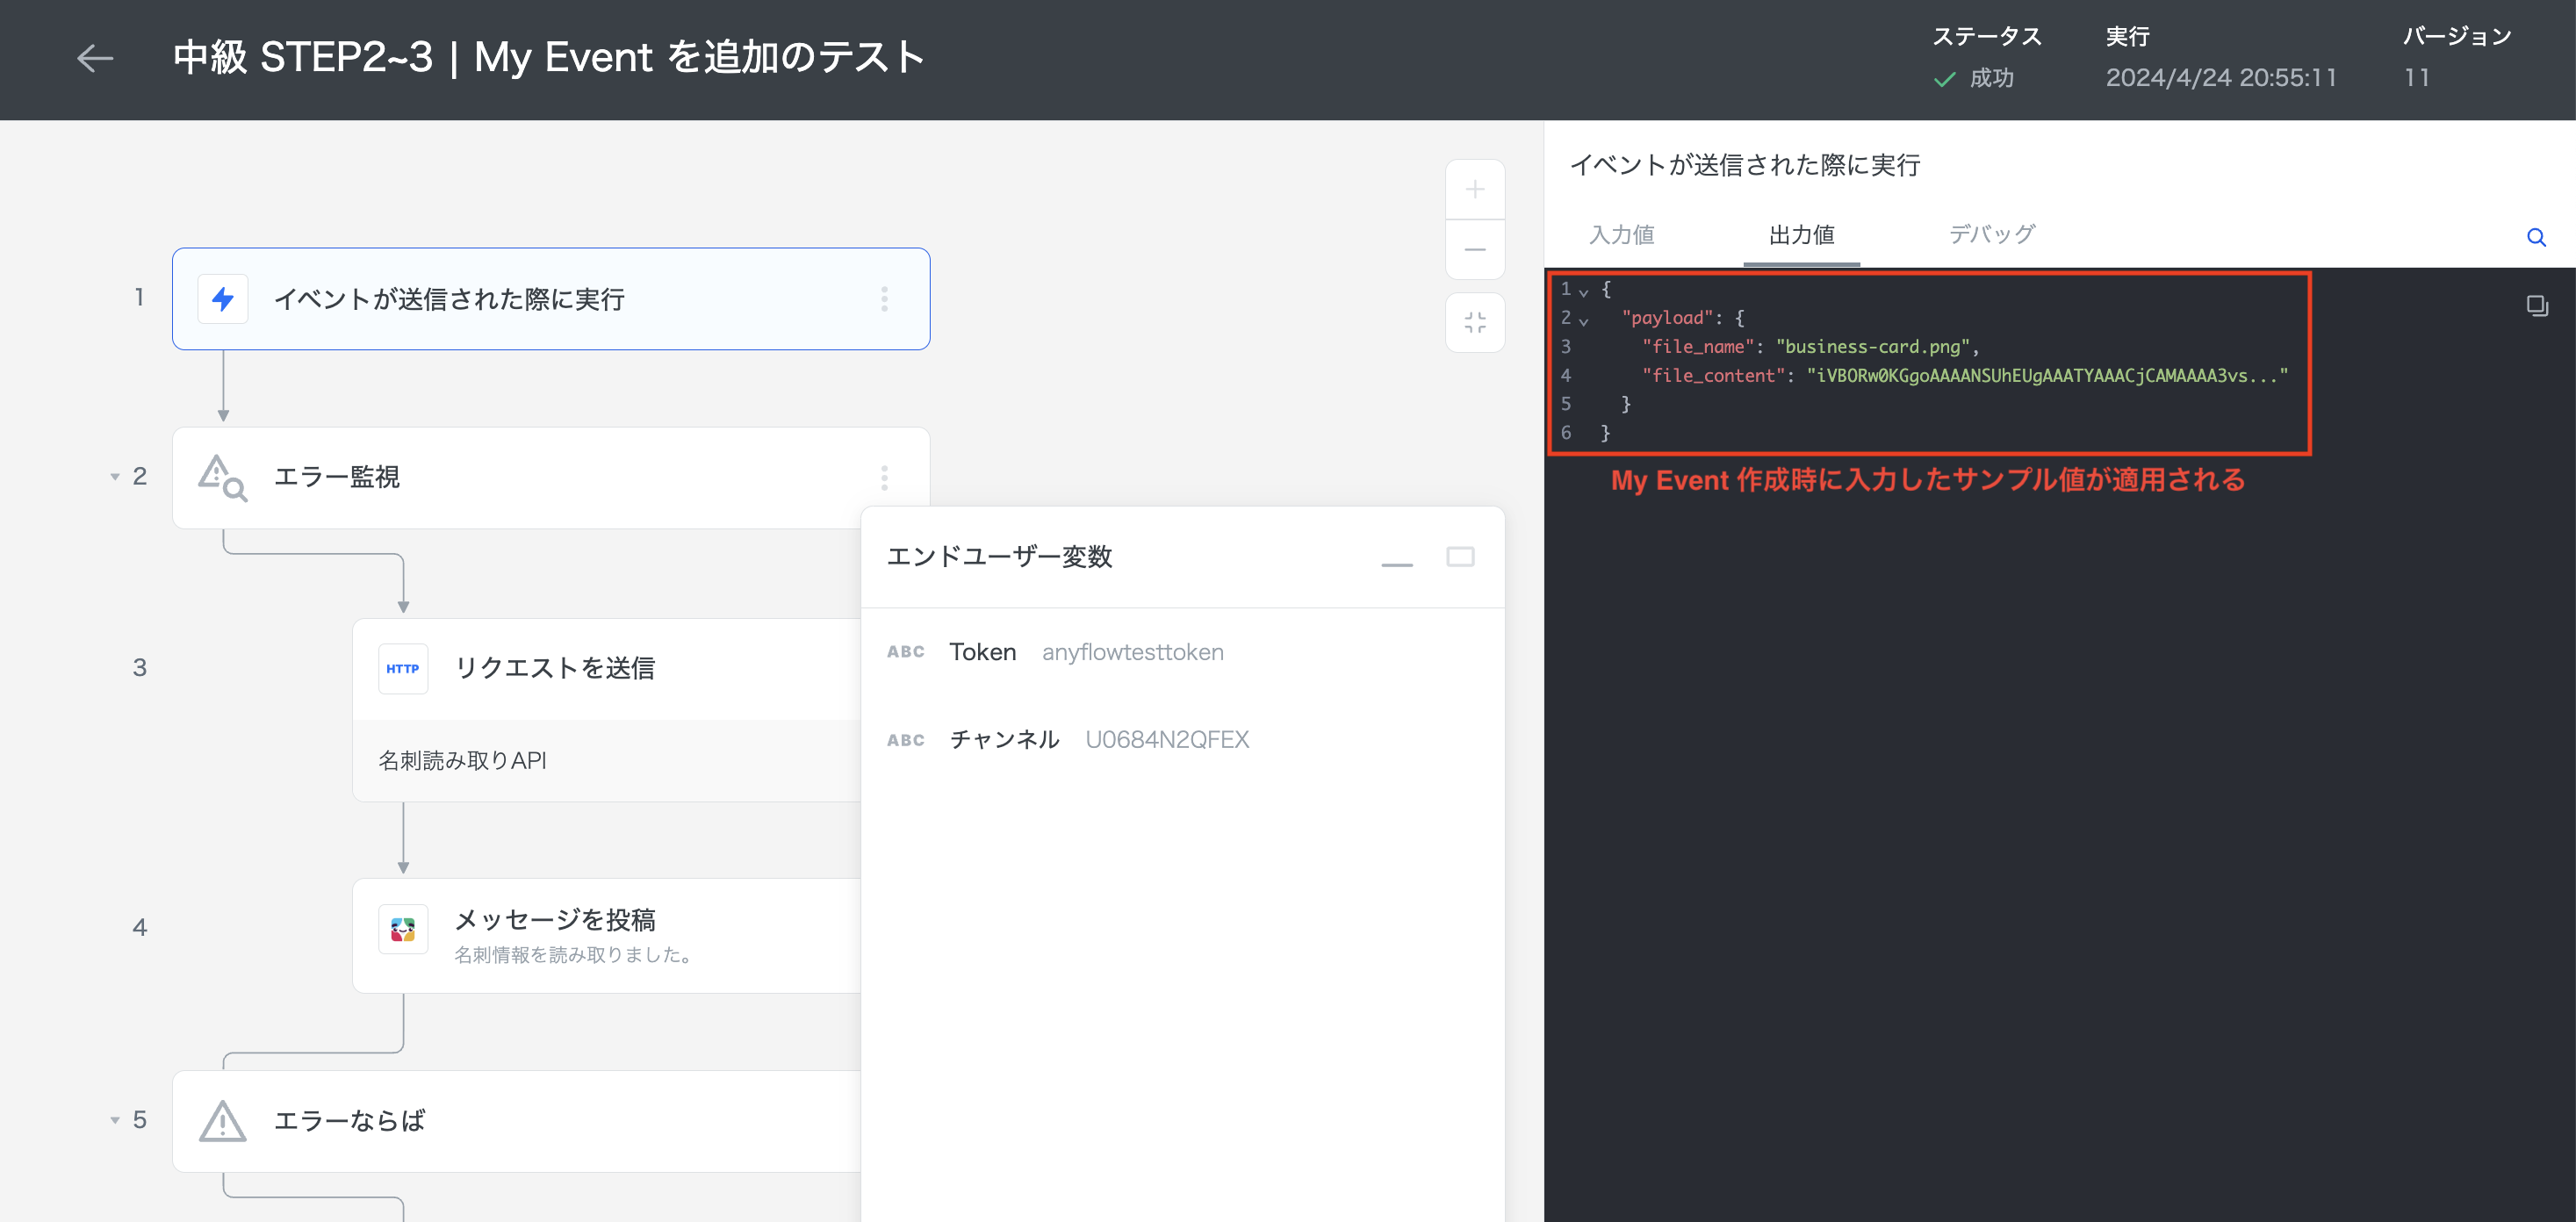
管理画面にて My Event を利用したソリューションをテストする場合、擬似的にMy Event が実行された扱いとなり、My Event のAPI をリクエストしなくてもテストが動きます。
My Event のペイロードで渡される値は、My Event 作成時に入力したサンプル値となります。
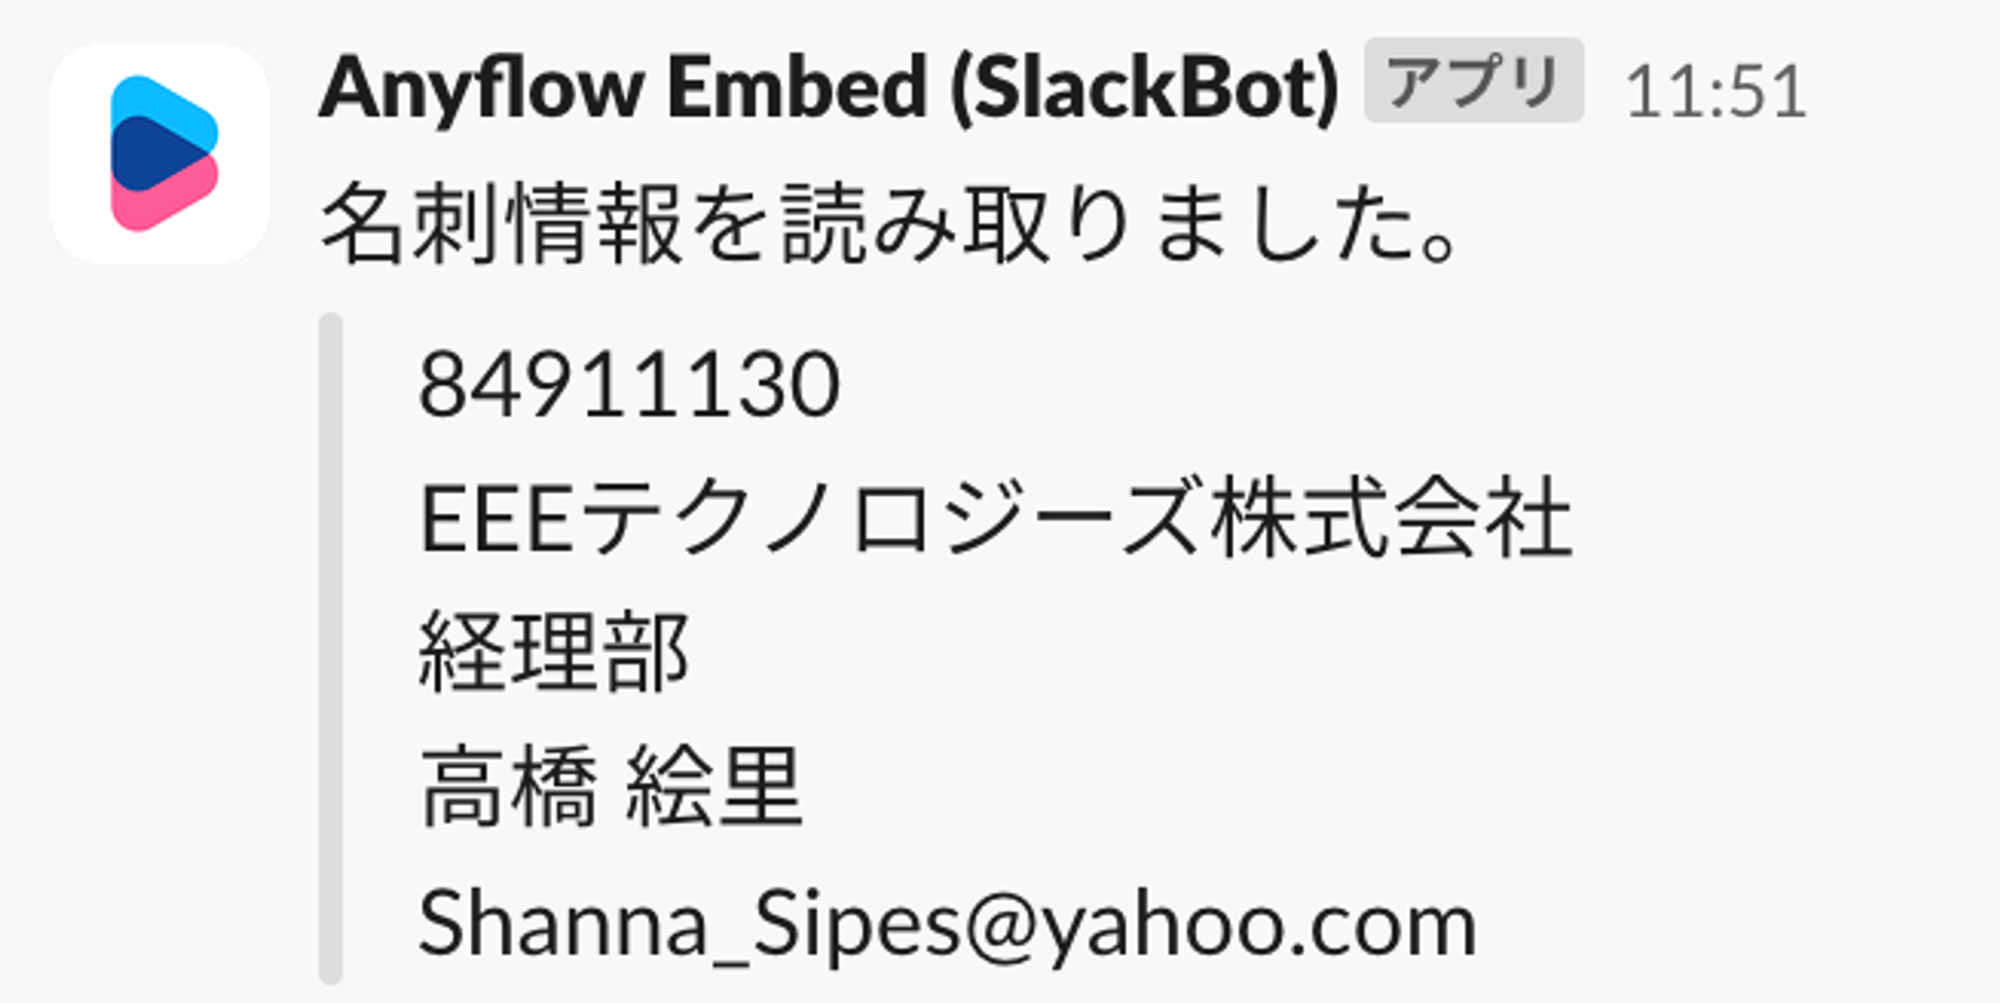
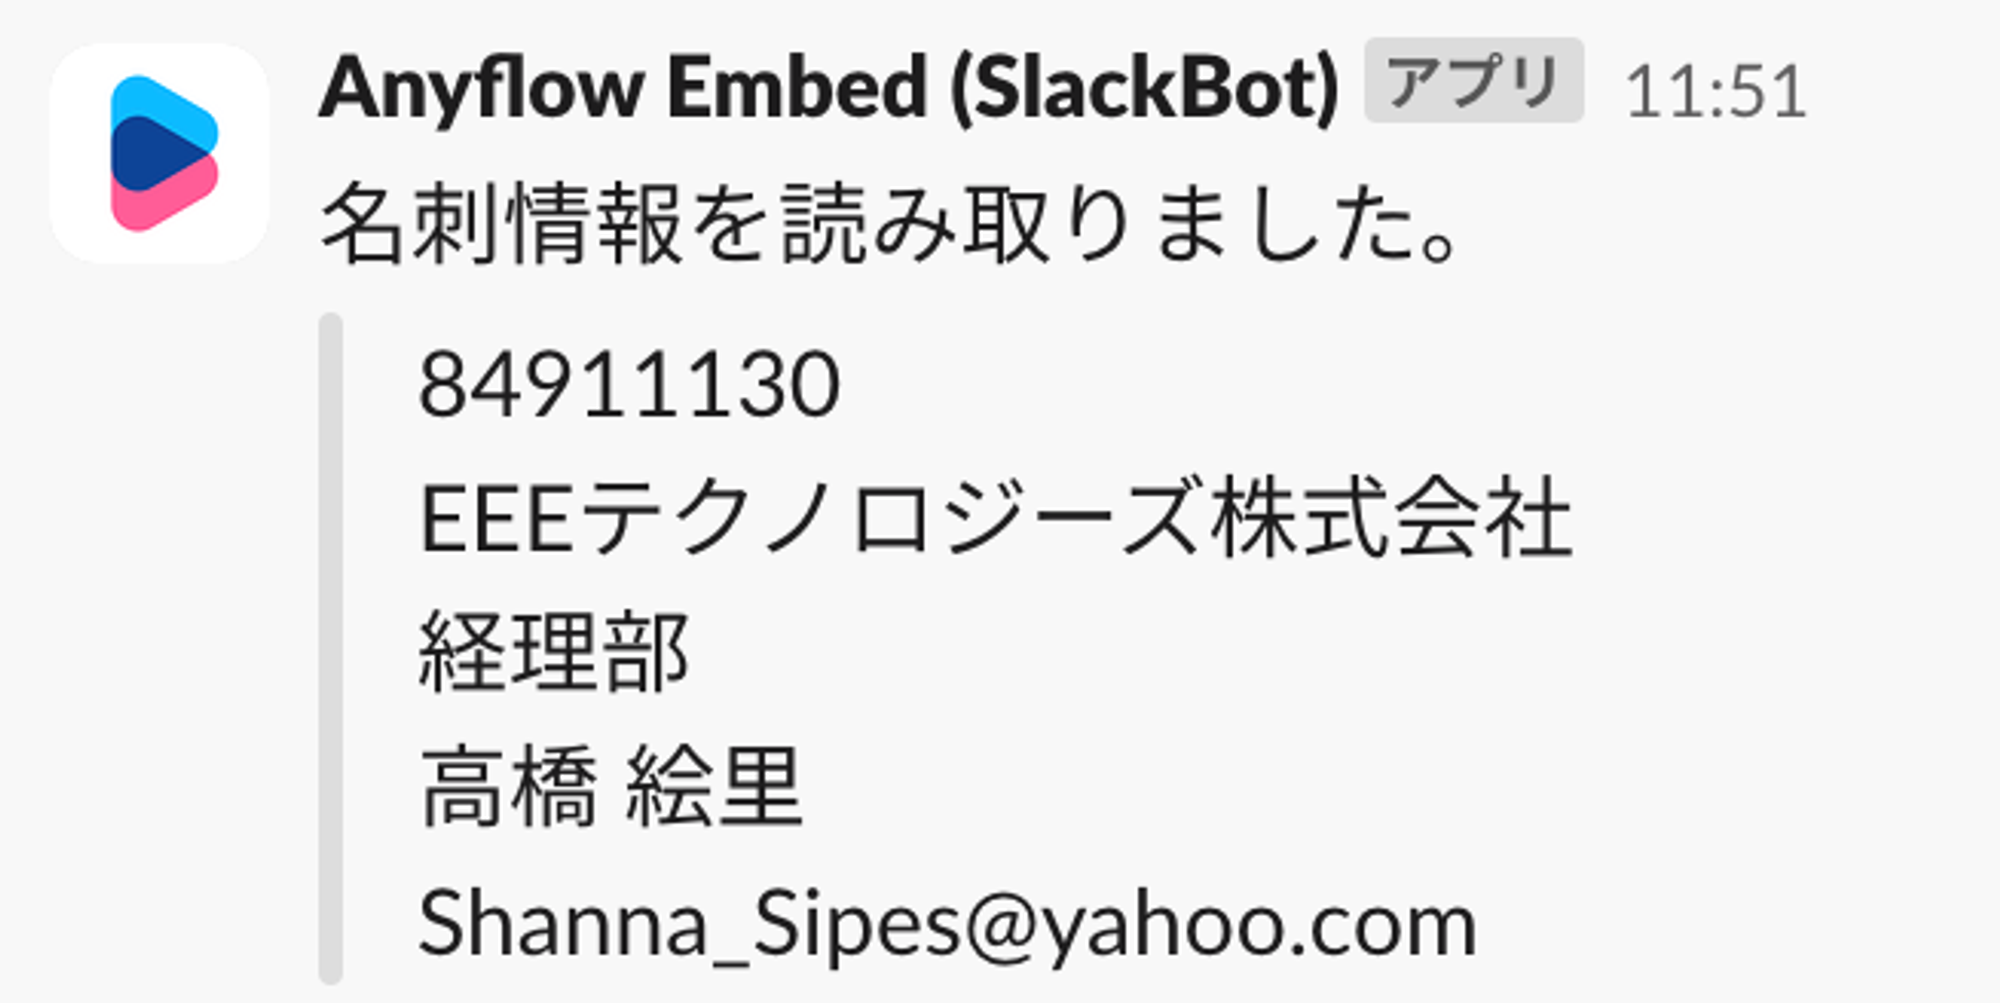
これまでと同様にSlackメッセージが投稿されれば、ソリューションの設定は完了です。
次のステップで必要となるため、ソリューションのデプロイを行います。
保存ボタンの隣にある矢印からデプロイを選択します。
{% hint style="success" %}
### ヒント
ここでデプロイしたソリューションは、次のステップを実装しない限りエンドユーザーは利用できません。
{% endhint %}
***
## **3. ソリューションを提供する**
実際にMy Event のAPI をリクエストする形でソリューションを実行していきます。
作成したソリューションを[エンドユーザー向けの環境で提供する](/release/how-to-delivery.md)必要があります。
方法は二通りありますが、今回はSDKを用いる方法について説明していきます。
### **3-1. JWTを発行する**
STEP2ではデモ環境を使ったため、JWTの発行はスキップされました。
今回はスキップできないため、自身の環境で処理を作成してください。
事前にAnyflow CS とやり取りが必要な部分があります。
**手順**
1. [SDKを埋め込むサイトのオリジン(URL)をAnyflow CS に共有する](/release/embed/generate-jwt.md#jwtwosuruni)
2. [署名を行うための鍵ペアを生成し、公開鍵を管理画面から登録する](/release/embed/generate-jwt.md#jwtwosuru)
3. [iss(ベンダーID)の値を管理画面から取得する](/release/embed/generate-jwt.md#peirdono)
4. [指定されたJWTの仕様に基づき、JWTを発行する](/release/embed/generate-jwt.md#sanpurukdo)
### **3-2. SDKを実装する**
こちらの[SDKドキュメント](https://docs-embed.anyflow.jp/anyflow-sdk/docs)を参考に進めていきます。
**手順**
1. SDKをインストールする
2. JWTを使ってSDKを初期化、SDKインスタンスを取得する
3. 今回作成したソリューションのIDを取得する
4. 取得したIDを使ってウィザードを読み込む
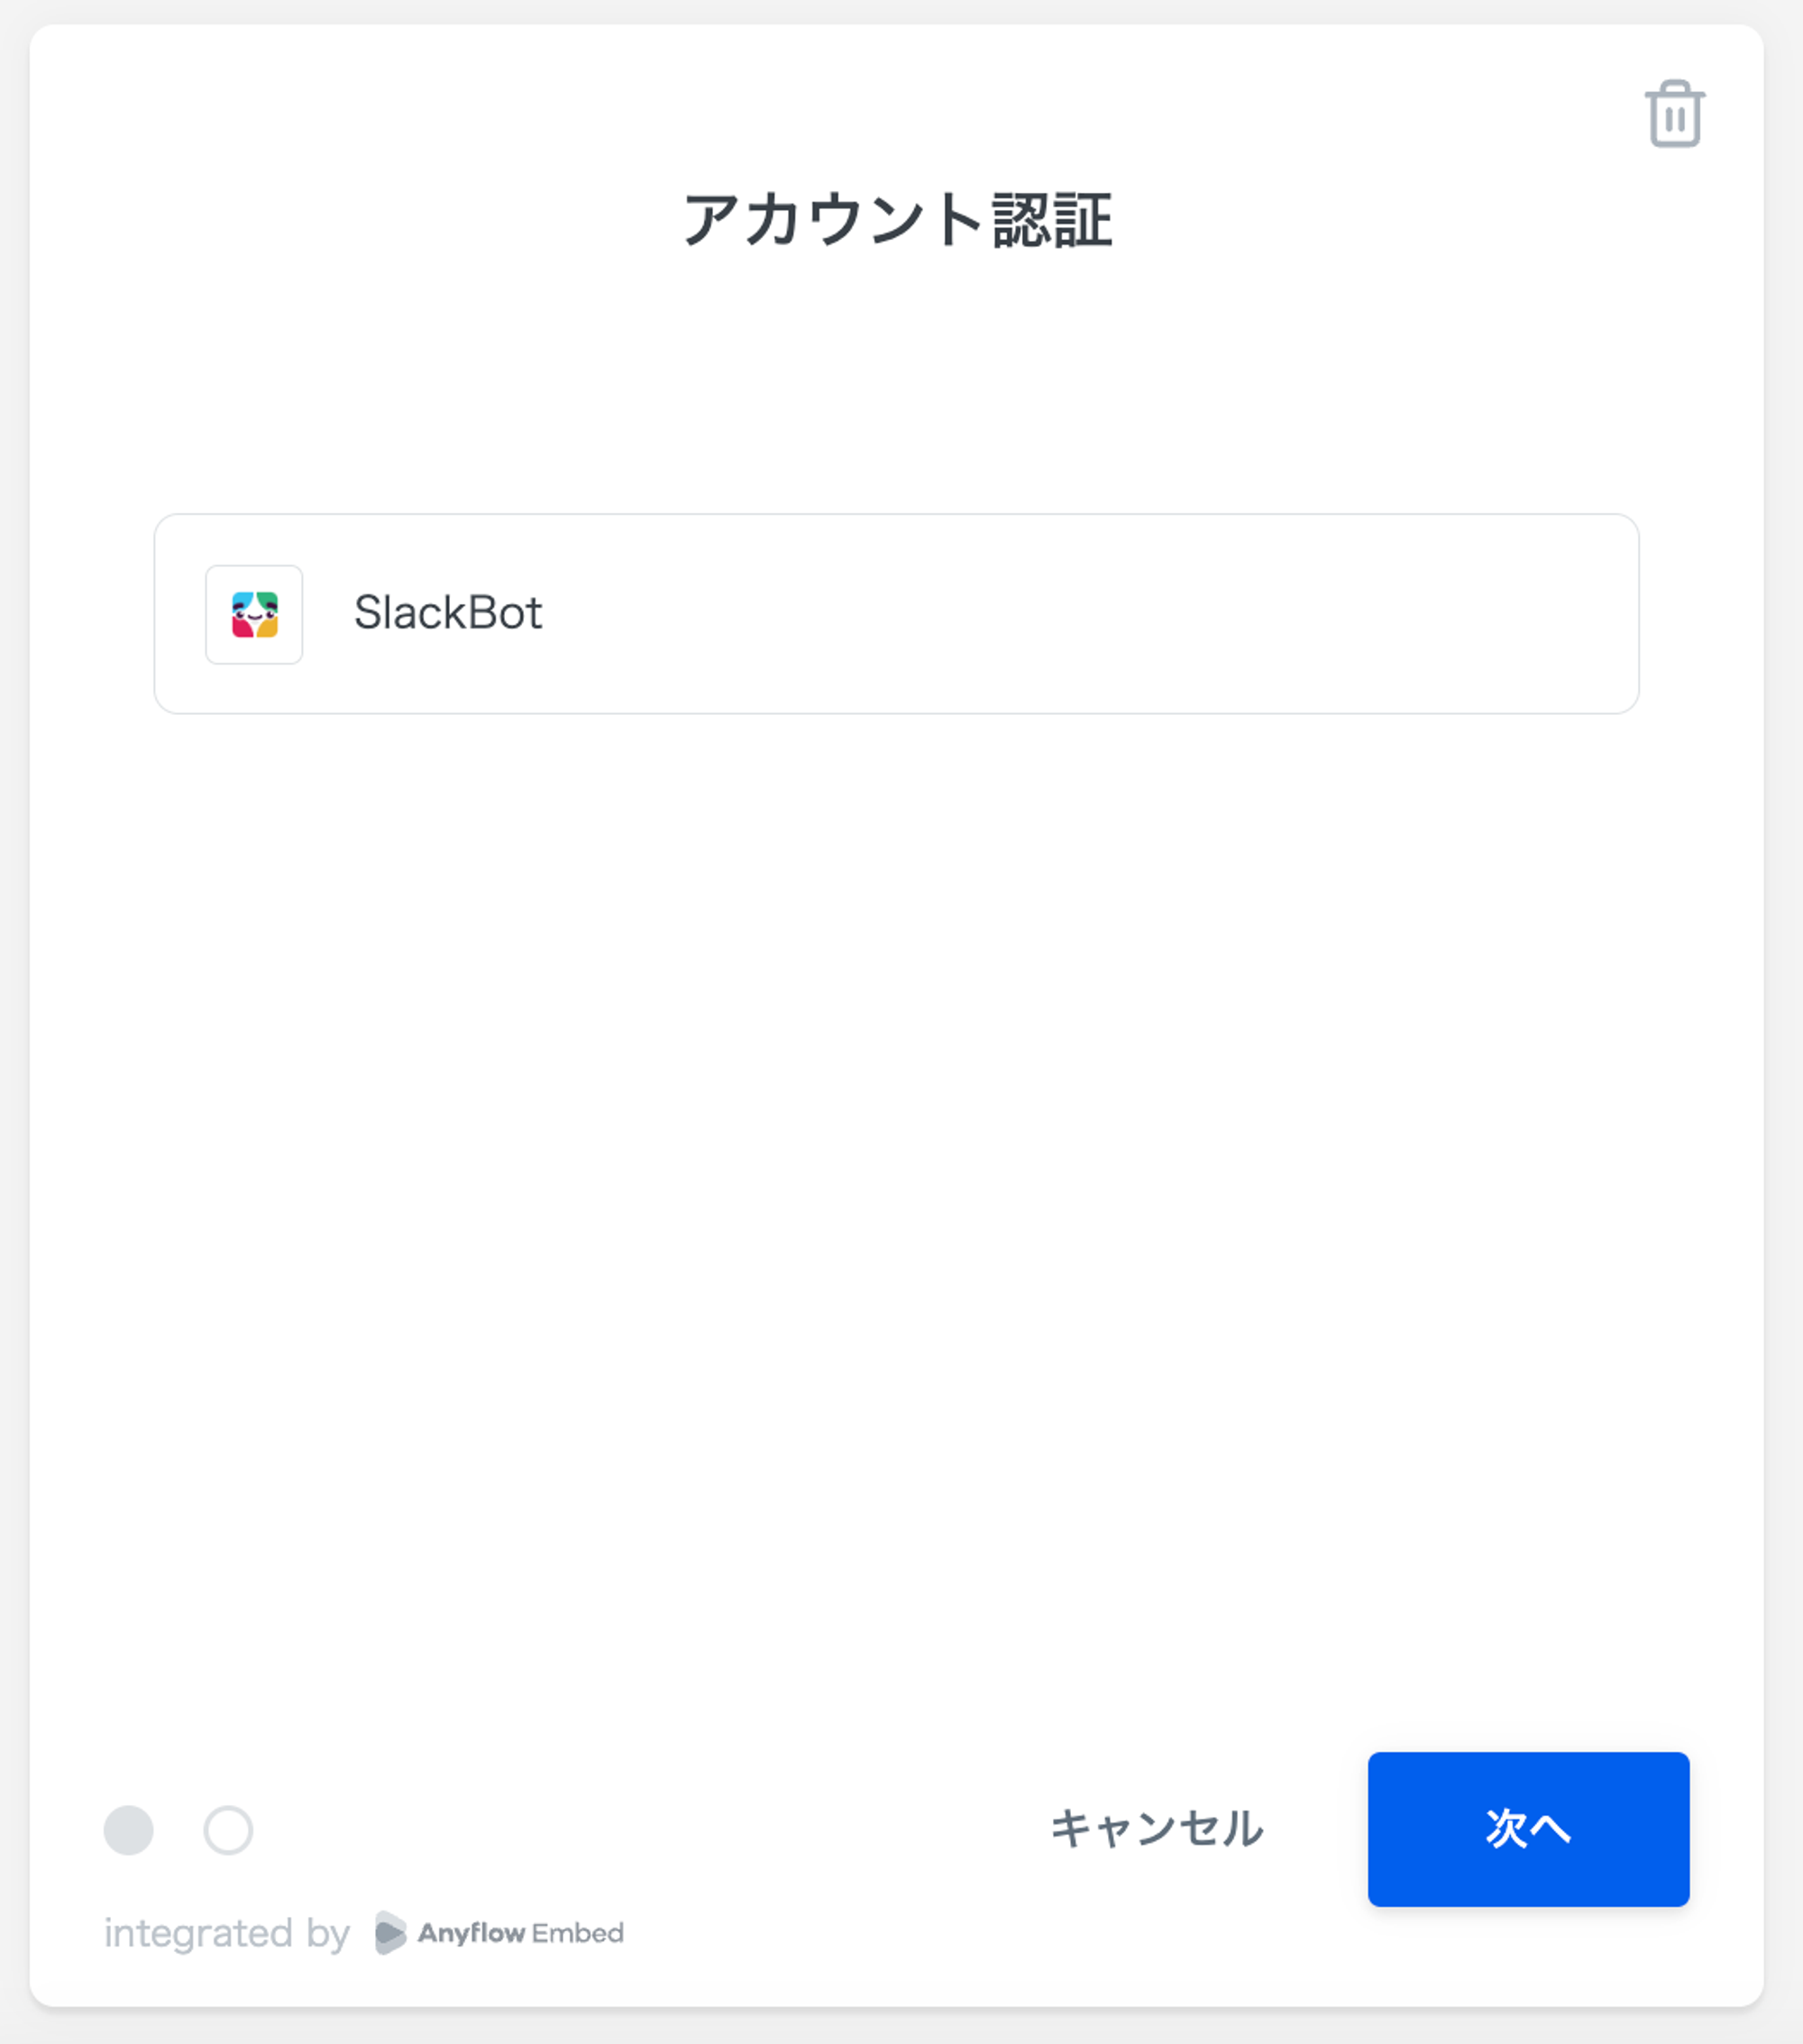
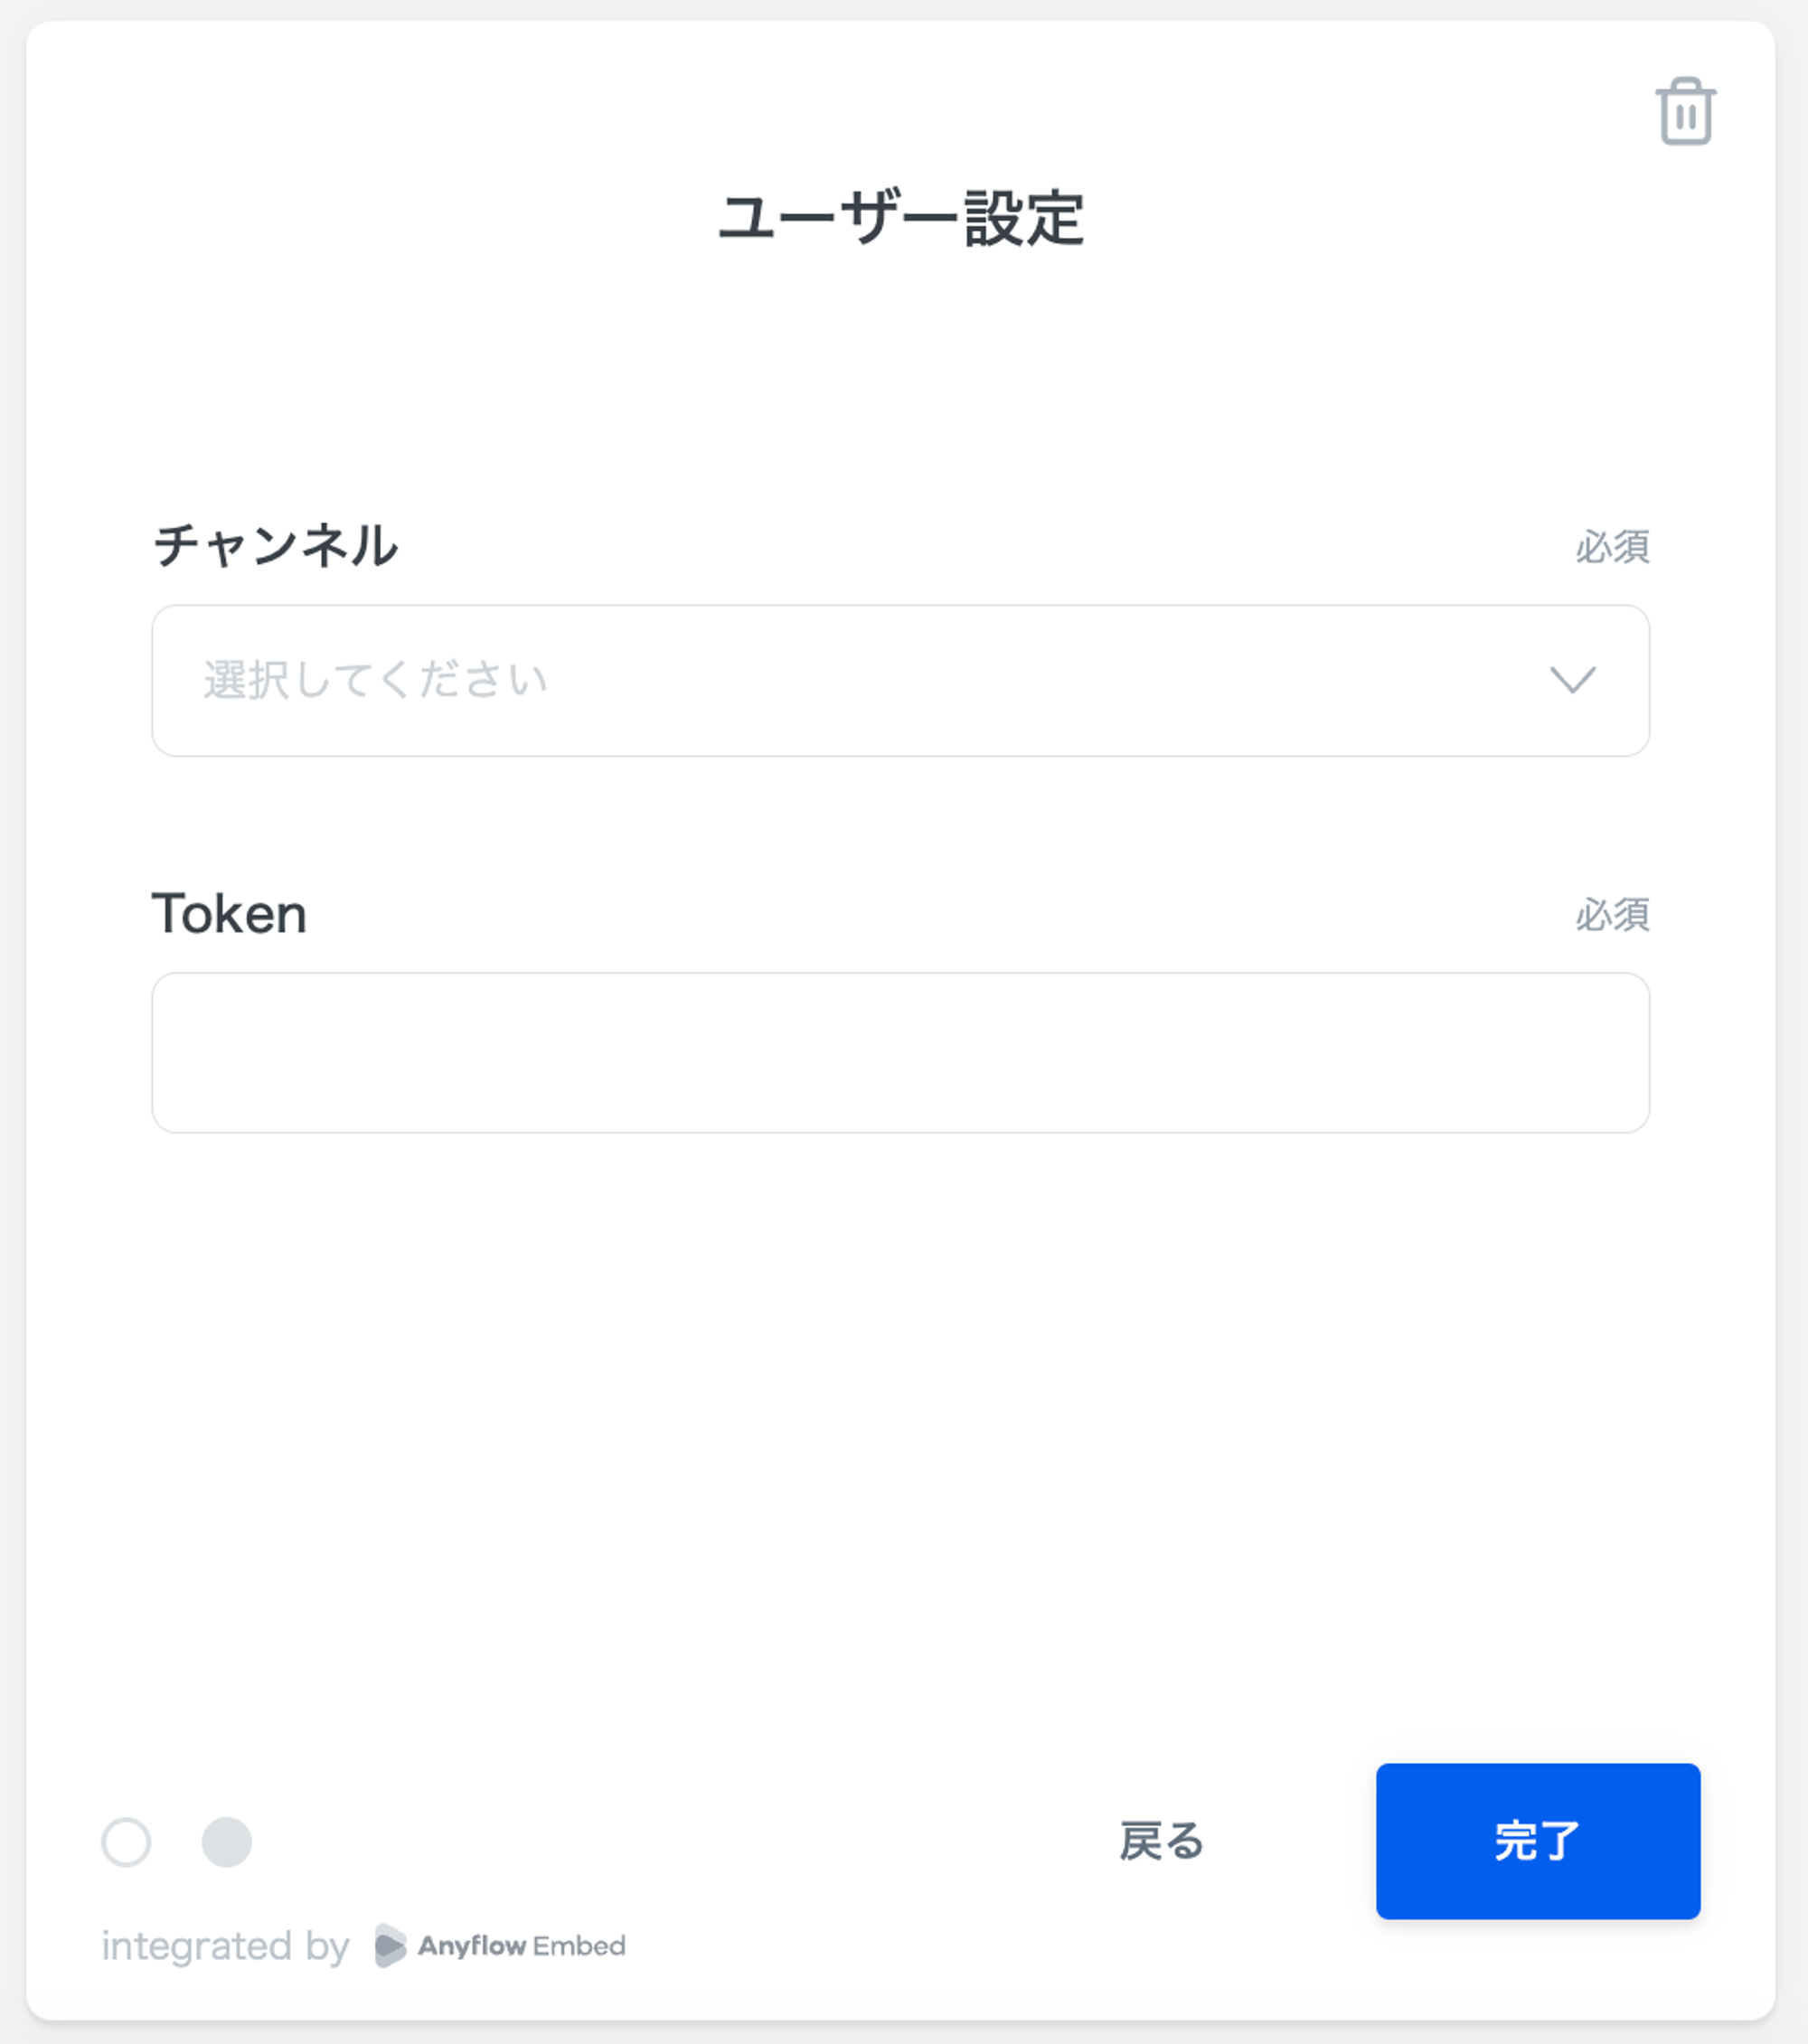
ウィザードが開き、以下の様な画面が表示されれば成功です🎉
エンドユーザーとして認証を行えば、My Event を受け取る準備ができました。
***
## **4. My Event を実行する**
STEP2と同様に進めていきます。
1. [アクセストークンの発行](/solution-editor/triggers/outgoing/my-event/access-token.md)
“”の部分をJWT(signature)の値に置き換えてリクエストを行います
```json
curl --location --request POST 'https://for-product-api.anyflow.jp/sdk/token' \
--header 'Content-Type: application/json' \
--data-raw '{
"jwt":"",
"env": null
}'
```
2. [My Event の API 実行](/solution-editor/triggers/outgoing/my-event.md#my-event-endopointonirikuesutowosuru)
”<アクセストークン>”の部分は先程取得したアクセストークンの値に置き換えてください。
```json
curl https://for-product-api.anyflow.jp/sdk/send_my_event \
--request POST \
--header "Authorization: Bearer <アクセストークン>" \
--header "Content-Type: application/json" \
--data '{
"key": "image_uploaded",
"payload": {
"file_name": "business-card.png",
"file_content": "iVBORw0KGgoAAAANSUhEUgAAATYAAACjCAMAAAA3vs..."
}
}'
```
上記のcurlコマンドは My Event の詳細画面からも取得できます。
これまでと同様にSlackメッセージが投稿されれば成功です🎉
***
## **TIPS : トークン入力を省く方法**
今回はソリューションの中で架空の名刺サービスAPIを利用しています。
この認証では、エンドユーザーが初回の認証時にウィザードでTokenの値を入力する必要があります。
しかし、もしこのAPIが自社プロダクトのAPIの場合、自社プロダクトにログインしているエンドユーザーが、再度自社プロダクトの認証を行うのは手間に感じるかもしれません。
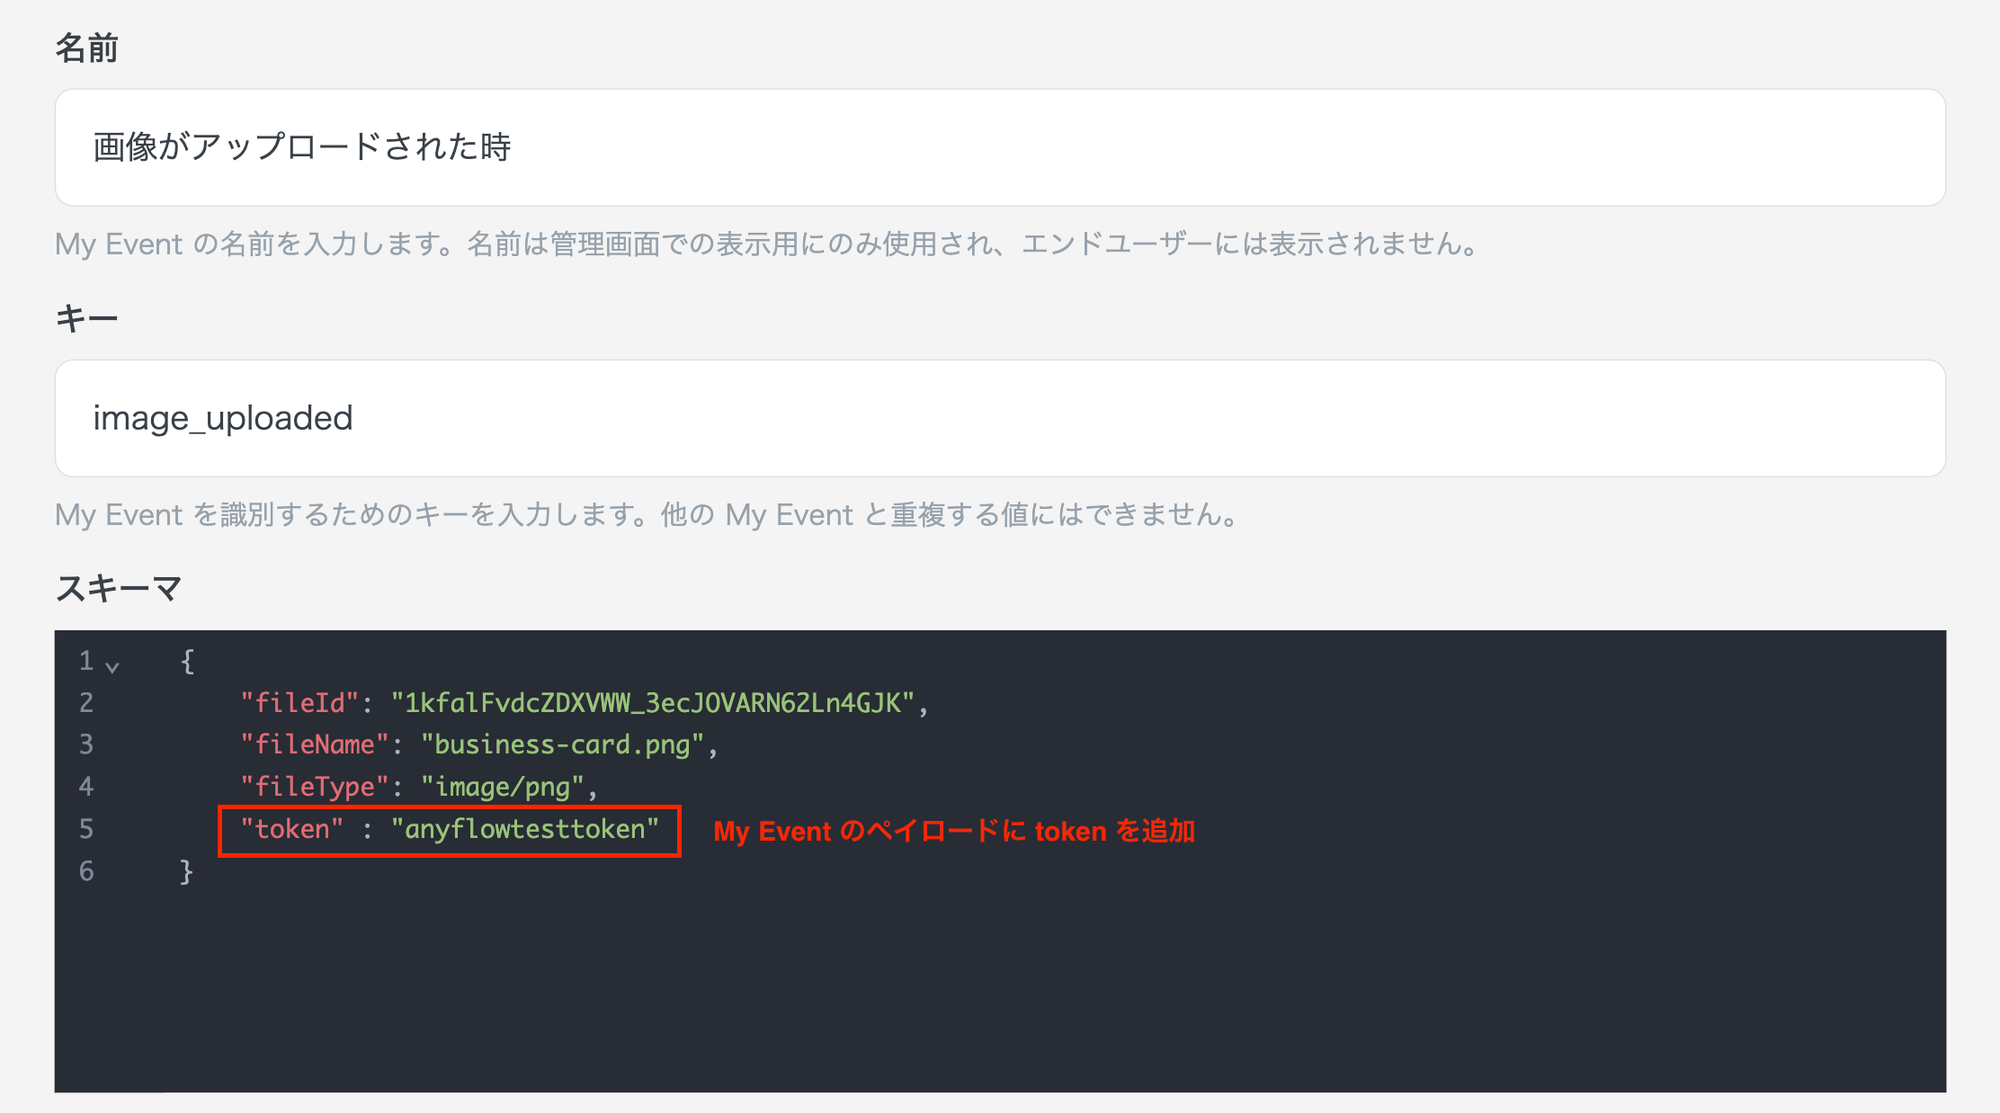
この場合、Tokenの値をエンドユーザー変数で取得するのではなく、My Event のペイロードに含めてしまえば、エンドユーザーの入力は不要になります。
My Event は自社プロダクトの内部処理からリクエストできるため、tokenの存在をエンドユーザーが意識することなくソリューションを実行することが可能です。
***
## **まとめ**
今回のセクションでは、My Event やSDKの実装について学ぶことができました。
STEP1の通り、HTTPコネクタを使えば独自のアクションを実現でき、
STEP2\~3の通り、My Eventを使えば独自のトリガーを実現できます。
これらを活用してさらに自由度の高いソリューション作成を進めていきましょう!!
### 👉**いよいよ、本番向けソリューションの構築へ**
[トライアルツアーが終わったら](/trial-tour/after-trial-tour.md)
---
# Agent Instructions
This documentation is published with GitBook. GitBook is the documentation platform designed so that both humans and AI agents can read, navigate, and reason over technical content effectively. Learn more at gitbook.com.
## Querying This Documentation
If you need additional information that is not directly available in this page, you can query the documentation dynamically by asking a question.
Perform an HTTP GET request on the current page URL with the `ask` query parameter, and the optional `goal` query parameter:
```
GET https://docs-embed.anyflow.jp/trial-tour/start-intermediate-1/step3-intermediate.md?ask=&goal=
```
`ask` is the immediate question: it should be specific, self-contained, and written in natural language.
`goal` is optional and describes the broader end goal you are ultimately trying to accomplish on behalf of the user. GitBook uses it to tailor the answer towards what is most useful for that goal.
The response will contain a direct answer to the question and relevant excerpts and sources from the documentation.
Use this mechanism when the answer is not explicitly present in the current page, you need clarification or additional context, or you want to retrieve related documentation sections.