> For the complete documentation index, see [llms.txt](https://docs-embed.anyflow.jp/llms.txt). Markdown versions of documentation pages are available by appending `.md` to page URLs; this page is available as [Markdown](https://docs-embed.anyflow.jp/trial-tour/start-intermediate-1/step2-intermediate.md).
# STEP2 | My Event を理解する
## **概要**
中級STEP1では独自の`アクション`をソリューションに組み込む方法を学びました。
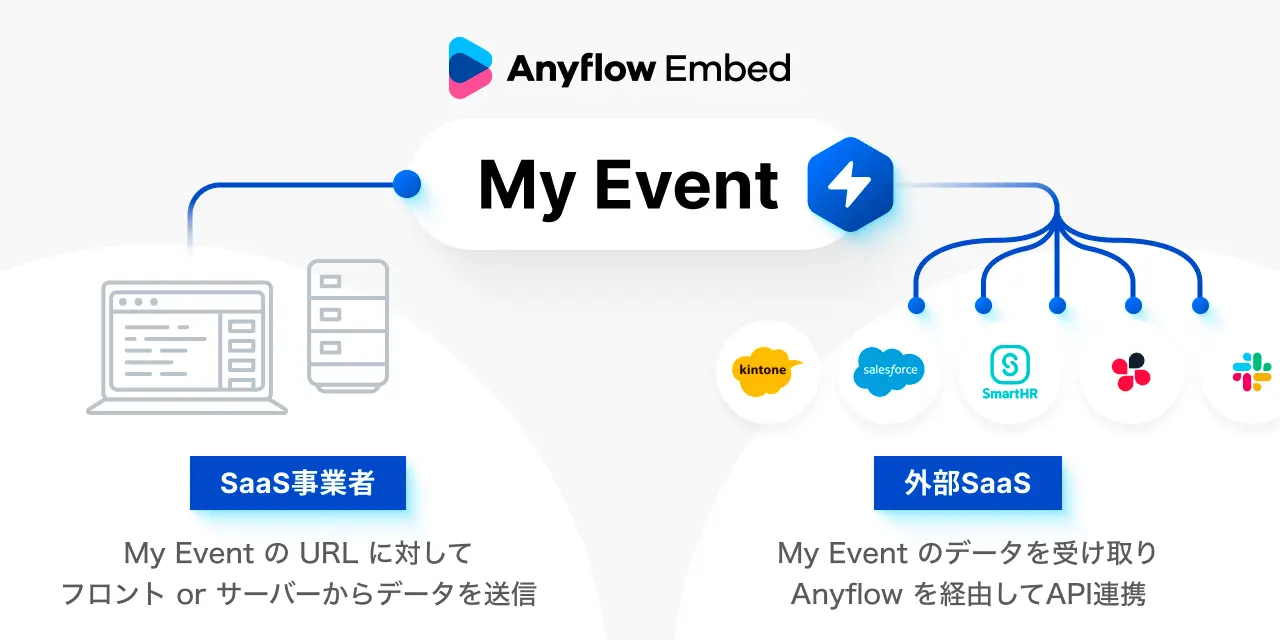
中級STEP2では独自の`トリガー`をソリューションに組み込む方法として、[**My Event**](/solution-editor/triggers/outgoing/my-event.md)を紹介します。
My Event を使用すると、自社プロダクトで発生した任意のイベントをもとに Anyflow のソリューションを実行することができます。
My Event を使用したソリューションを実行するまでの流れ:
1. **管理画面で My Event を作成し、ソリューションのトリガーに使用する**
2. **自社プロダクトから、My Event のエンドポイントにAPIリクエストを送信する**
3. **My Event をトリガーにしたソリューションが実行される**
このセクションでは、あらかじめ準備されたデモ環境を用いて、上記の流れを簡単に体験していただきます。
***
## **0.デモ用ツールにログインする**
事前準備として[Anyflow-demo ウィザードホスティング](https://anyflow-demo.integrations.jp/)にログインします。
ログインできない場合はカスタマーサクセス担当者までご連絡ください。
{% hint style="success" %}
### ウィザードホスティングとは
Anyflowが用意したドメインにある、SDKを実装済のサイトです。\
詳しくは[こちら](/release/wizard-hosting.md)をご確認ください。
{% endhint %}
***
## **1.My Event の作成〜トリガー使用**
実際にMy Event を設定しトリガーに指定する方法は、STEP3で紹介します。
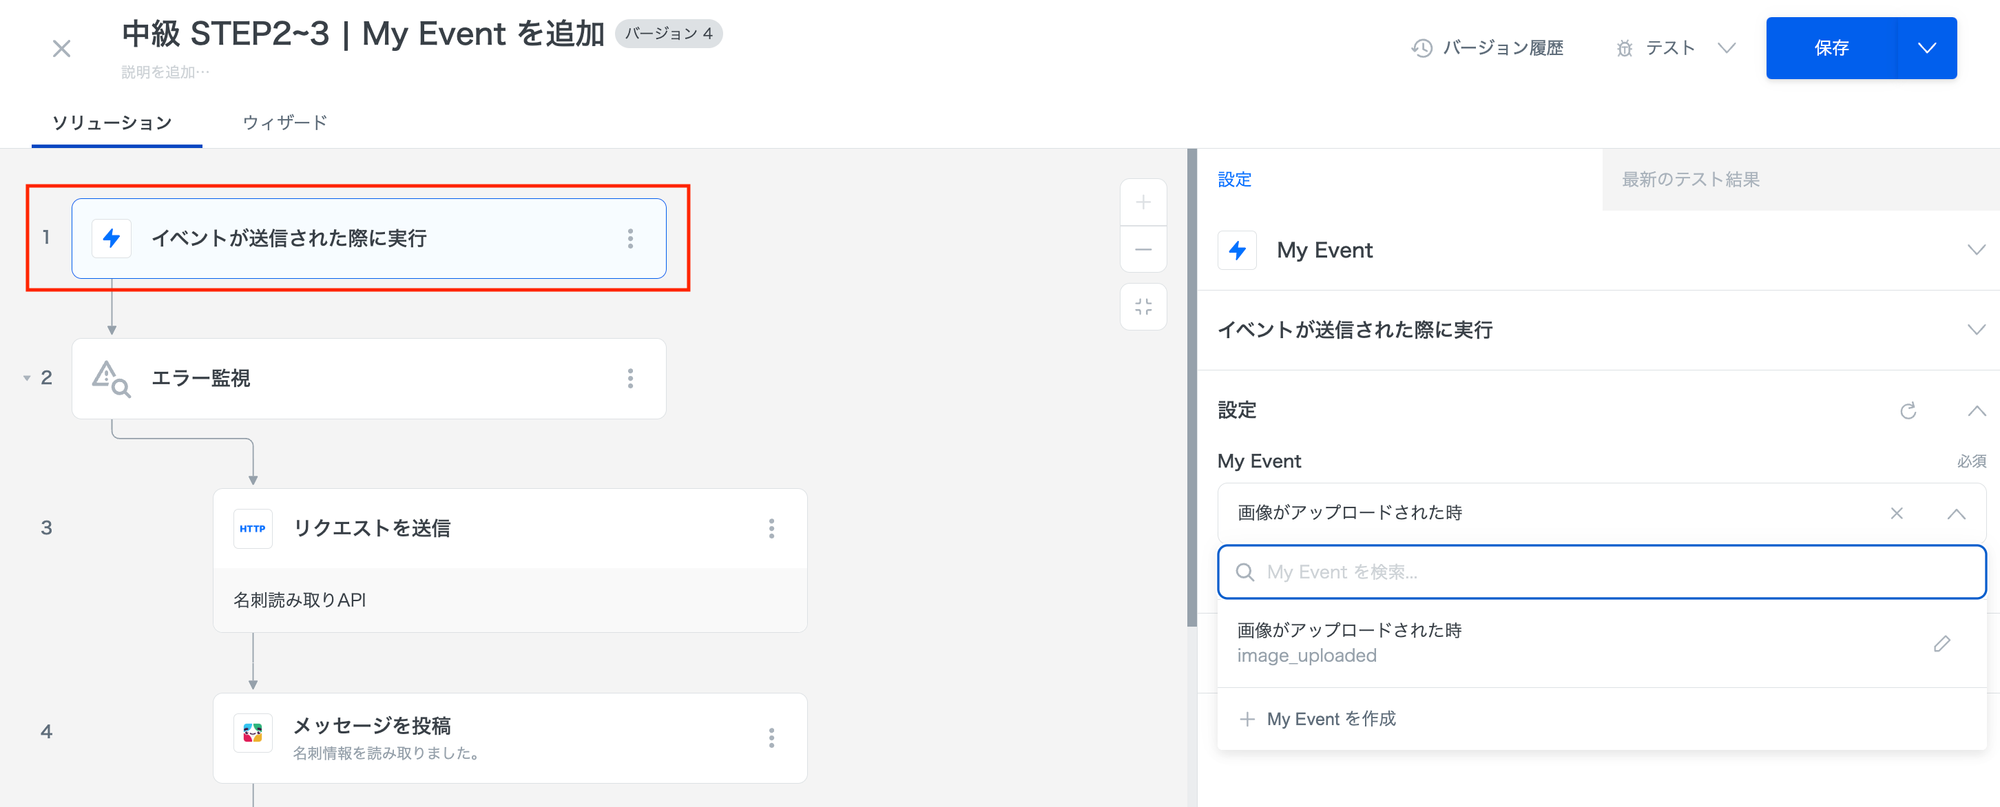
今回はあらかじめ設定済のスクリーンショットをご確認ください。
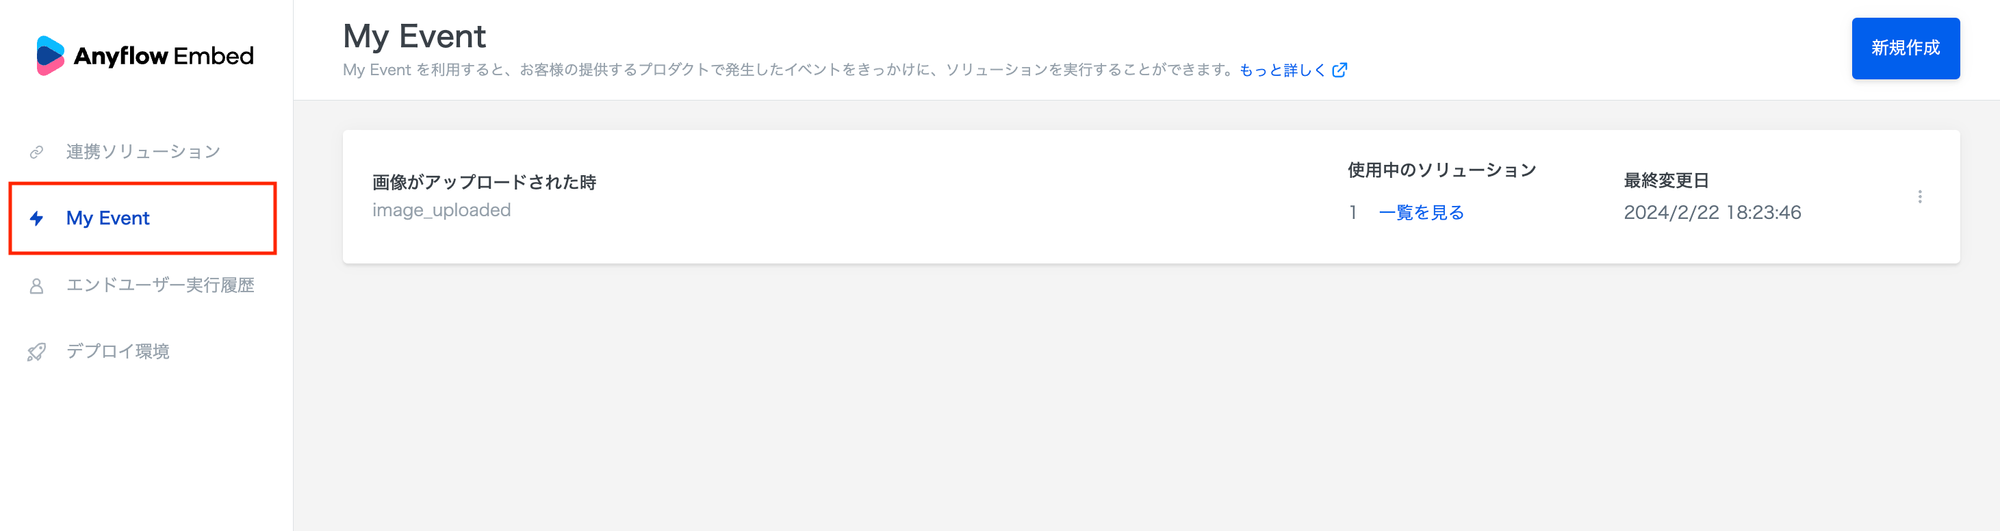
左メニューから「My Event」を選択すると、設定済のMy Event の一覧が表示されます。
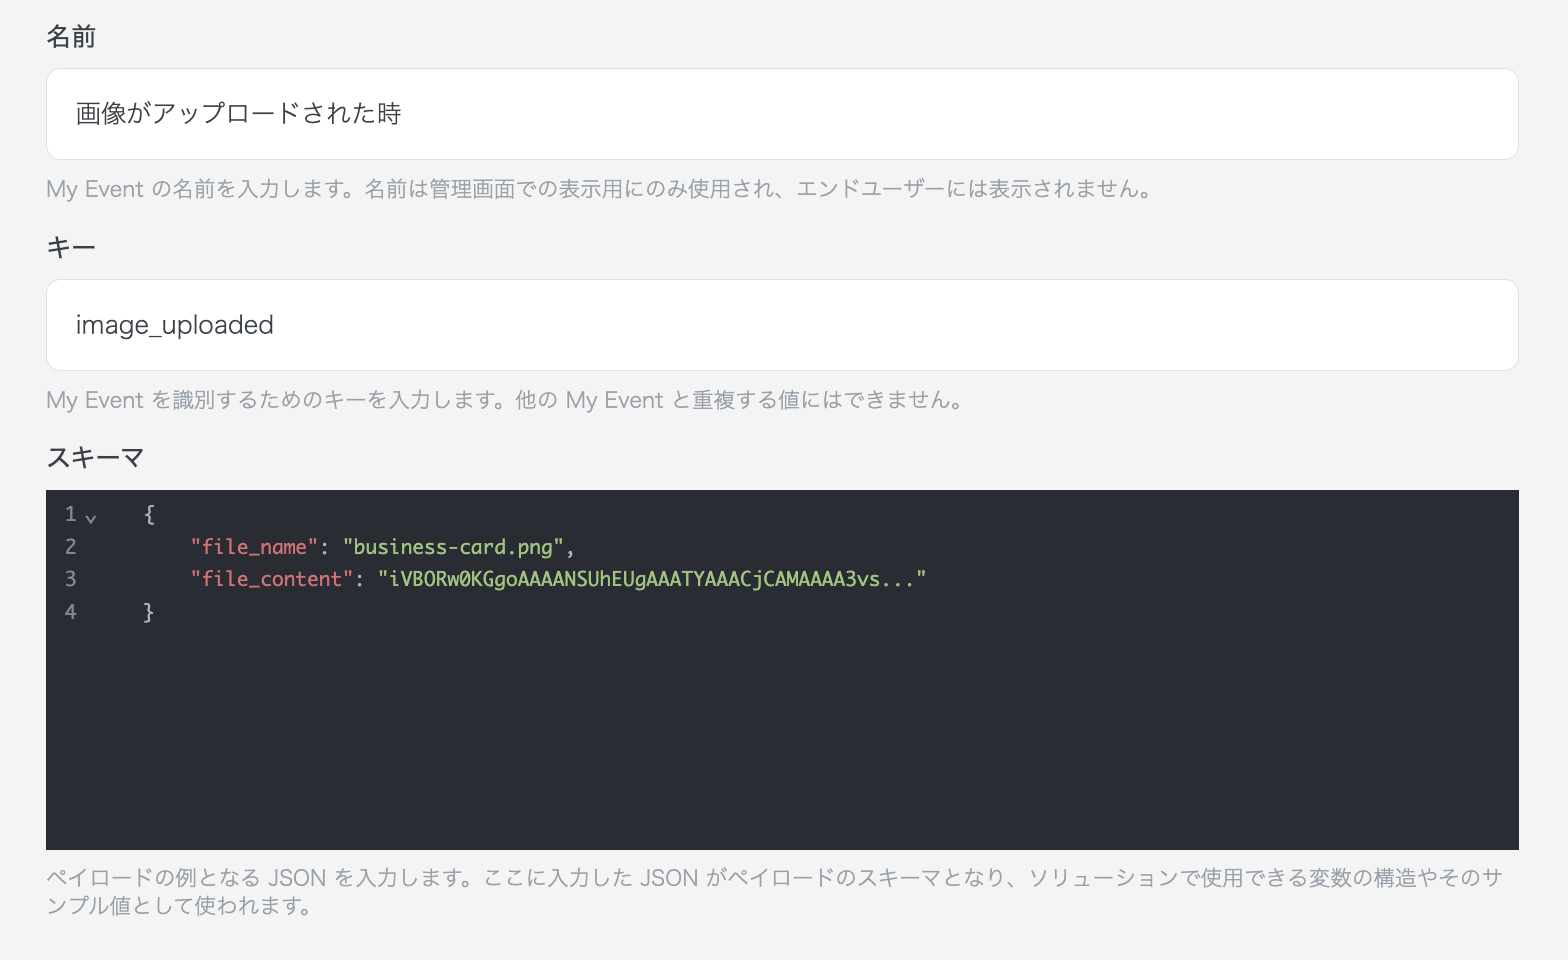
My Event には、任意のイベント名(キー)とスキーマを定義できます。
スキーマを使うことで、My Event の実行時に自社プロダクトから送信したいデータを含めることができます。
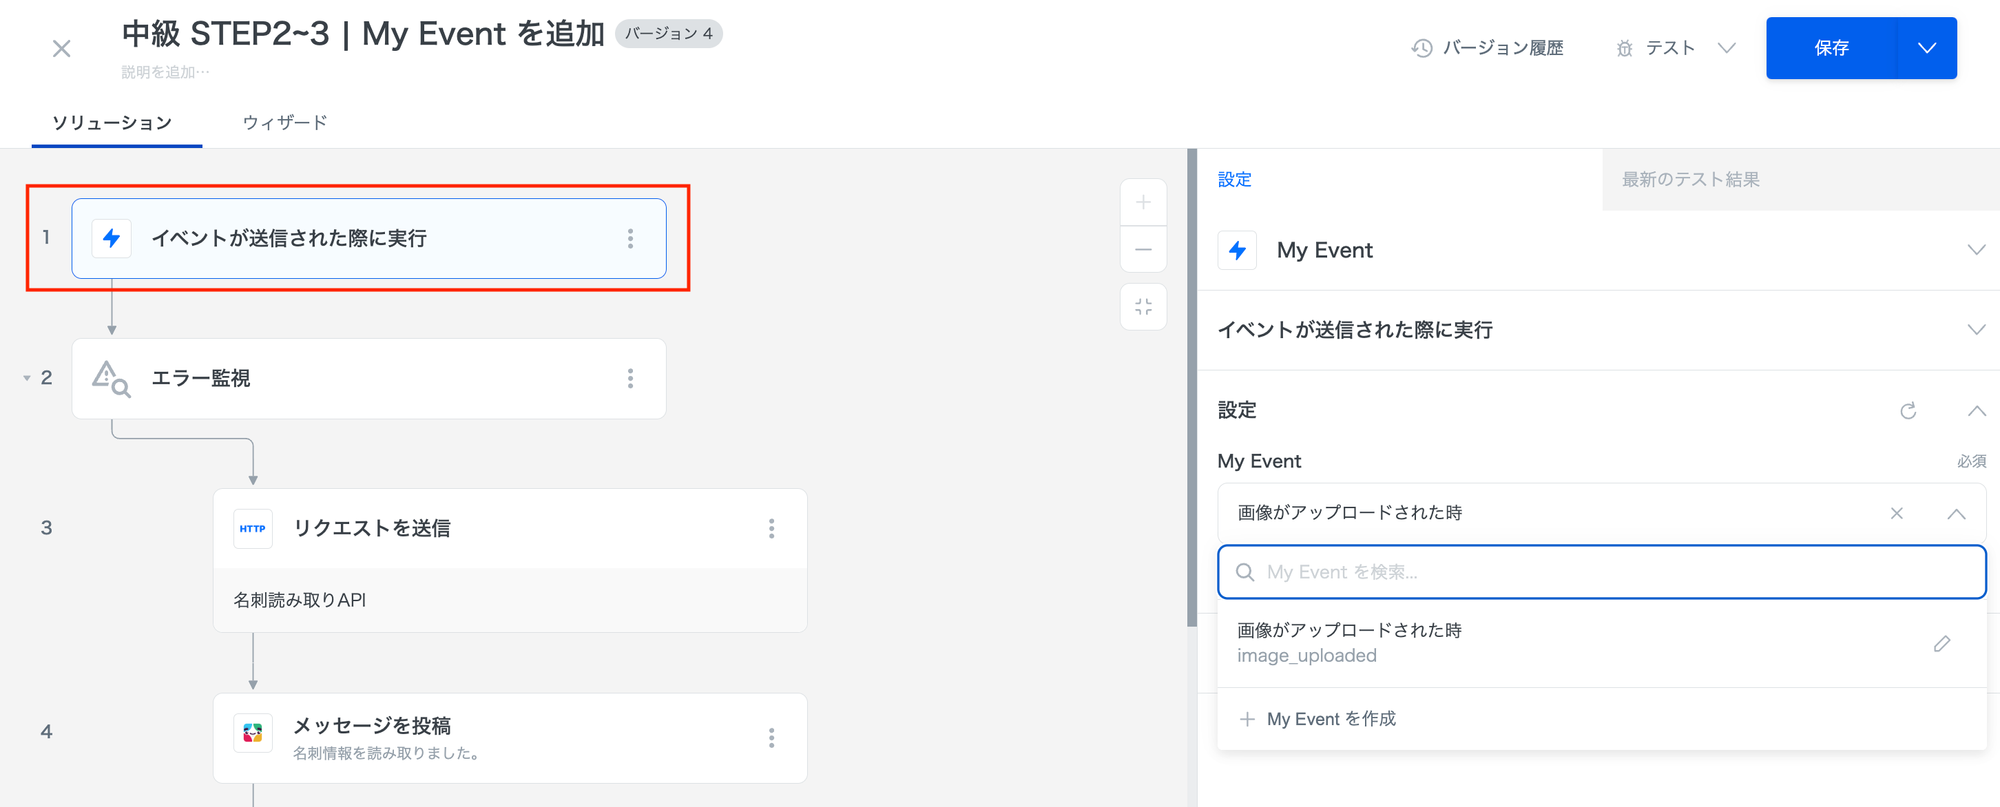
作成したMy Event は、ソリューションエディタにてトリガーとして使用することができます。
今回は、STEP1で作成したソリューションのトリガーを Google Drive から My Event に変更しています。
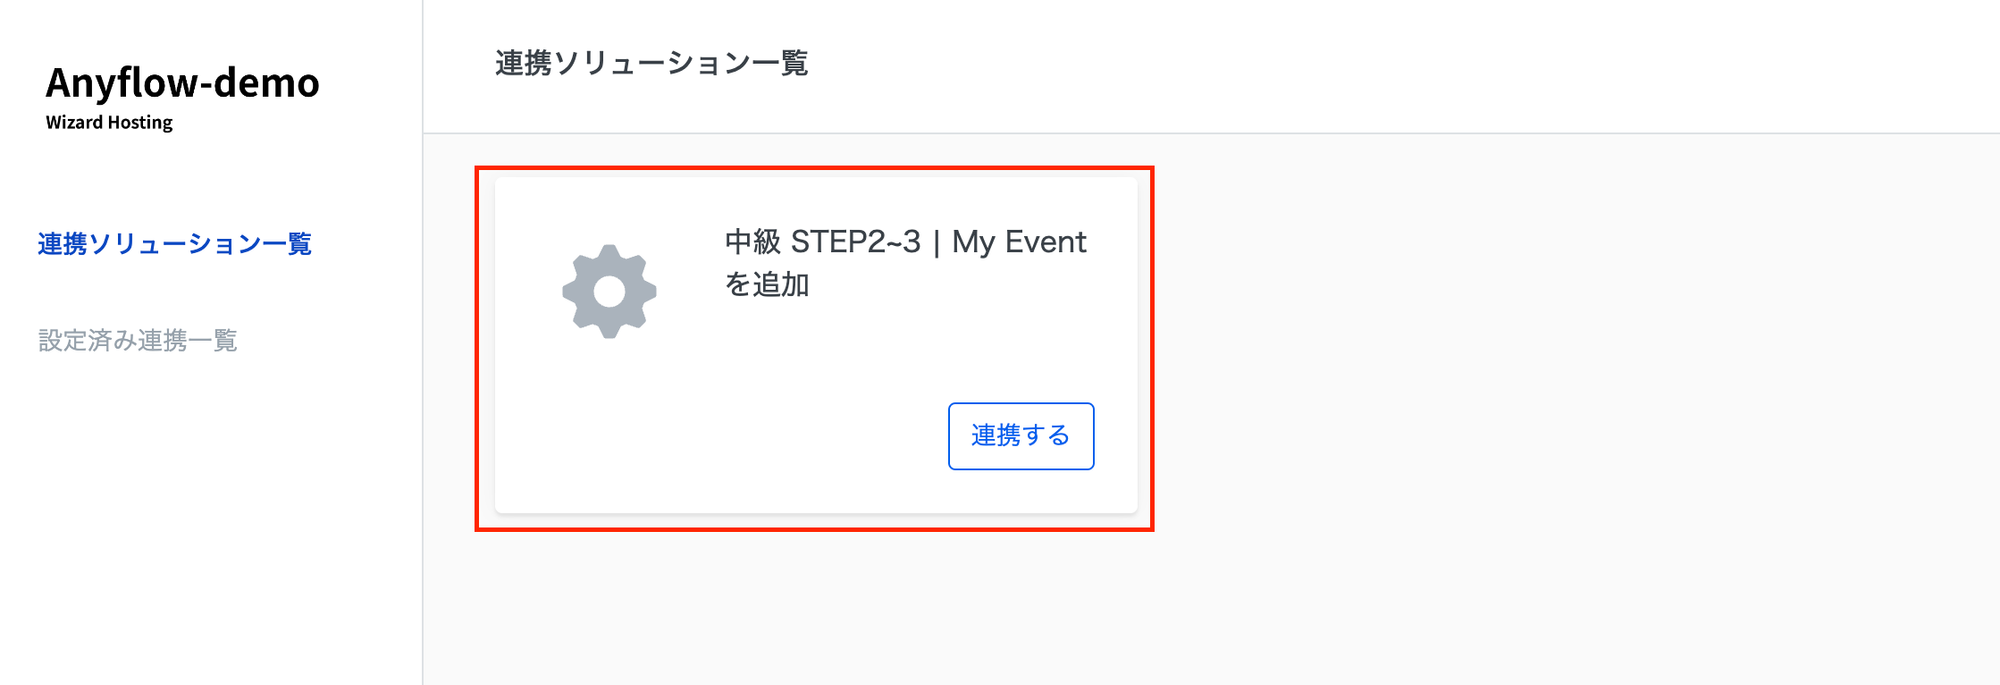
このようにして作成されたソリューションが、[Anyflow-demo ウィザードホスティング](https://anyflow-demo.integrations.jp/)にデプロイされています。
エンドユーザーとして体験するために「連携する」をクリックします。
***
## **2.My Event のAPIリクエスト**
ウィザードホスティングを利用して My Event をテスト実行する場合、以下の手順により簡単にアクセストークンを取得することができます。
[アクセストークンの発行 - ウィザードホスティングの場合](/solution-editor/triggers/outgoing/my-event/access-token.md)
アクセストークンを取得したら、以下のリクエストを行うことで、設定済のMy Eventである `file_uploaded` を実行します。
”<アクセストークン>”の部分は先程取得したアクセストークンの値に置き換えてください。
```json
curl https://for-product-api.anyflow.jp/sdk/send_my_event \
--request POST \
--header "Authorization: Bearer <アクセストークン>" \
--header "Content-Type: application/json" \
--data '{
"key": "file_uploaded",
"payload": {
"file_name": "business-card.png",
"file_content": "iVBORw0KGgoAAAANSUhEUgAAATYAAACjCAMAAAA3vs...",
}
}'
```
{% hint style="success" %}
### ヒント
cURLの実行が不安な場合でも、PostmanなどのAPI実行ツールにペーストするとスムーズに実行できます。
[Import cURL commands - Postman Leaning Center](https://learning.postman.com/docs/getting-started/importing-and-exporting/importing-curl-commands/)
{% endhint %}
アクセストークンの有効期限は発行してから**10分間**のため、スムーズに行いましょう。
(期限が切れてしまった場合は、再度ウィザードホスティングから取得します。)
***
## **3.My Event によるソリューション実行**
今回は、STEP1で作成したソリューションのトリガーを Google Drive から My Event に変更しています。
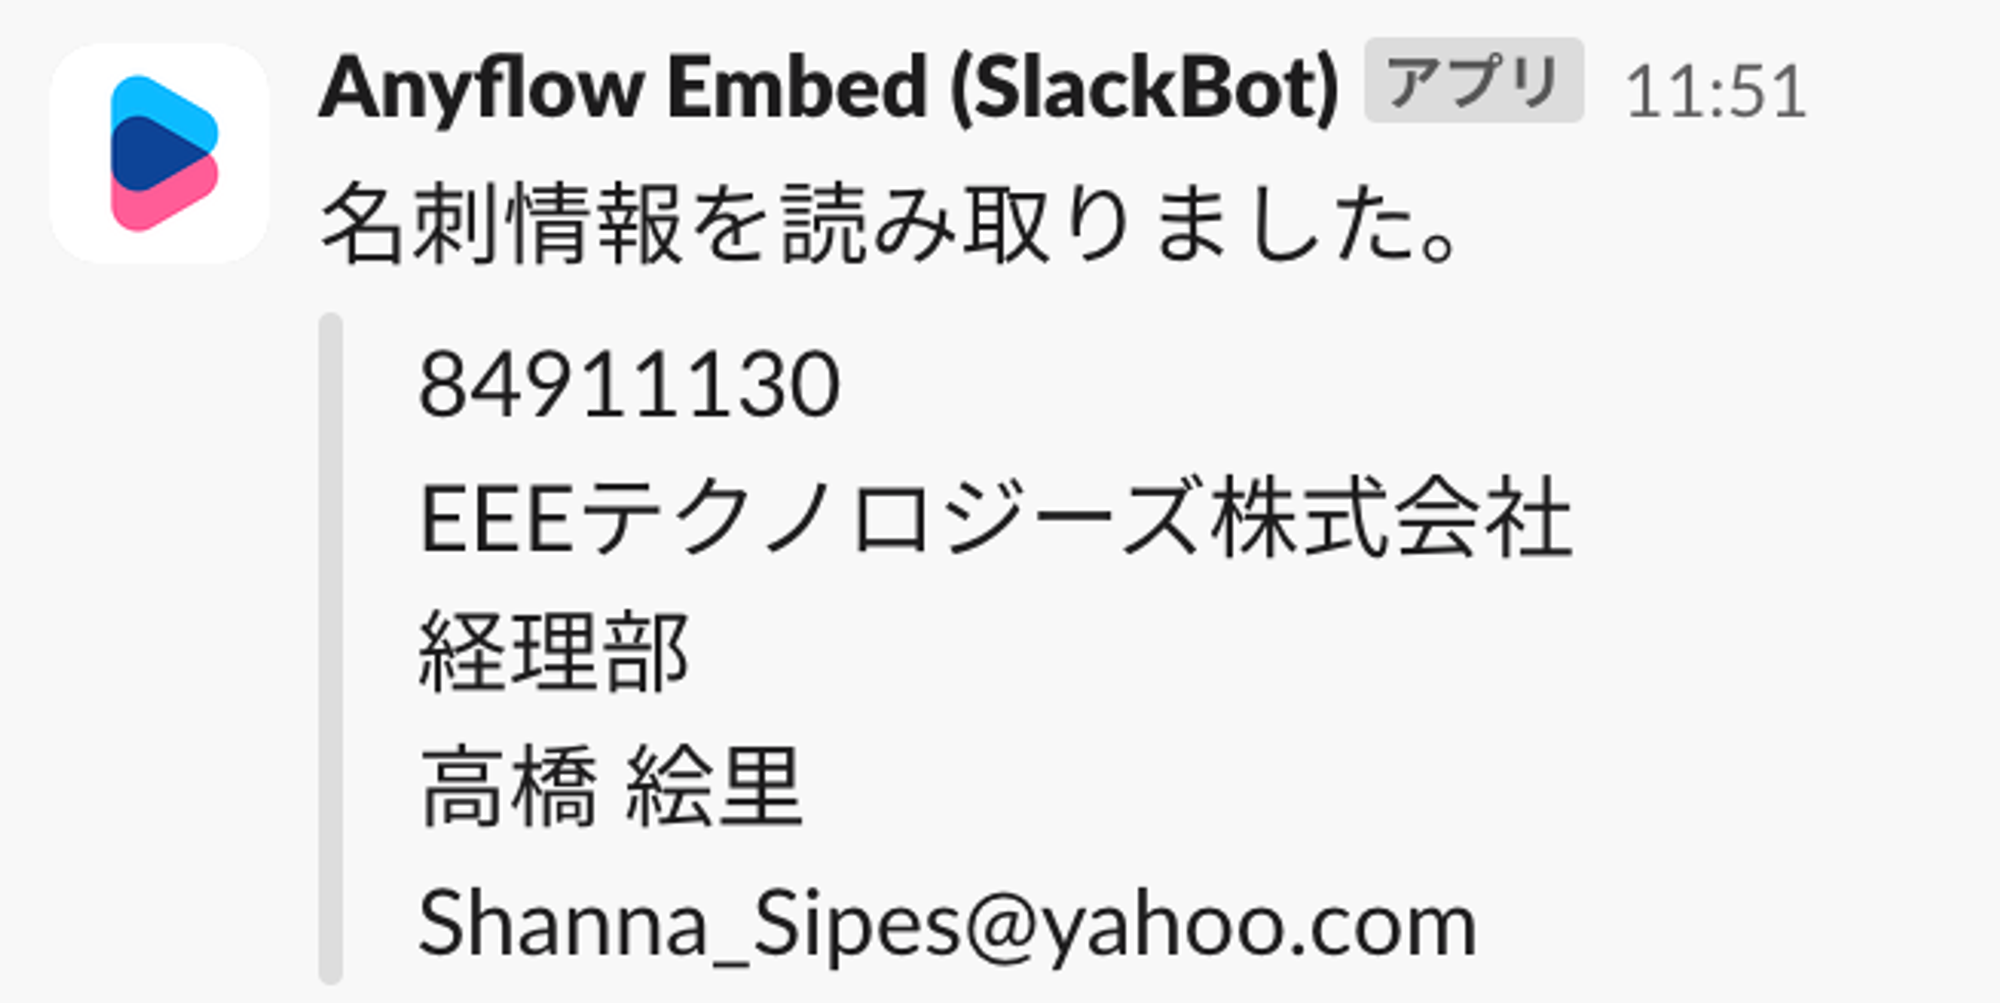
つまり、トリガーを変更してもSTEP1と同様のメッセージが得られれば成功となります。
以下のようなメッセージがSlackで投稿されたら成功です 🎉
## **まとめ**
今回のセクションでは、My Event の仕組みについて学ぶことができました。
My Event を使うと`独自のトリガー`を組み込んだソリューションを作成することができます。
今回はデモ環境を用いての簡易的な紹介でしたが、STEP3では実際に自身の環境で試していきましょう。
***
## **ネクストステップ**
次は、自身の環境でMy Event を実装する方法をご紹介します。
[STEP3 | My Event を実装する](broken://pages/fLJ6hztesbIez12mquE4)
にお進みください。
---
# Agent Instructions
This documentation is published with GitBook. GitBook is the documentation platform designed so that both humans and AI agents can read, navigate, and reason over technical content effectively. Learn more at gitbook.com.
## Querying This Documentation
If you need additional information that is not directly available in this page, you can query the documentation dynamically by asking a question.
Perform an HTTP GET request on the current page URL with the `ask` query parameter, and the optional `goal` query parameter:
```
GET https://docs-embed.anyflow.jp/trial-tour/start-intermediate-1/step2-intermediate.md?ask=&goal=
```
`ask` is the immediate question: it should be specific, self-contained, and written in natural language.
`goal` is optional and describes the broader end goal you are ultimately trying to accomplish on behalf of the user. GitBook uses it to tailor the answer towards what is most useful for that goal.
The response will contain a direct answer to the question and relevant excerpts and sources from the documentation.
Use this mechanism when the answer is not explicitly present in the current page, you need clarification or additional context, or you want to retrieve related documentation sections.